Two-Factor Authentication
Secure Masteriyo and WordPress logins with two-factor authentication (2FA) — email OTP verification with configurable length, expiry, and resend limits.
Two-factor authentication enhances security by requiring users to verify their identity through a one-time password (OTP) sent to their email, providing an additional layer of protection beyond passwords.
Prerequisites
- Masteriyo LMS Pro plan or higher.
- Masteriyo LMS installed and activated.
- Two Factor Authentication Add-on.
Installation & Activation
To enable the feature, follow the steps below:
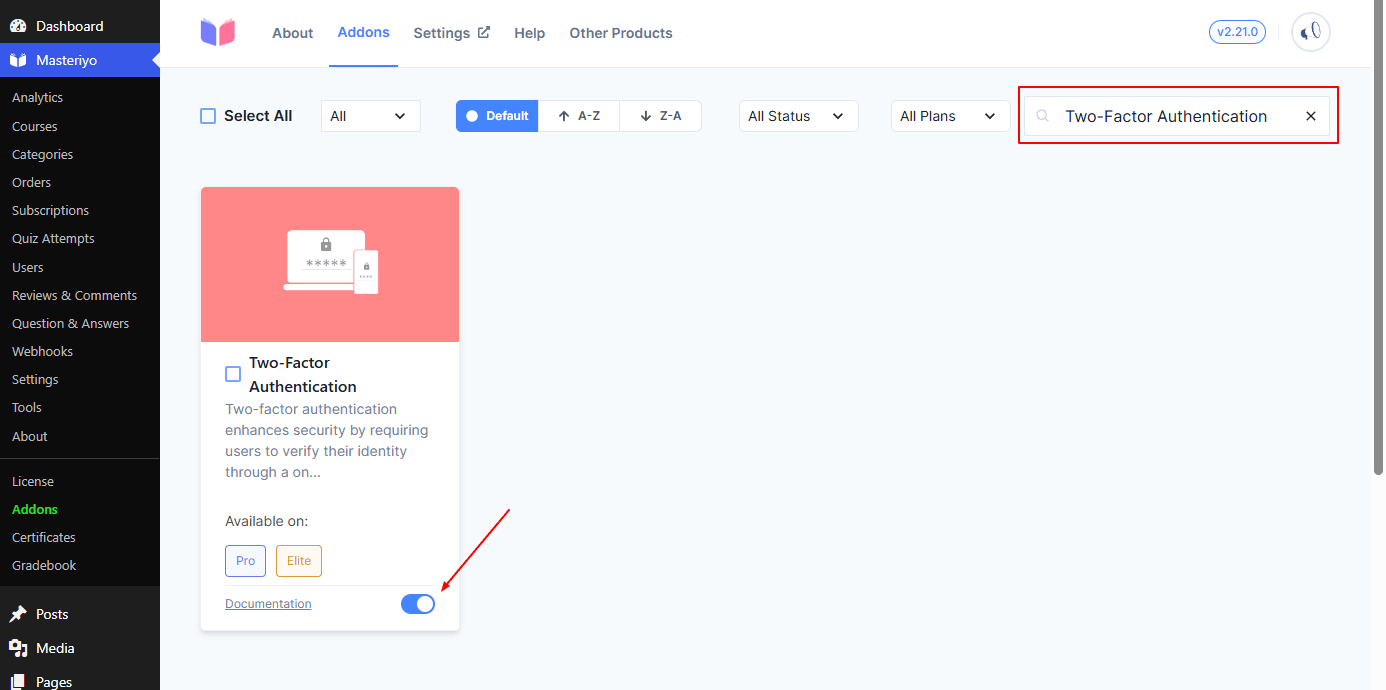
- Navigate to Masteriyo > Settings > Authentication.
- Locate Two-Factor Authentication.
- Toggle Enable to turn the feature on.
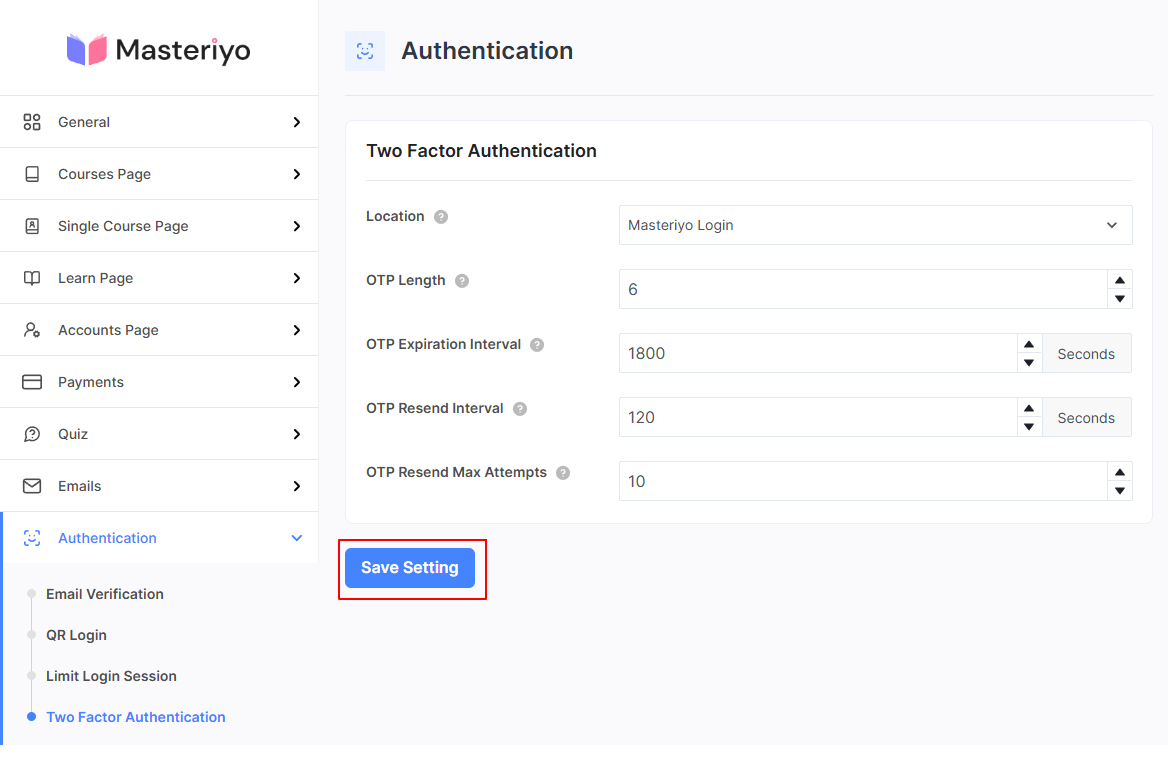
Access Two-Factor Authentication Settings
Once you activate the addon, you can go to the following location.
Masteriyo > Settings > Authentication > Two-Factor Authentication
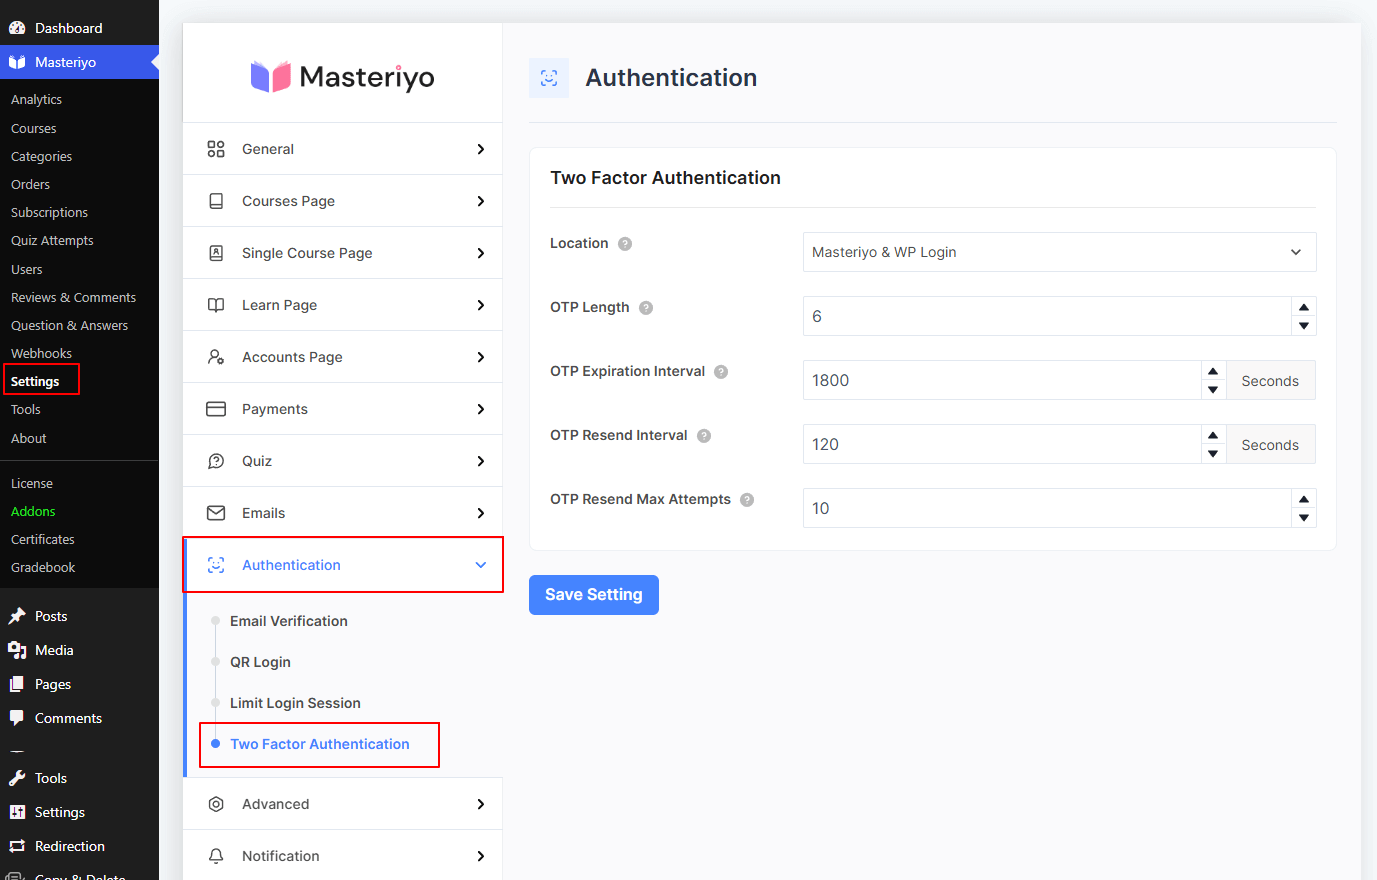
Configure Two-Factor Authentication for your LMS Site
You can configure all the settings required for two-factor authentication from here.
Location Settings
The Location dropdown in your Two-Factor Authentication settings determines where the OTP verification will be required on your LMS website.
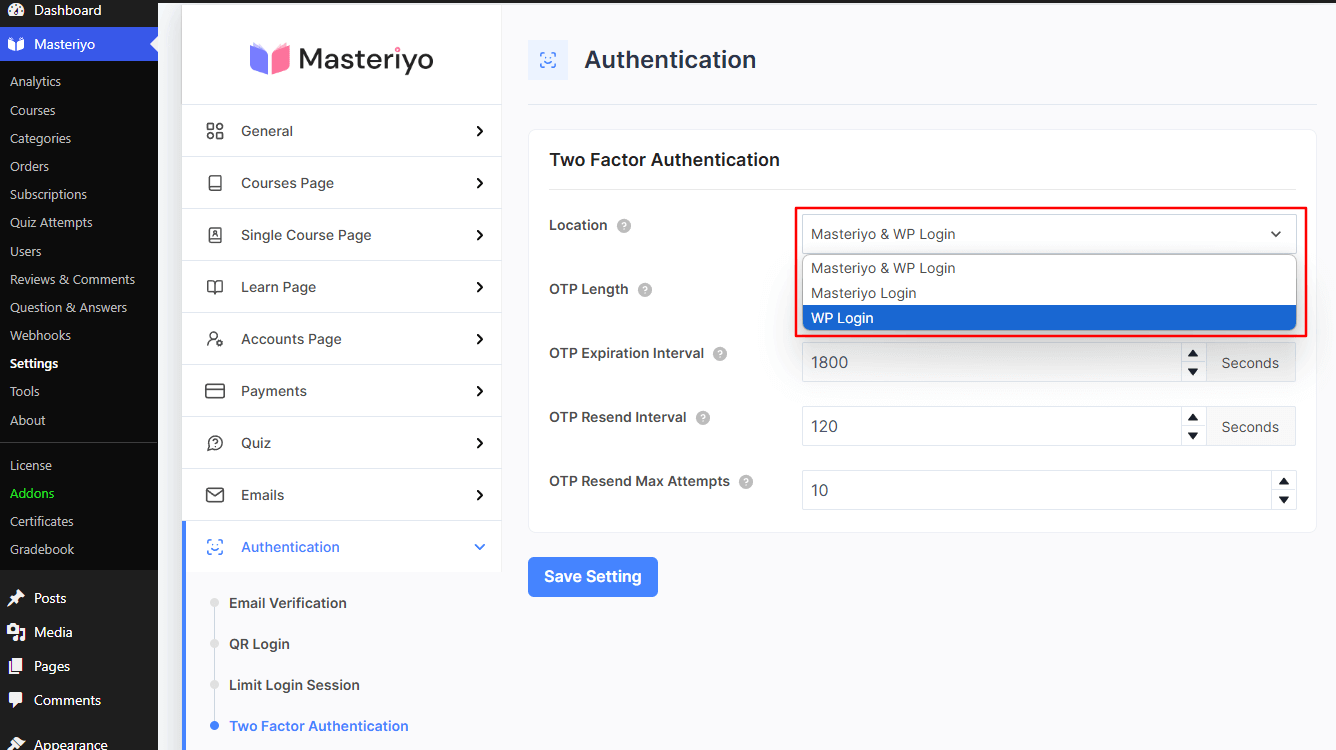
- Masteriyo & WP Login: Enforces two-factor authentication on both LMS and WordPress login for your site.
- Masteriyo Login: Enforces two-factor authentication only on Masteriyo Login.
- WP Login: Enforces two-factor authentication only on the WordPress login.
OTP-related settings
Next, you'll find different setting options related to OTP:
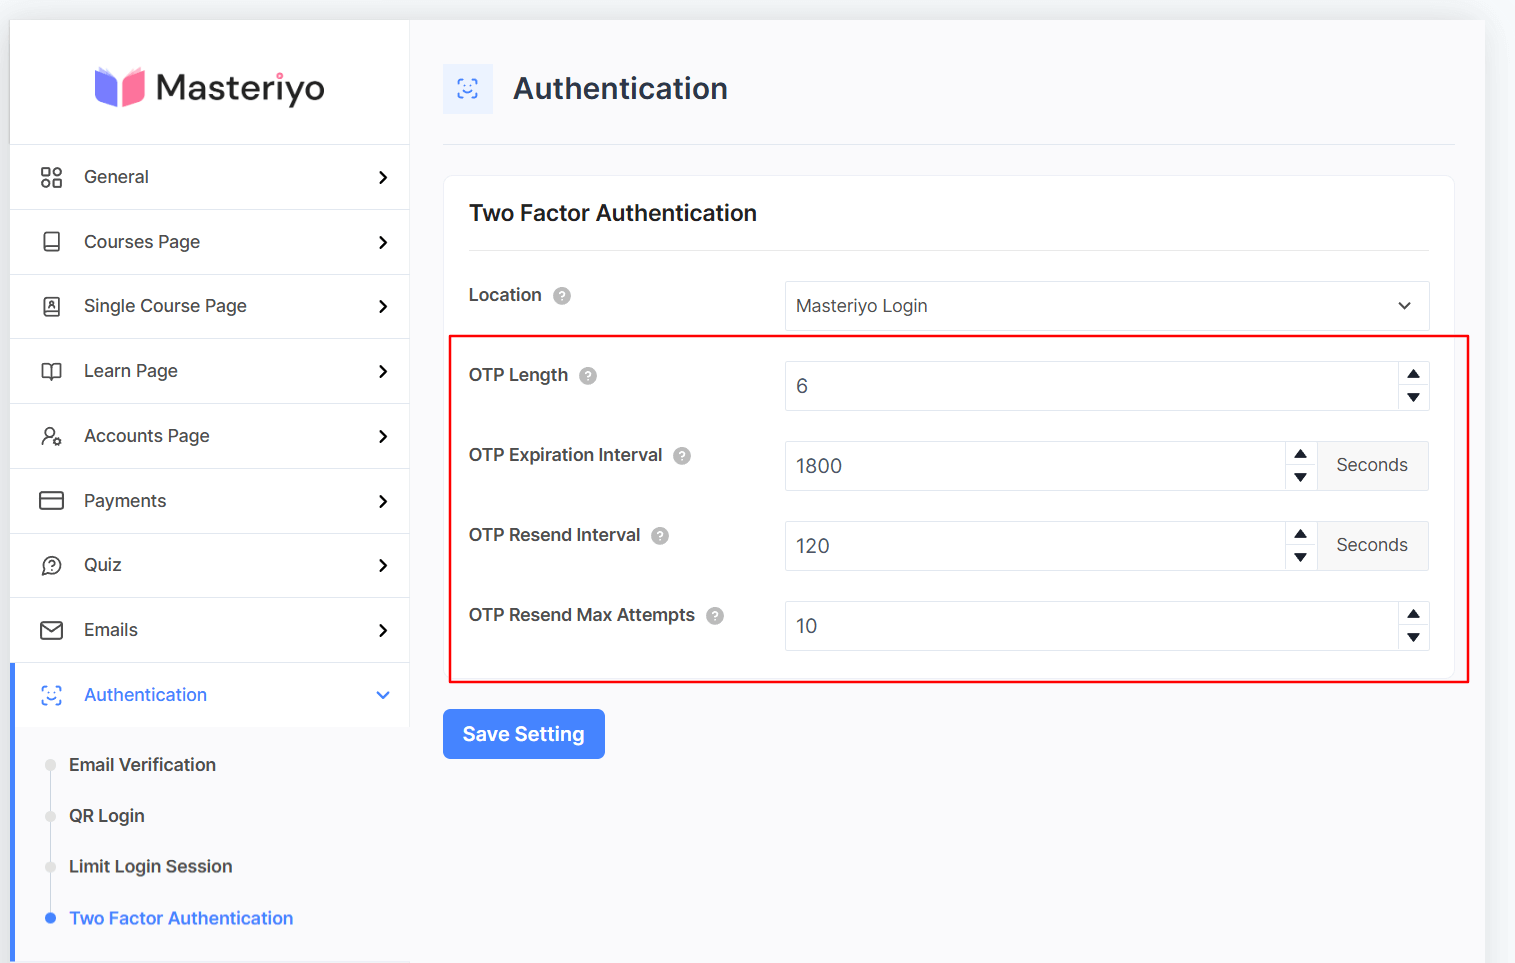
OTP Length
From here, you can set the number of digits in the one-time password.
- Default: 6 digits.
- Range: Typically 4-8 digits.
OTP Expiration Interval
Set a time limit for OTP validity before it expires, so that the user must verify the OTP within the given time frame. If verification fails, they must request to resend the OTP. The expiration interval is specified in the email of the user:
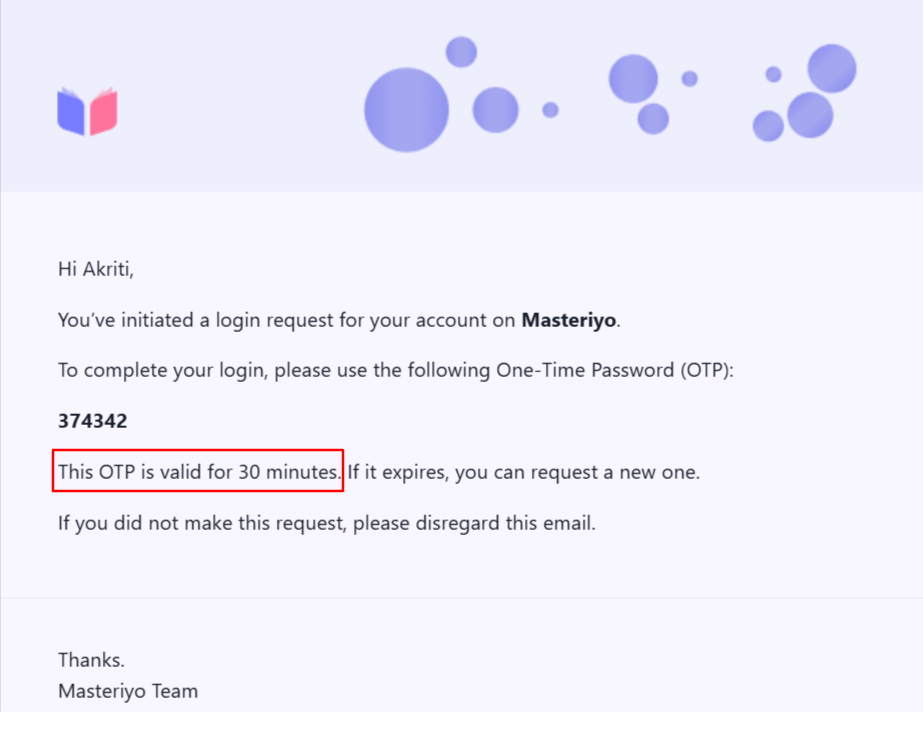
- Default: 1800 seconds (30 minutes).
- Recommended: 300-1800 seconds for optimal security.
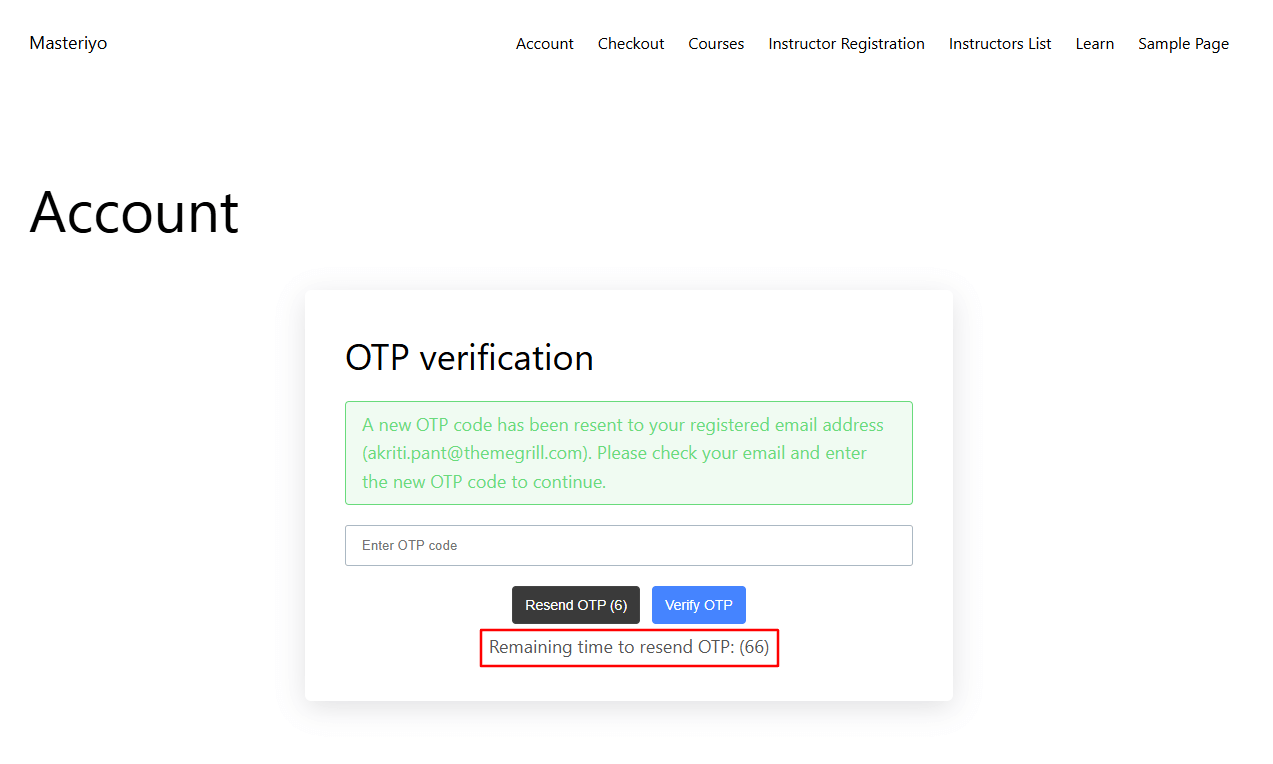
OTP Resend Interval
It sets the minimum time users must wait before requesting a new OTP. The resend interval will be shown below the Resend OTP button.
- Default: 120 seconds (2 minutes).
- Recommended: 60-300 seconds to prevent spam.
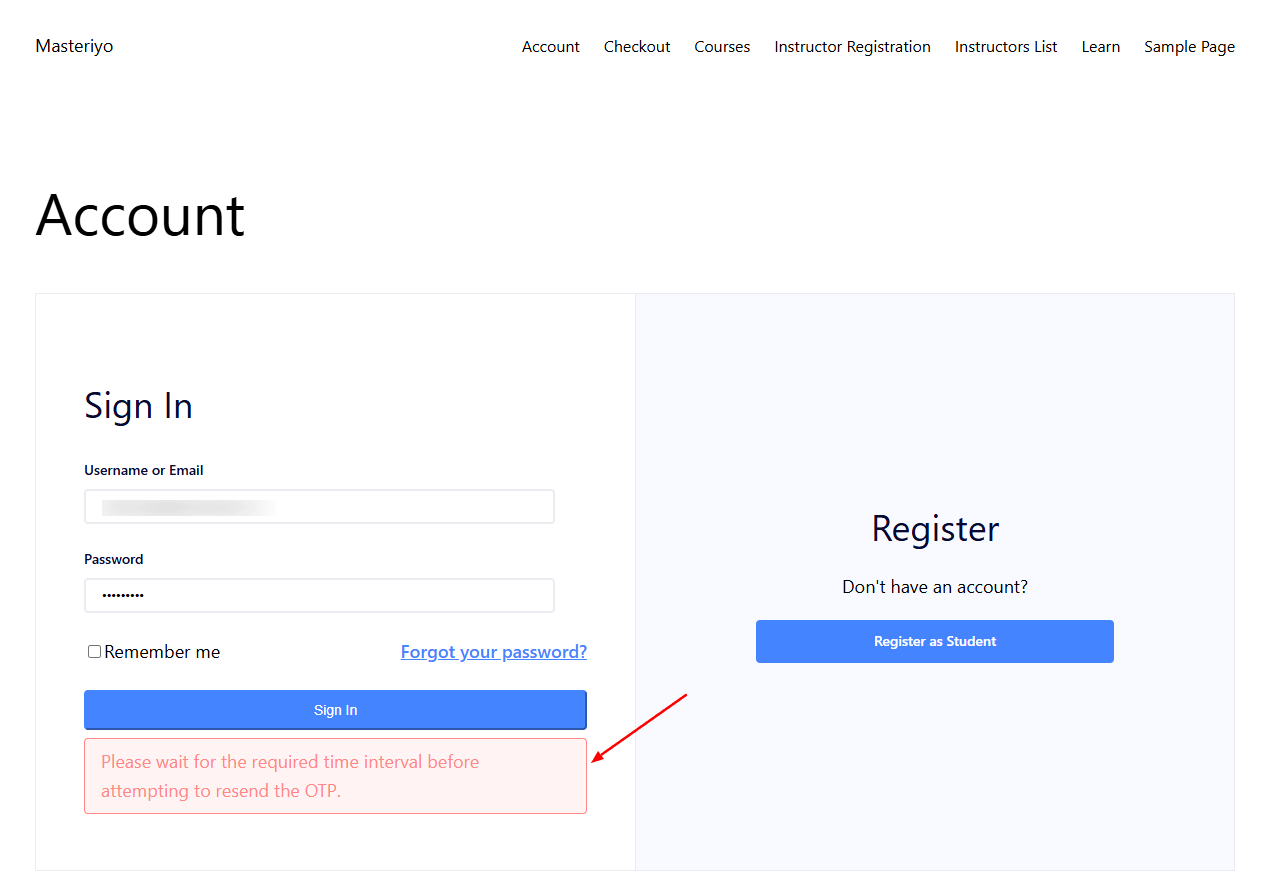
If the user tries to ask for the new OTP before the interval, an error message will be shown:
OTP Resend Max Attempts
Set the maximum number of times a user can request OTP resend. It prevents abuse and potential spam attacks. Remaining attempts will be shown to the user at the frontend:
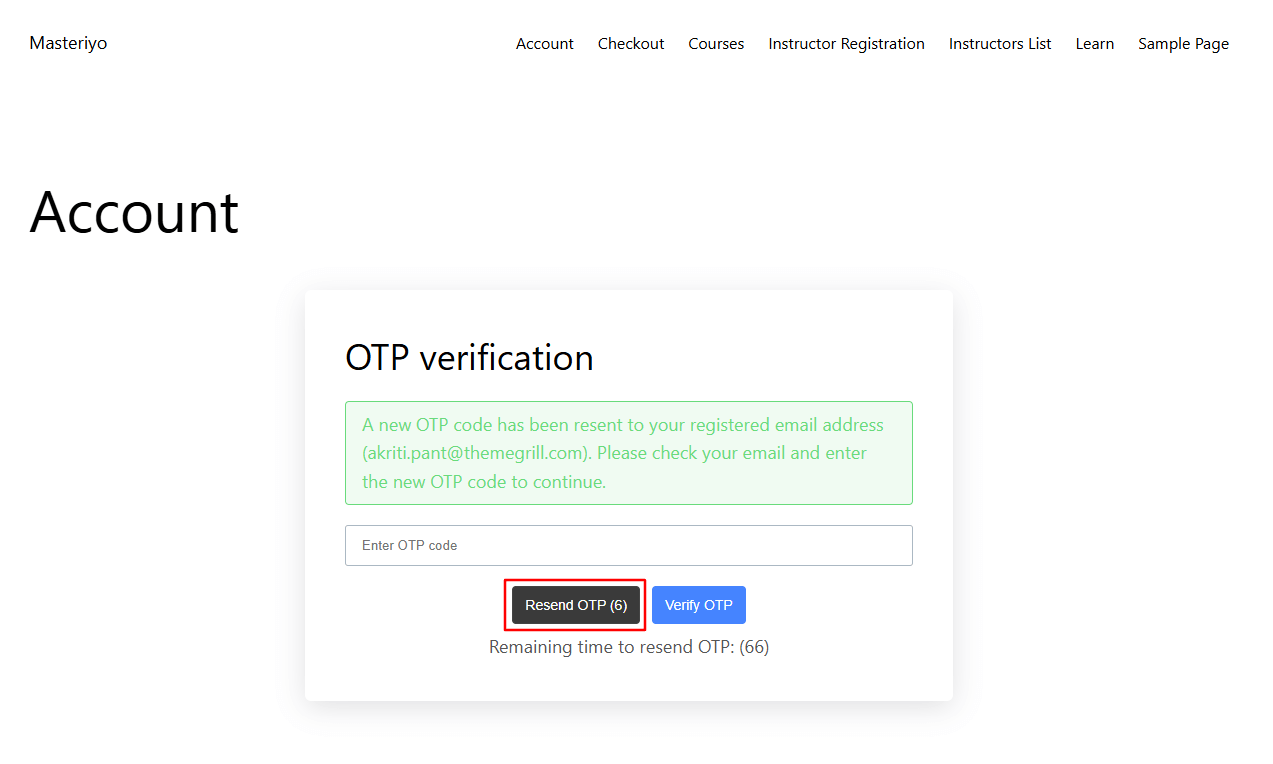
- Default: 10 attempts.
Once you've configured all options above, click Save Settings to enable two-factor authentication on your site.
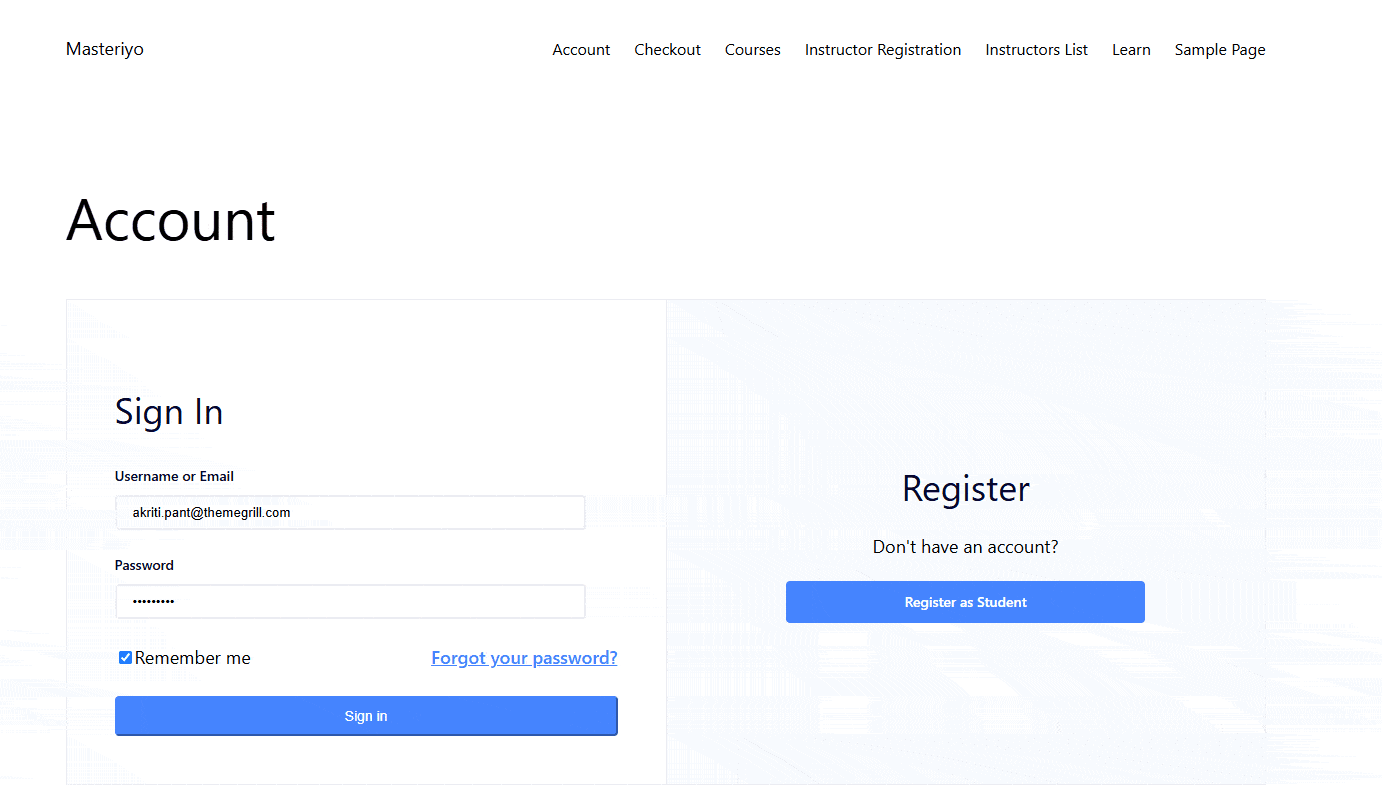
Test User Experience with Two-Factor Authentication
To test two-factor authentication, register on your LMS site and sign out. Now, try to log in to your Account. You'll then receive an OTP on your registered email.
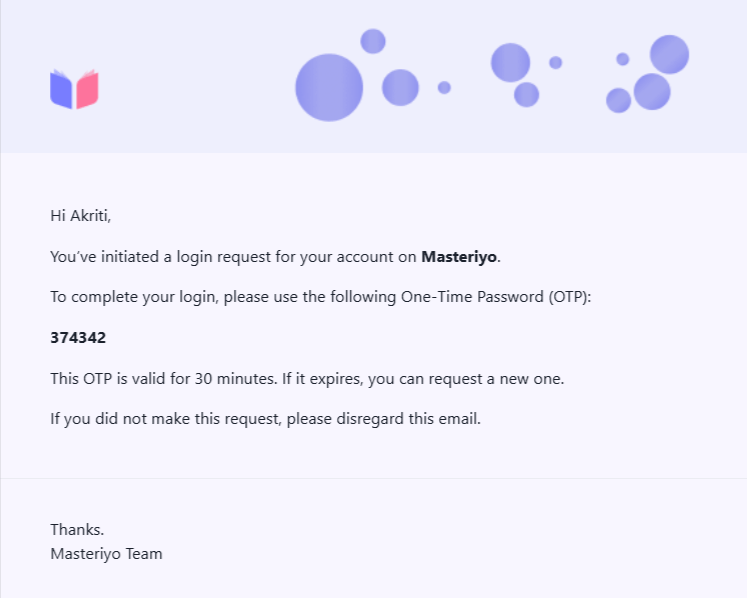
Copy the OTP and paste it under the OTP field to log in.
If you don't receive email or have a problem sending email, you can try using the SmartSMTP plugin. It helps ensure emails are delivered reliably by configuring proper SMTP settings for your WordPress site.
Here's how the two-factor authentication works at the user's end:
Additional Resources
Was this article helpful to you?
Give us Rating
Last edited on July 28, 2026.
Edit this page