White Label
Learn how to enable the White Label add-on to rebrand Masteriyo — hide the plugin name and logo and replace them with your own brand and menu icons.
The White Label add-on allows you to rebrand Masteriyo with your own brand name, logo, menu icons, and user role names. This helps you provide a branded experience in the WordPress dashboard without displaying the default Masteriyo branding.
Prerequisites
Before configuring White Label, make sure you have:
- An active Masteriyo LMS Elite plan.
- The White Label Add-on activated.
Activate the White Label Add-on
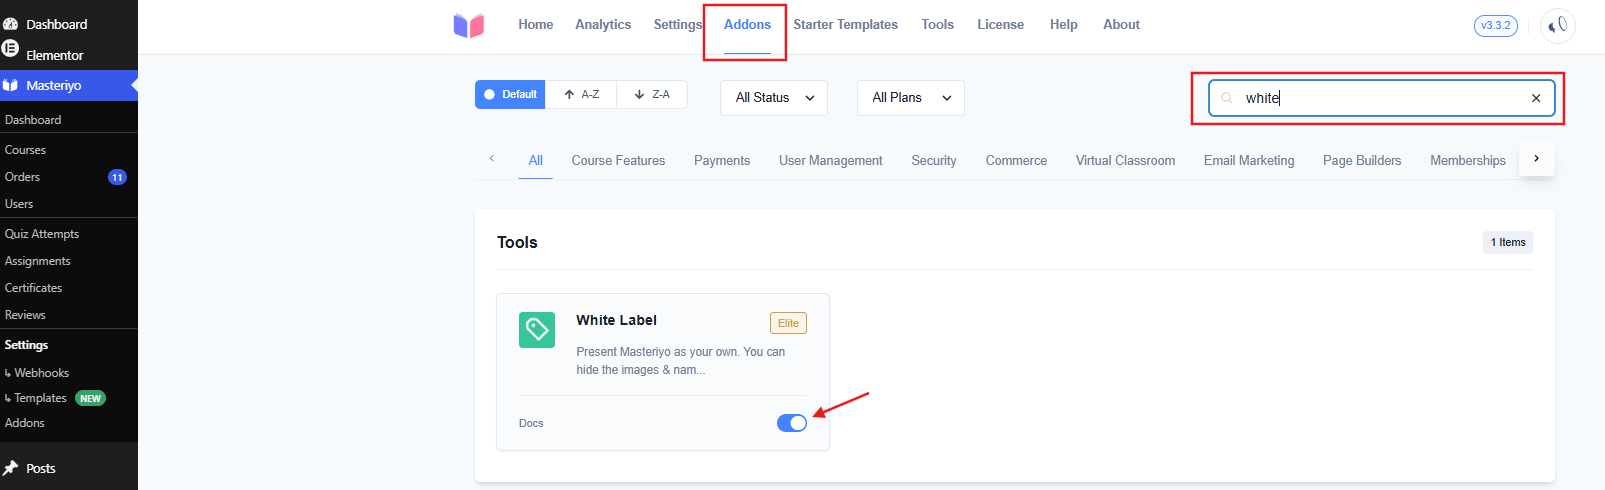
- Go to your WordPress dashboard and navigate to Masteriyo > Addons.
- Search for White Label.
- Once found, toggle the switch to enable the white label addon.
Configuration
- Go to your WordPress dashboard and navigate to Masteriyo > Settings > Advanced.
- Click on White Label.
- Configure your brand name, logo, and menu icons using the available fields (see below).
- Click on Save Settings.
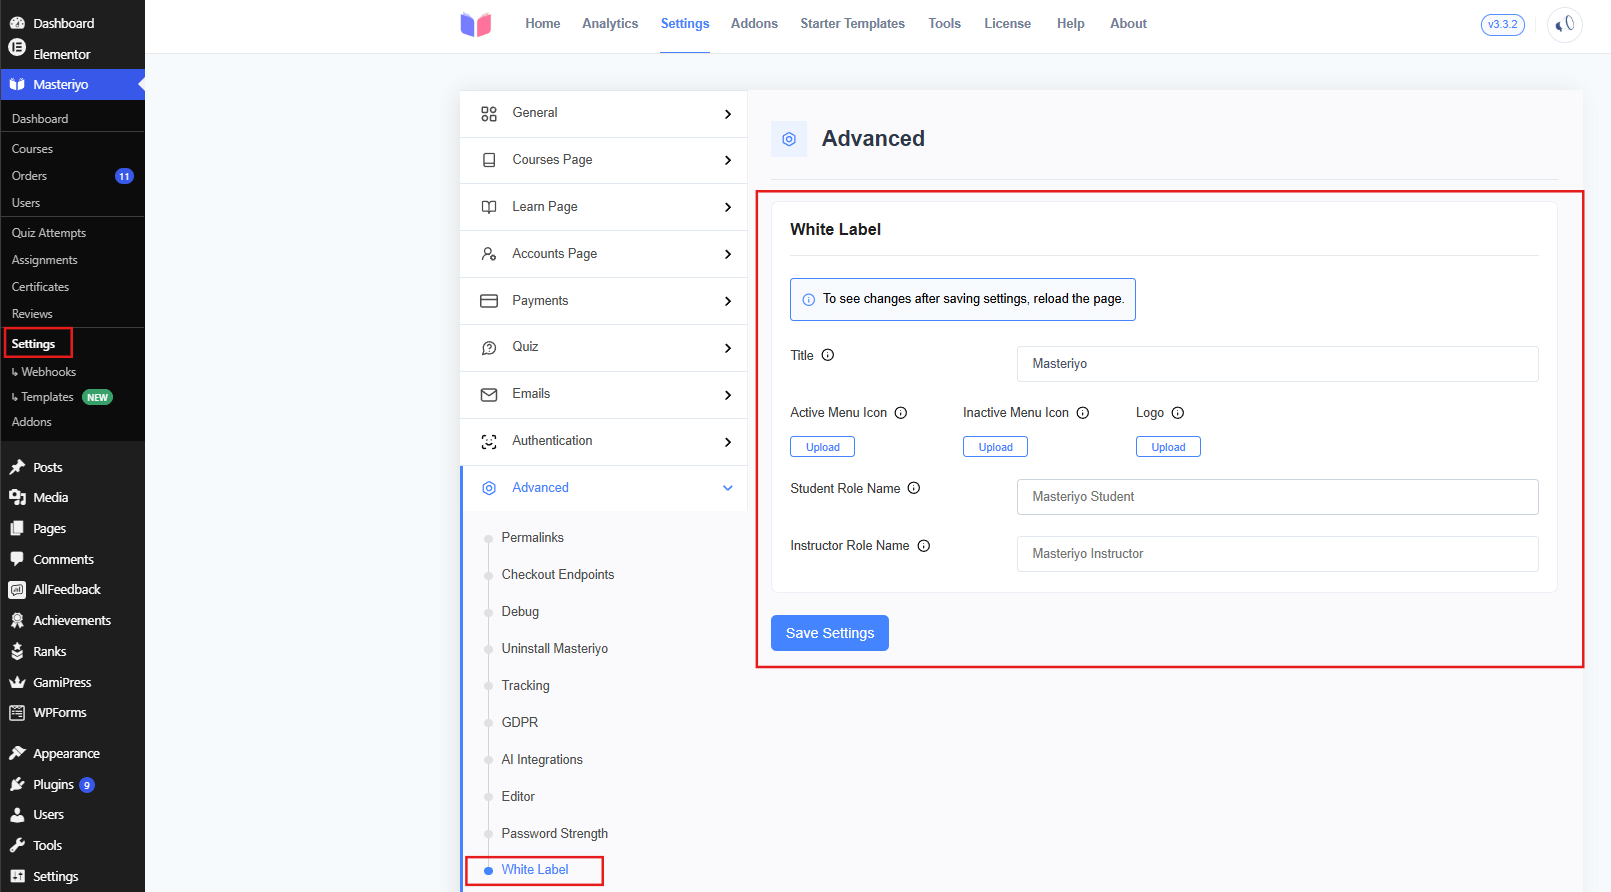
The available fields are described below:
- Title: Replaces "Masteriyo" with your own brand name across the WordPress dashboard, including the admin menu label.
- Active Menu Icon: The icon shown in the WordPress admin sidebar when the Masteriyo menu is active/selected.
- Inactive Menu Icon: The icon shown in the WordPress admin sidebar when the Masteriyo menu is not selected.
- Logo: Your brand logo, shown in place of the Masteriyo logo within the plugin's dashboard and pages.
- Student Role Name: Replaces the default "Masteriyo Student" user role label with your own custom name.
- Instructor Role Name: Replaces the default "Masteriyo Instructor" user role label with your own custom name.
After saving the settings, reload the page for the changes to take effect.
Was this article helpful to you?
Give us Rating
Last edited on August 13, 2026.
Edit this page