HubSpot Integration
Integrate HubSpot CRM with Masteriyo LMS — sync student enrollment data to HubSpot lists, track course progress, and trigger automated email campaigns.
Follow these step-by-step instructions for integrating HubSpot with Masteriyo LMS in WordPress. Integration allows you to synchronize student data, course enrollments, and learning activities with your HubSpot CRM, enabling advanced marketing, sales, and customer service capabilities.
Prerequisites
- Masteriyo LMS Pro plan or above installed and activated.
- Active installation of the HubSpot addon.
- An active HubSpot account.
Setup and Configuration
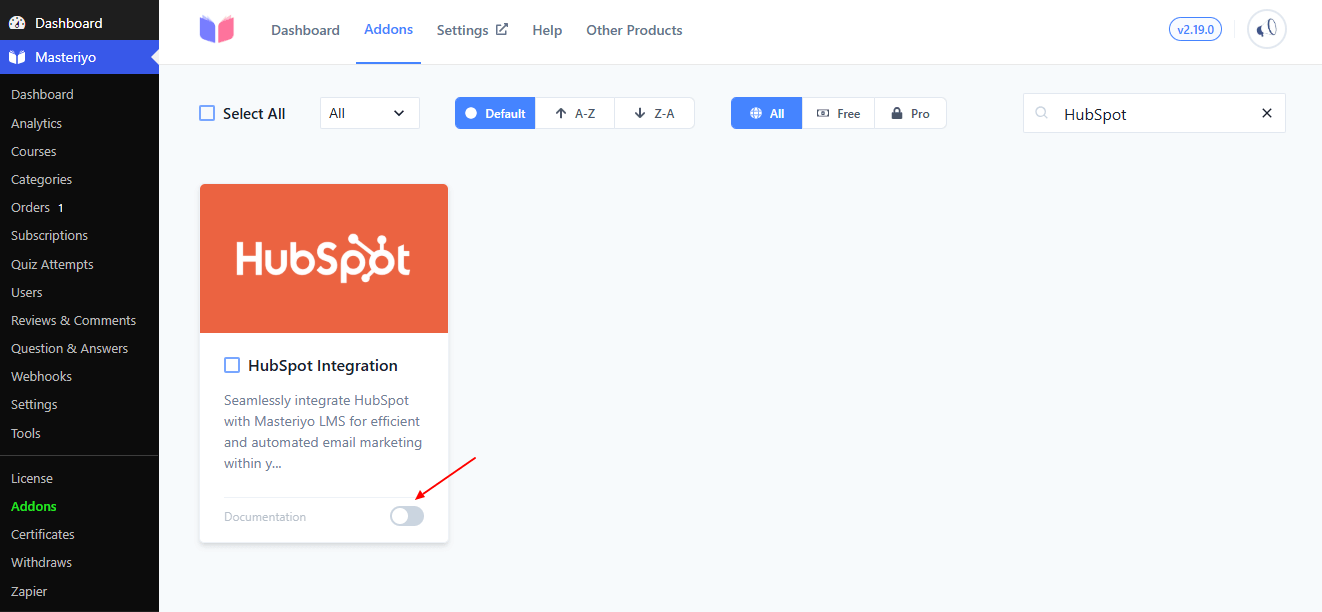
After you install and activate the Masteriyo LMS plugin, enable the HubSpot Integration addon.
Now, follow the steps below to configure further:
Step 1: Create a Private App in HubSpot and Generate a Token
Create an account with HubSpot if you haven’t done so, and log in to your account. To do so, navigate to Settings > Integrations > Private Apps.
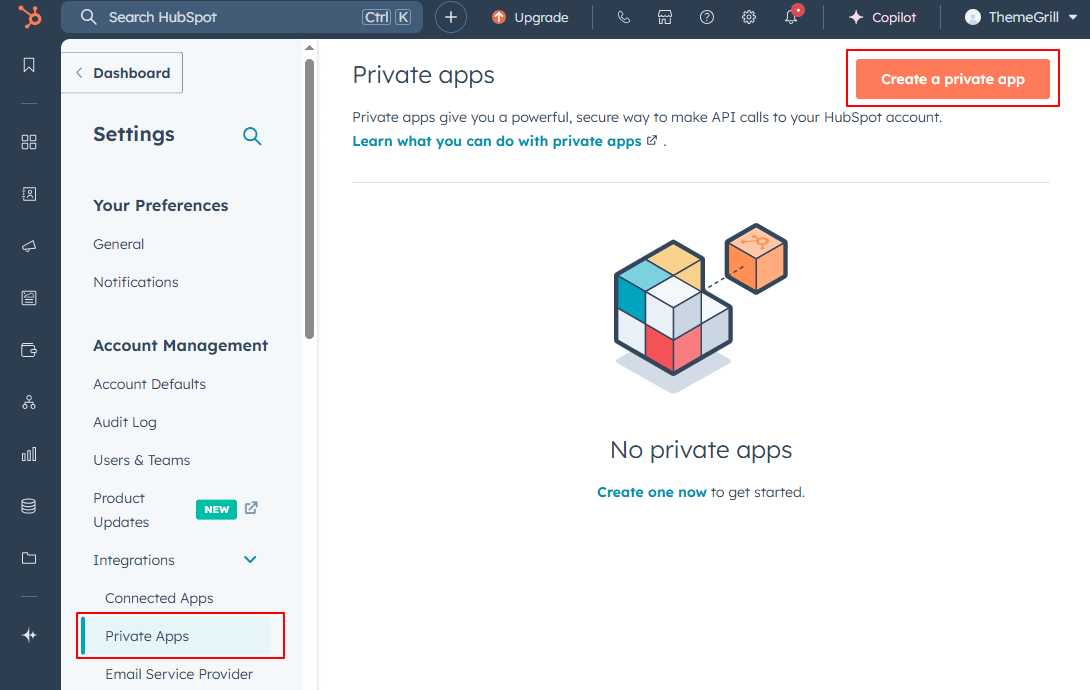
Next, click on Create a private app. A new screen pops up asking you for the details of the app.
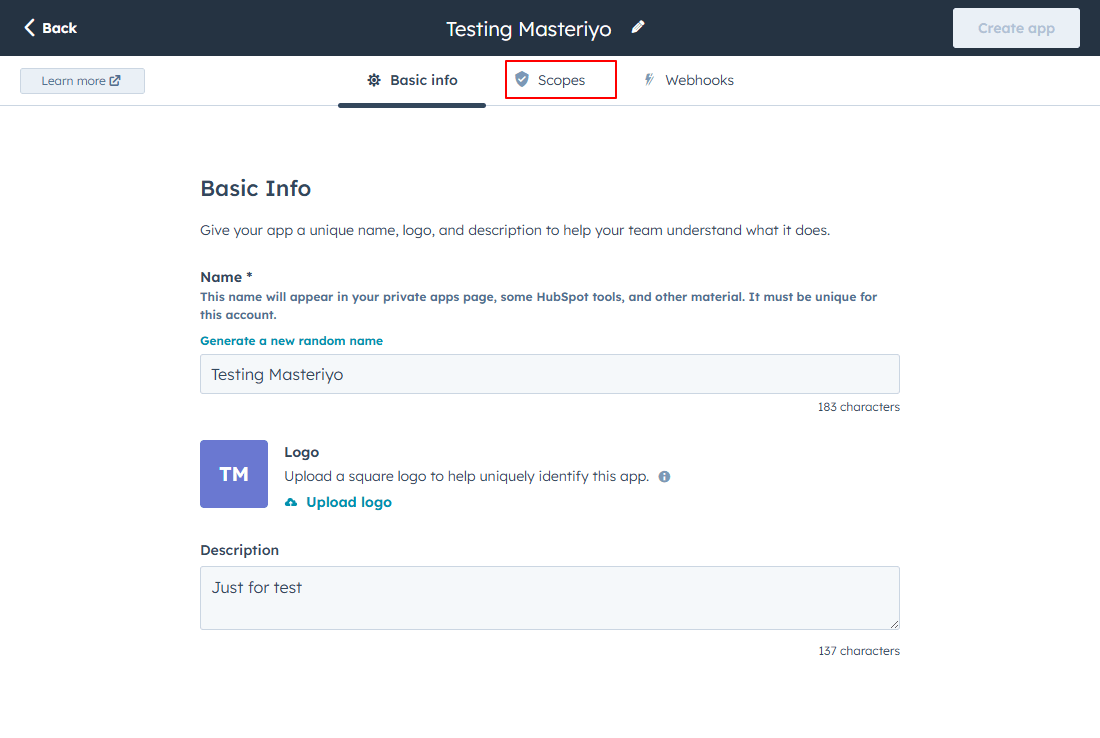
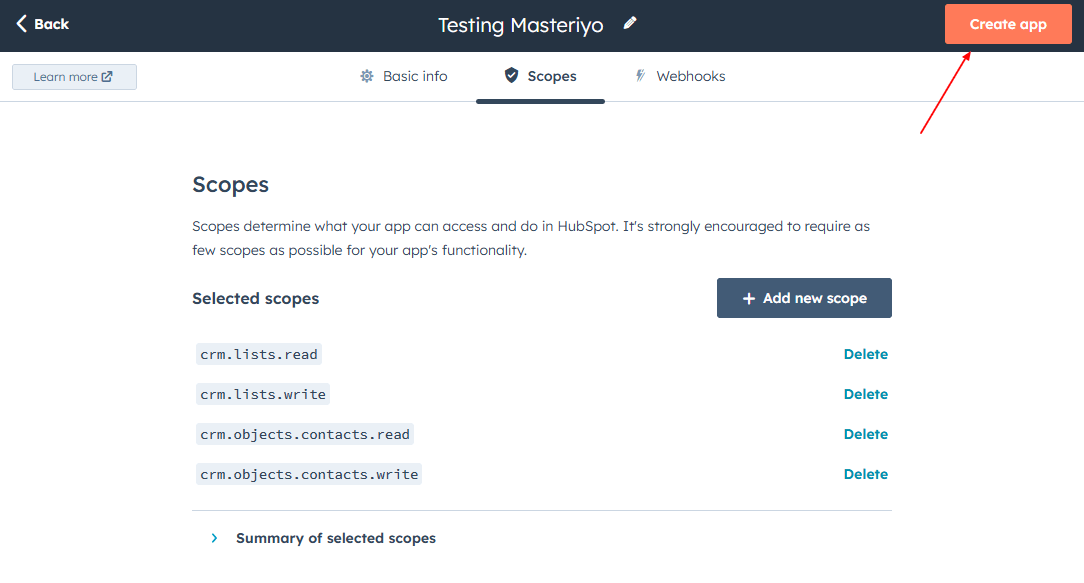
Click on the Scopes tab. Now, search for the following scopes and select them:
- crm.objects.contacts.read
- crm.objects.contacts.write
- crm.lists.write
- crm.lists.read
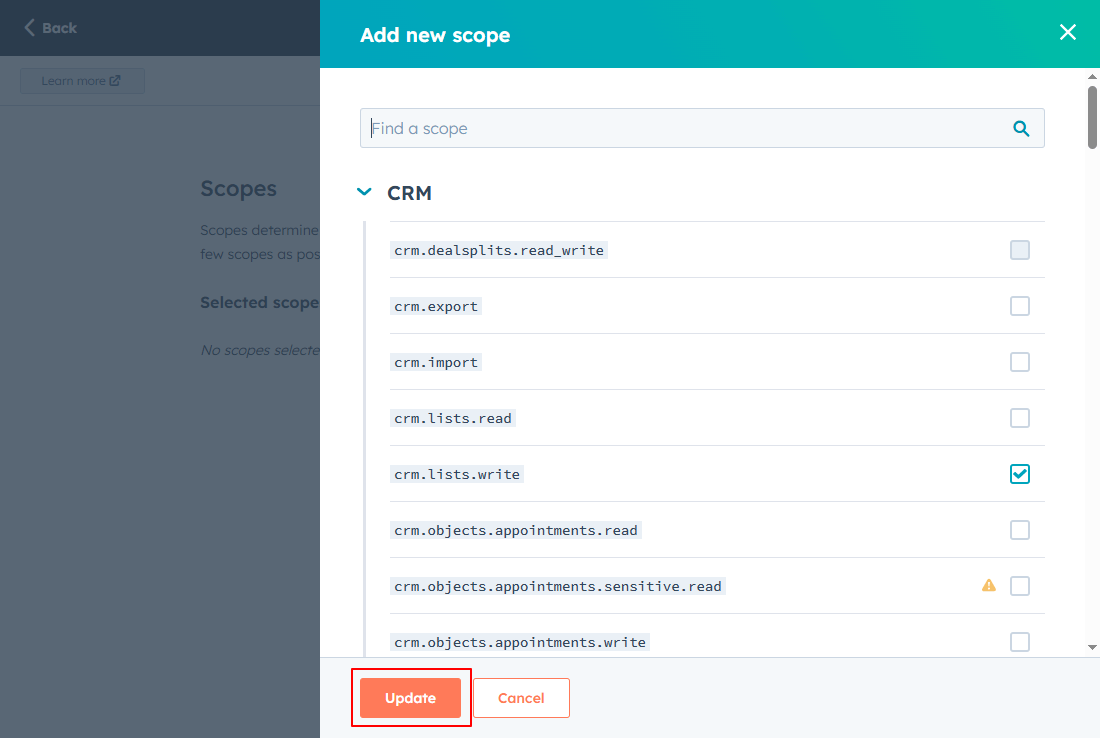
Click on the Update button once you have completed the selection. Next, click the Create app, and you’ll see a message about your access token. Hit the Continue creating button.
It will now generate a Token.
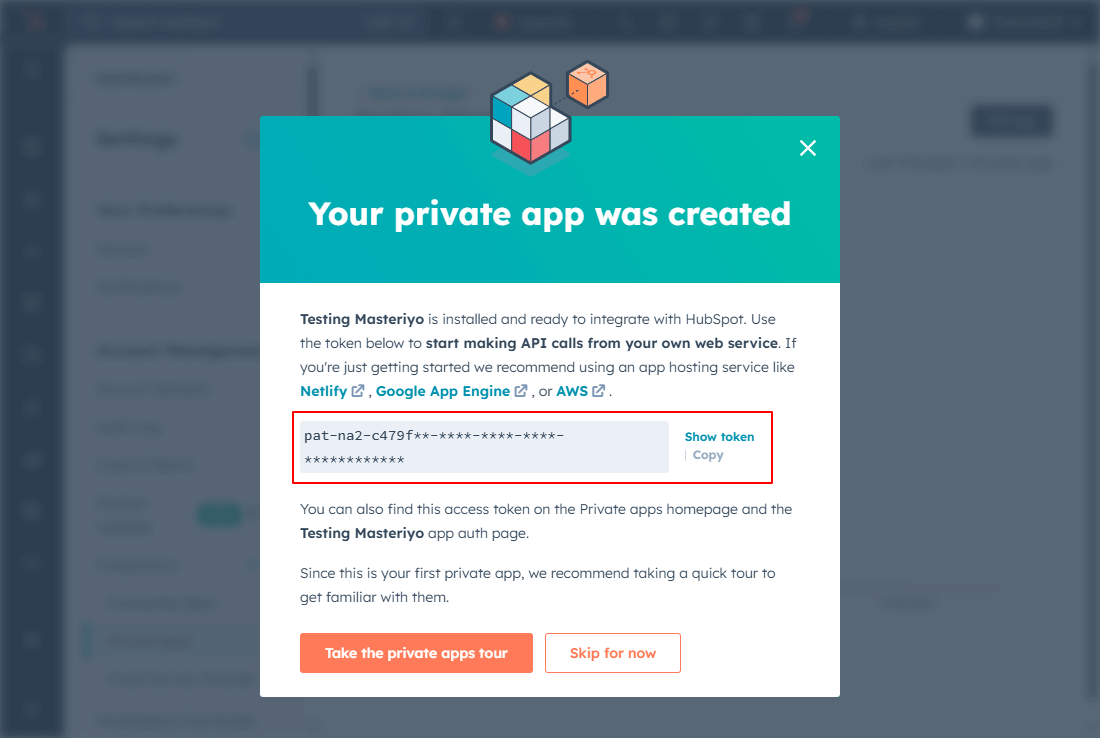
Click on Show token, then copy and keep it safe to use later.
Step 2: Generate a Static List
Masteriyo LMS integrations with HubSpot require you to specify which list to sync data to during the initial setup process. The list acts as the container for all the student information flowing from Masteriyo into HubSpot.
So, you now need to generate a list in HubSpot. Navigate to CRM > Lists and click on Create List.
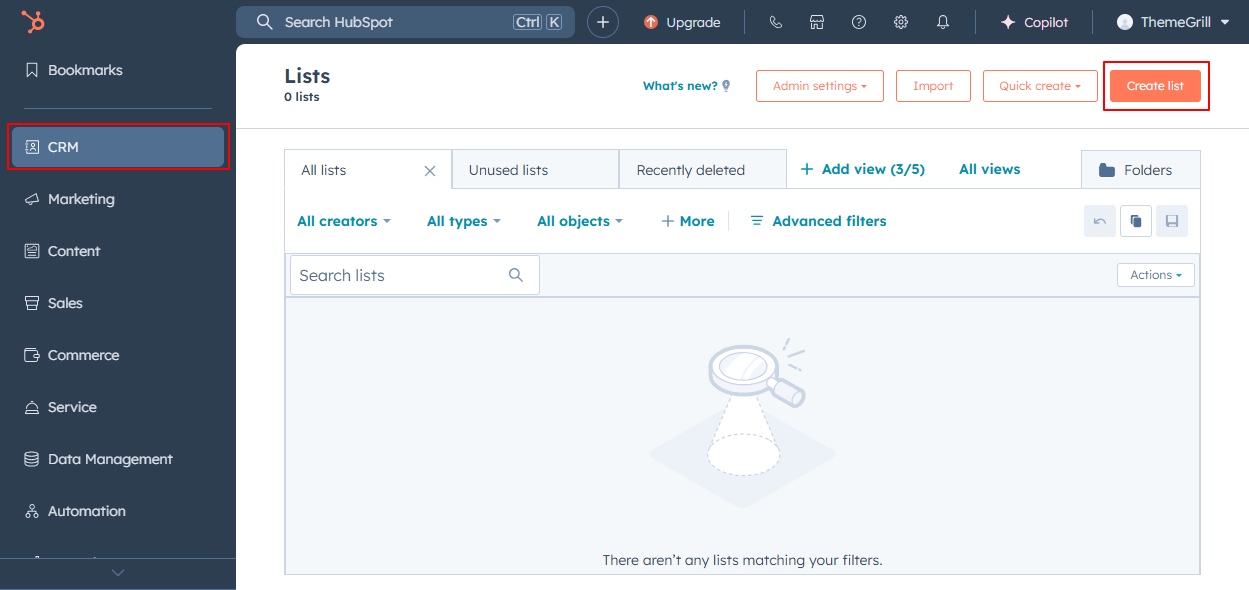
Now select the type of list you want to create and hit the Next button. Now, you can edit the list's name and click on the Review and save button.
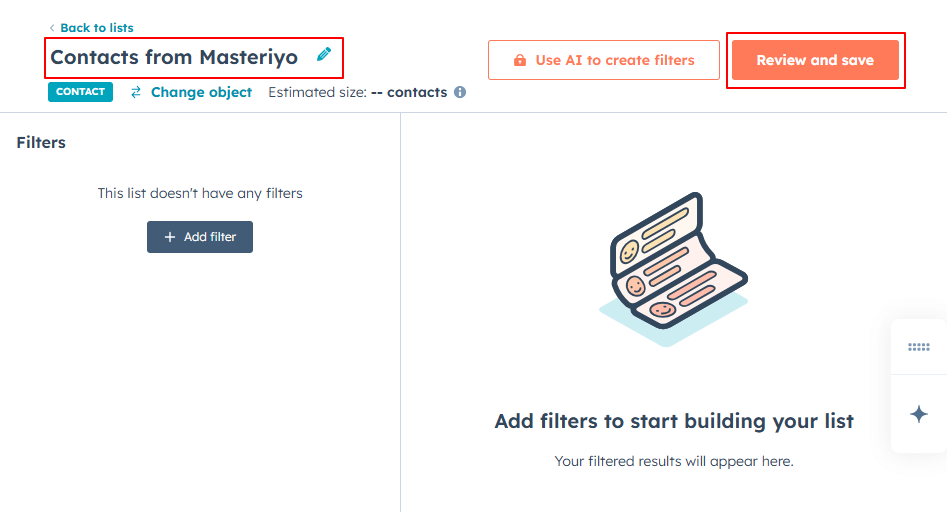
Now, the most crucial part is ensuring your list is Static to create a stable destination for syncing student data from Masteriyo. This prevents students from being automatically removed due to changing contact properties and gives you precise control over your educational marketing campaigns.
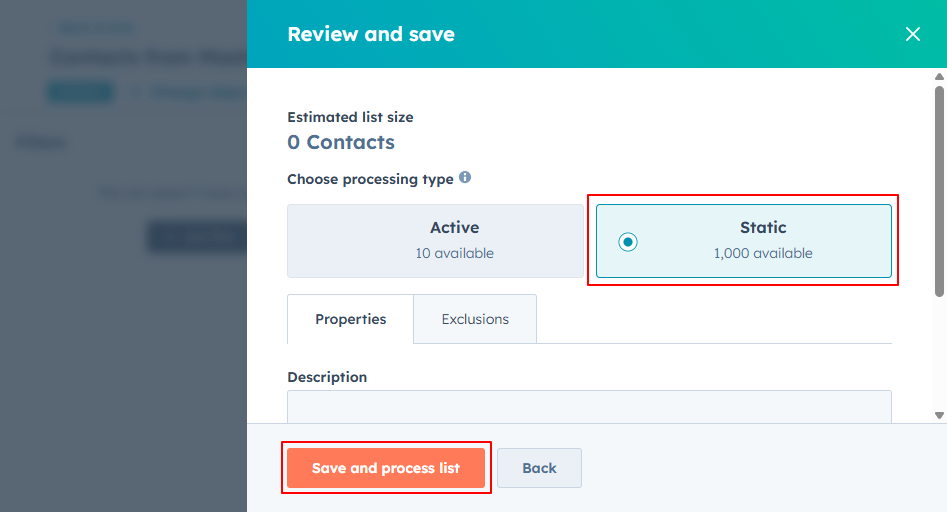
Click on Save and process list button.
Step 3: Configure HubSpot API Connection in WordPress
In your WordPress dashboard, go to Masteriyo > Settings > Integrations. Find the HubSpot Integration and click on it.
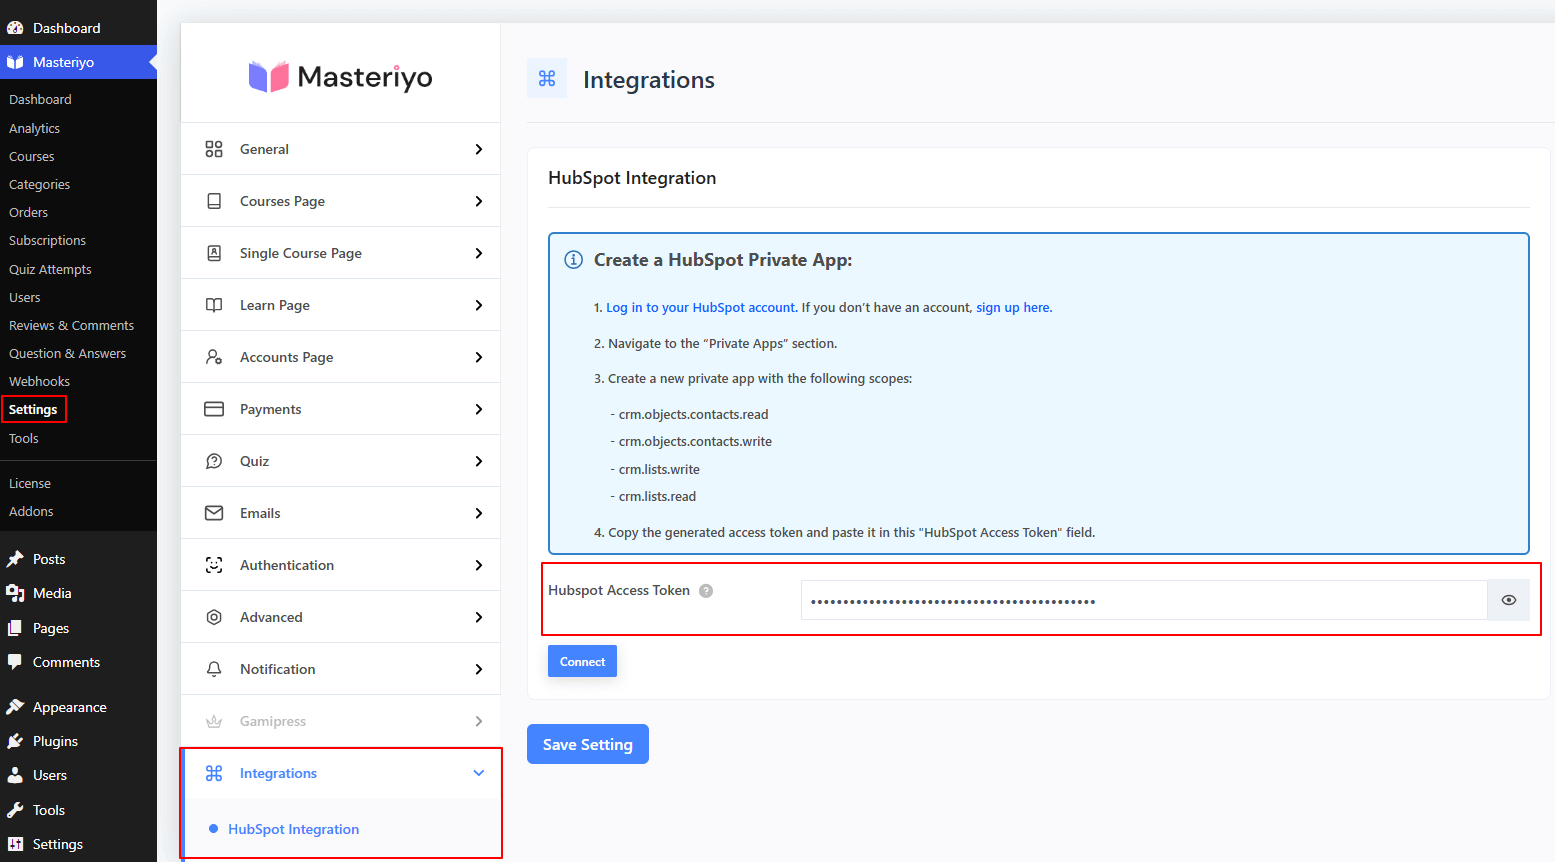
Paste the copied token under Hubspot Access Token and then click Connect.
You’ll now see the HubSpot Integration settings. From here, you can:
- Enable Forced Subscription to automatically subscribe users to your email list. If you enable this option, users who register on your site don’t see the consent message for receiving emails; they will be forced to receive email.
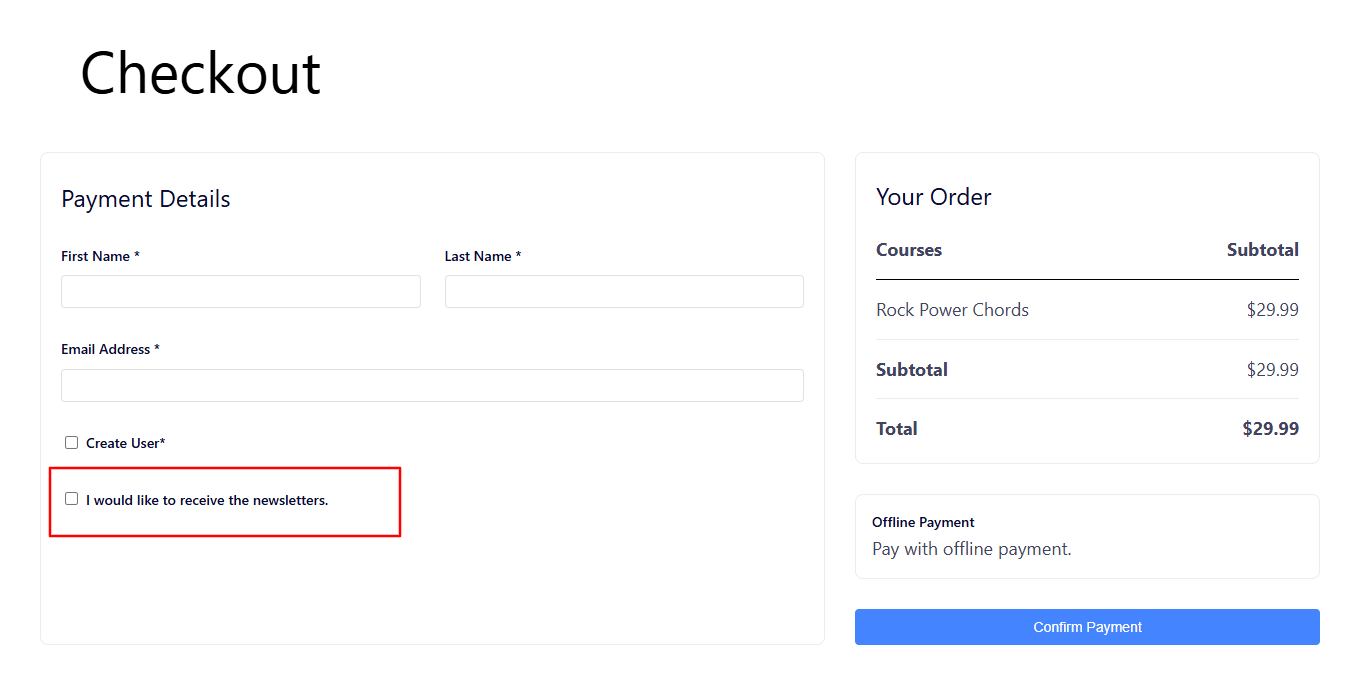
- Add a custom consent message that will be displayed to users asking for their email subscription consent.
- Choose a list you created in your Hubspot account so that the contact will be saved in the same list.
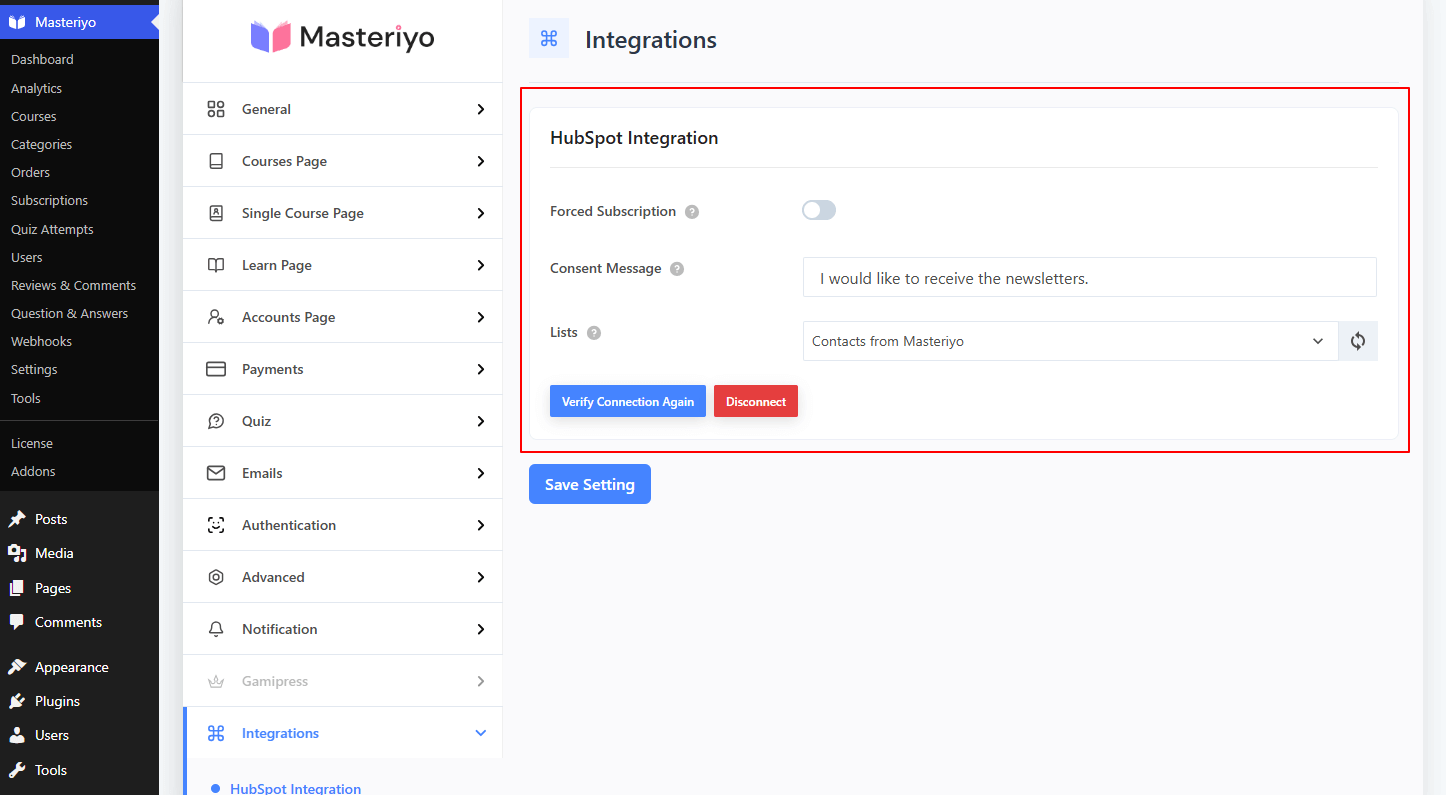
You can verify the connection again and click Save Settings to save the changes.
Step 4: Test the Integration
To test the integration, you can open your LMS site in private or incognito mode. Now, buy any course to see if the data gets integrated into the HubSpot list. After successful integration, Masteriyo data will be available in HubSpot:
Automation Possibilities
With integrated data, you can set up HubSpot automation to:
- Send welcome emails to new Masteriyo students.
- Create follow-up tasks for students who haven’t completed courses.
- Trigger congratulatory emails for course completions.
- Segment contacts based on course enrollments or completions.
- Create targeted marketing campaigns based on learning interests.
Was this article helpful to you?
Give us Rating
Last edited on July 23, 2026.
Edit this page