Google reCAPTCHA
Add Google reCAPTCHA v2 or v3 to Masteriyo login, student, and instructor registration forms to block spam signups and bot attacks.
Google reCAPTCHA addon safeguards the login and registration processes for both instructors and students in Masteriyo LMS. This security feature helps protect your eLearning platform from spam registrations, bot attacks, and fraudulent activities by requiring users to verify they are human.
Prerequisite: Google reCAPTCHA addon.
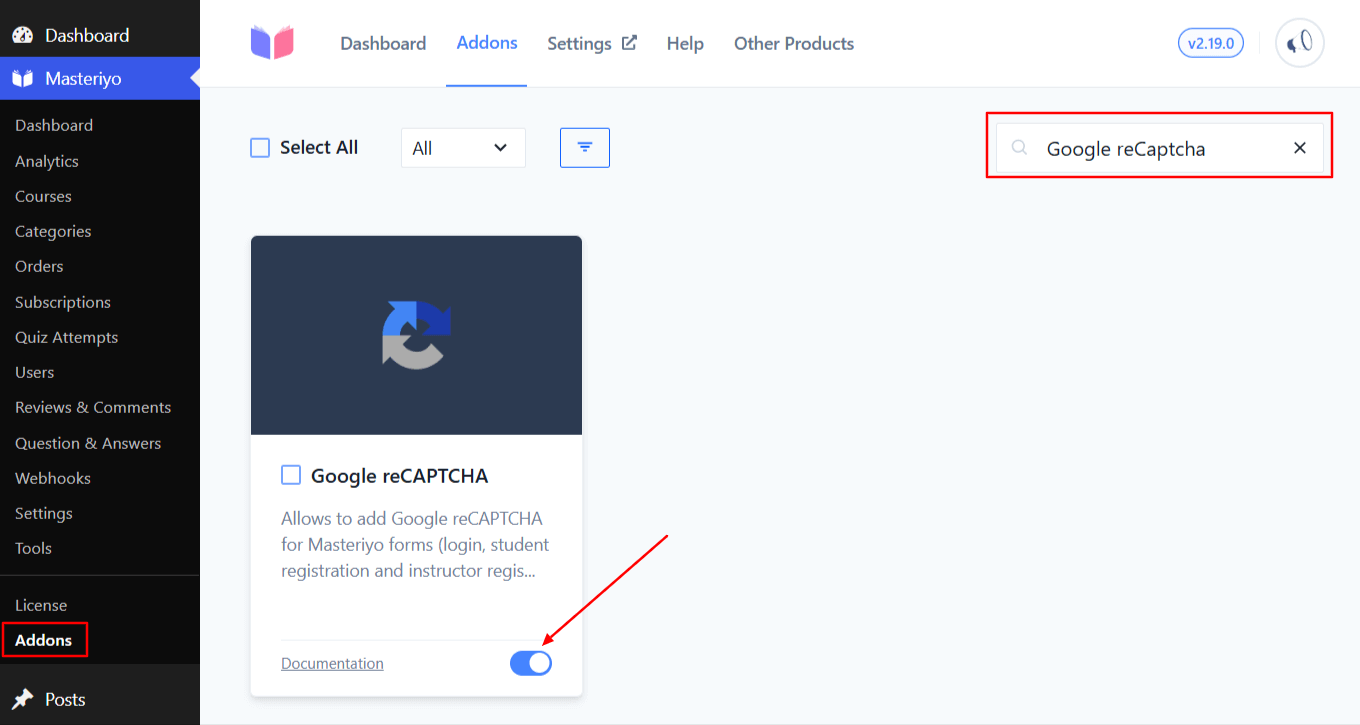
Step 1: Install and Activate Google reCAPTCHA Addon
After you have installed Masteriyo LMS on your site, navigate to Masteriyo > Addons and search for the Google reCAPTCHA addon. Next, toggle to enable the addon.
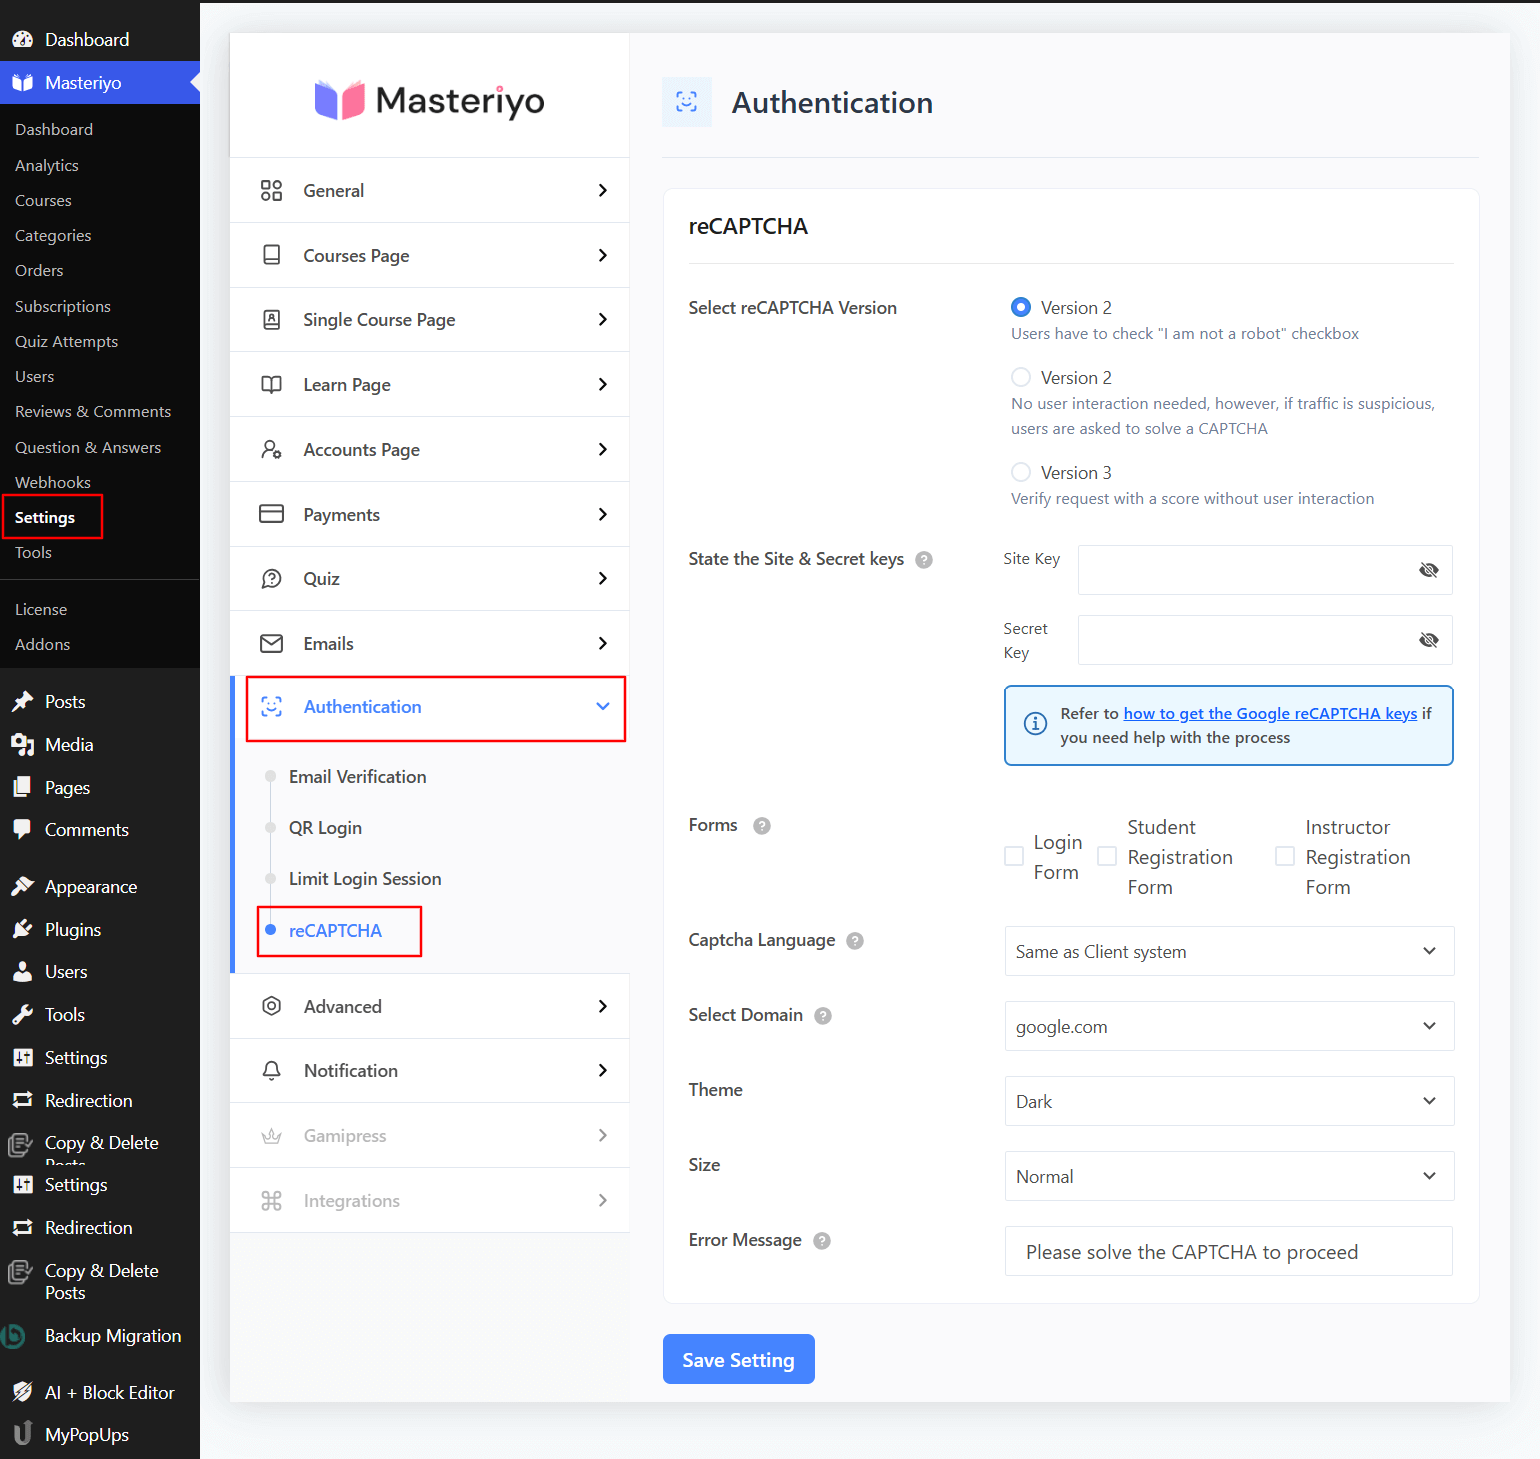
Step 2: Generate Google reCAPTCHA Keys
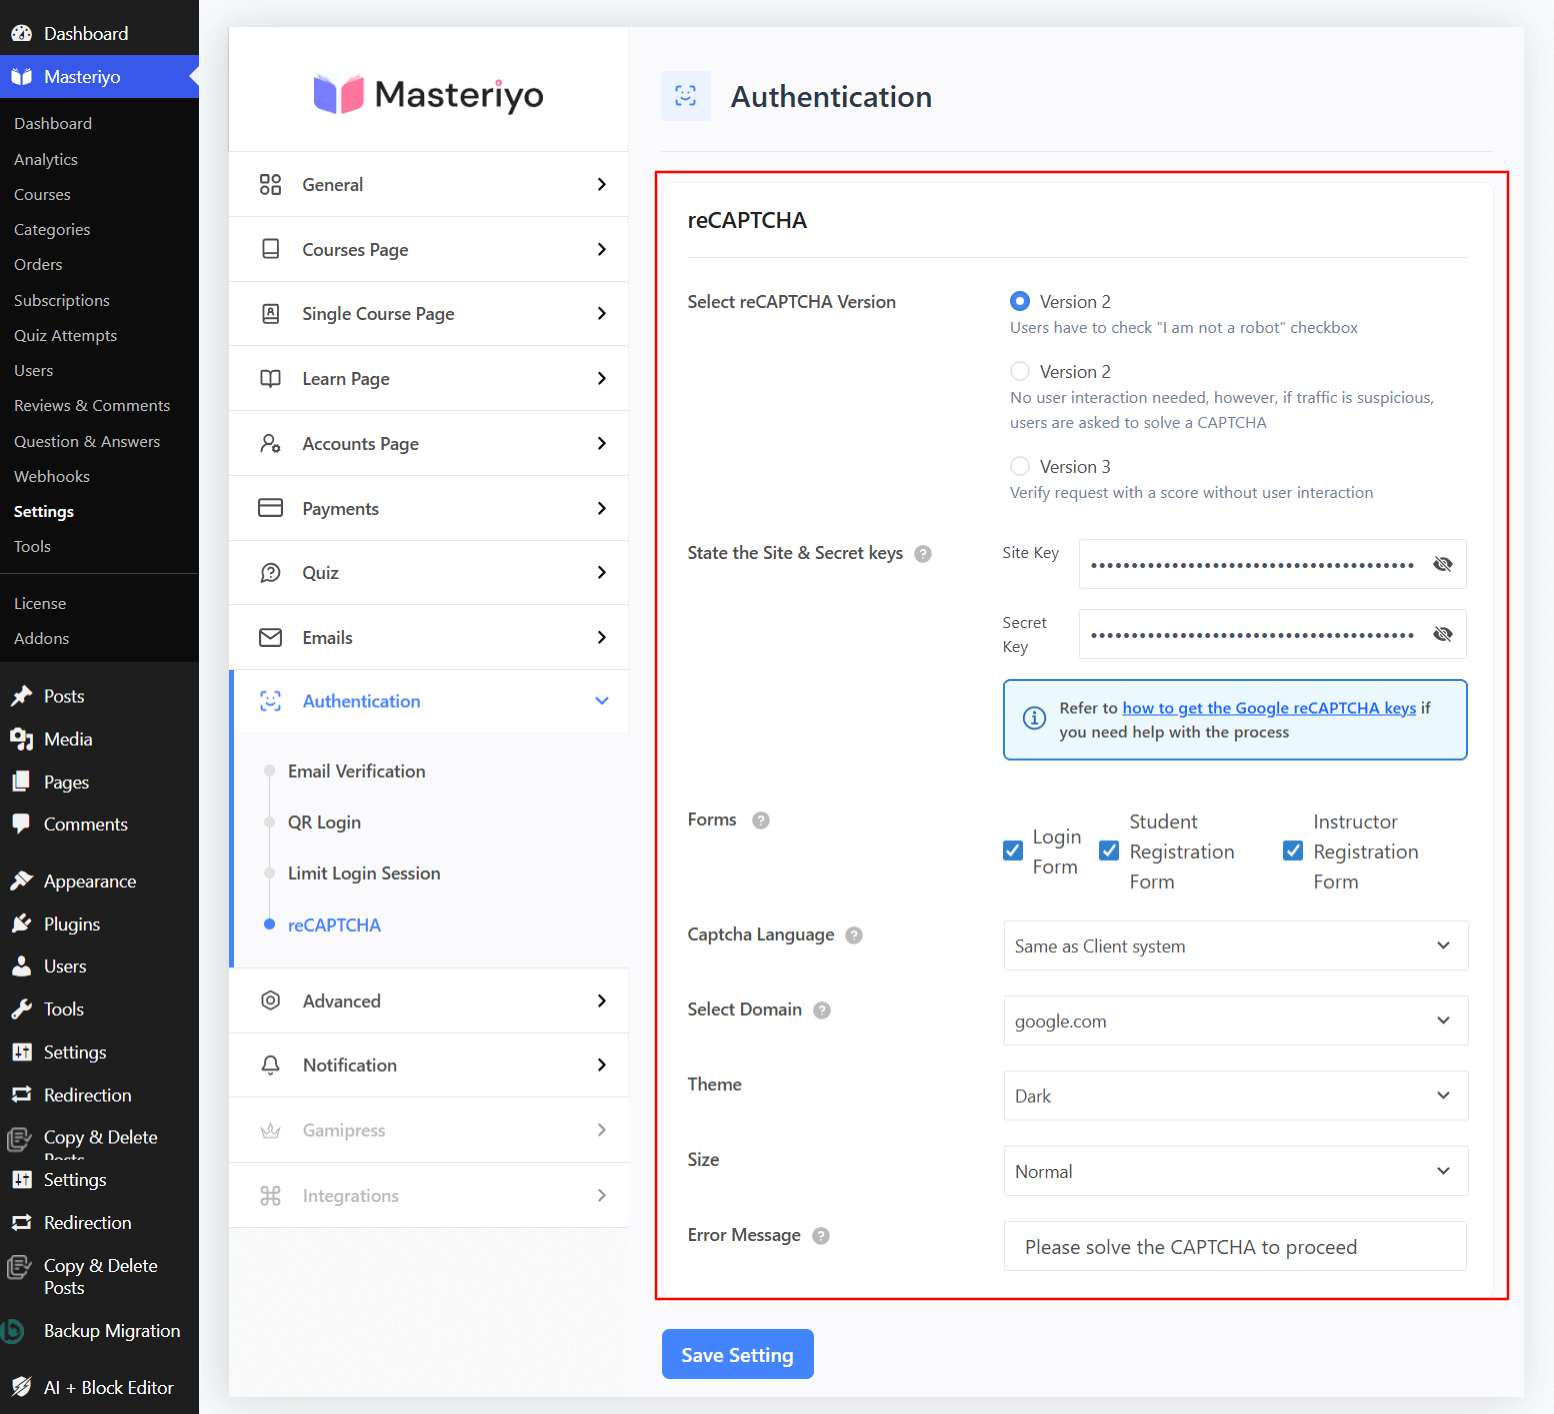
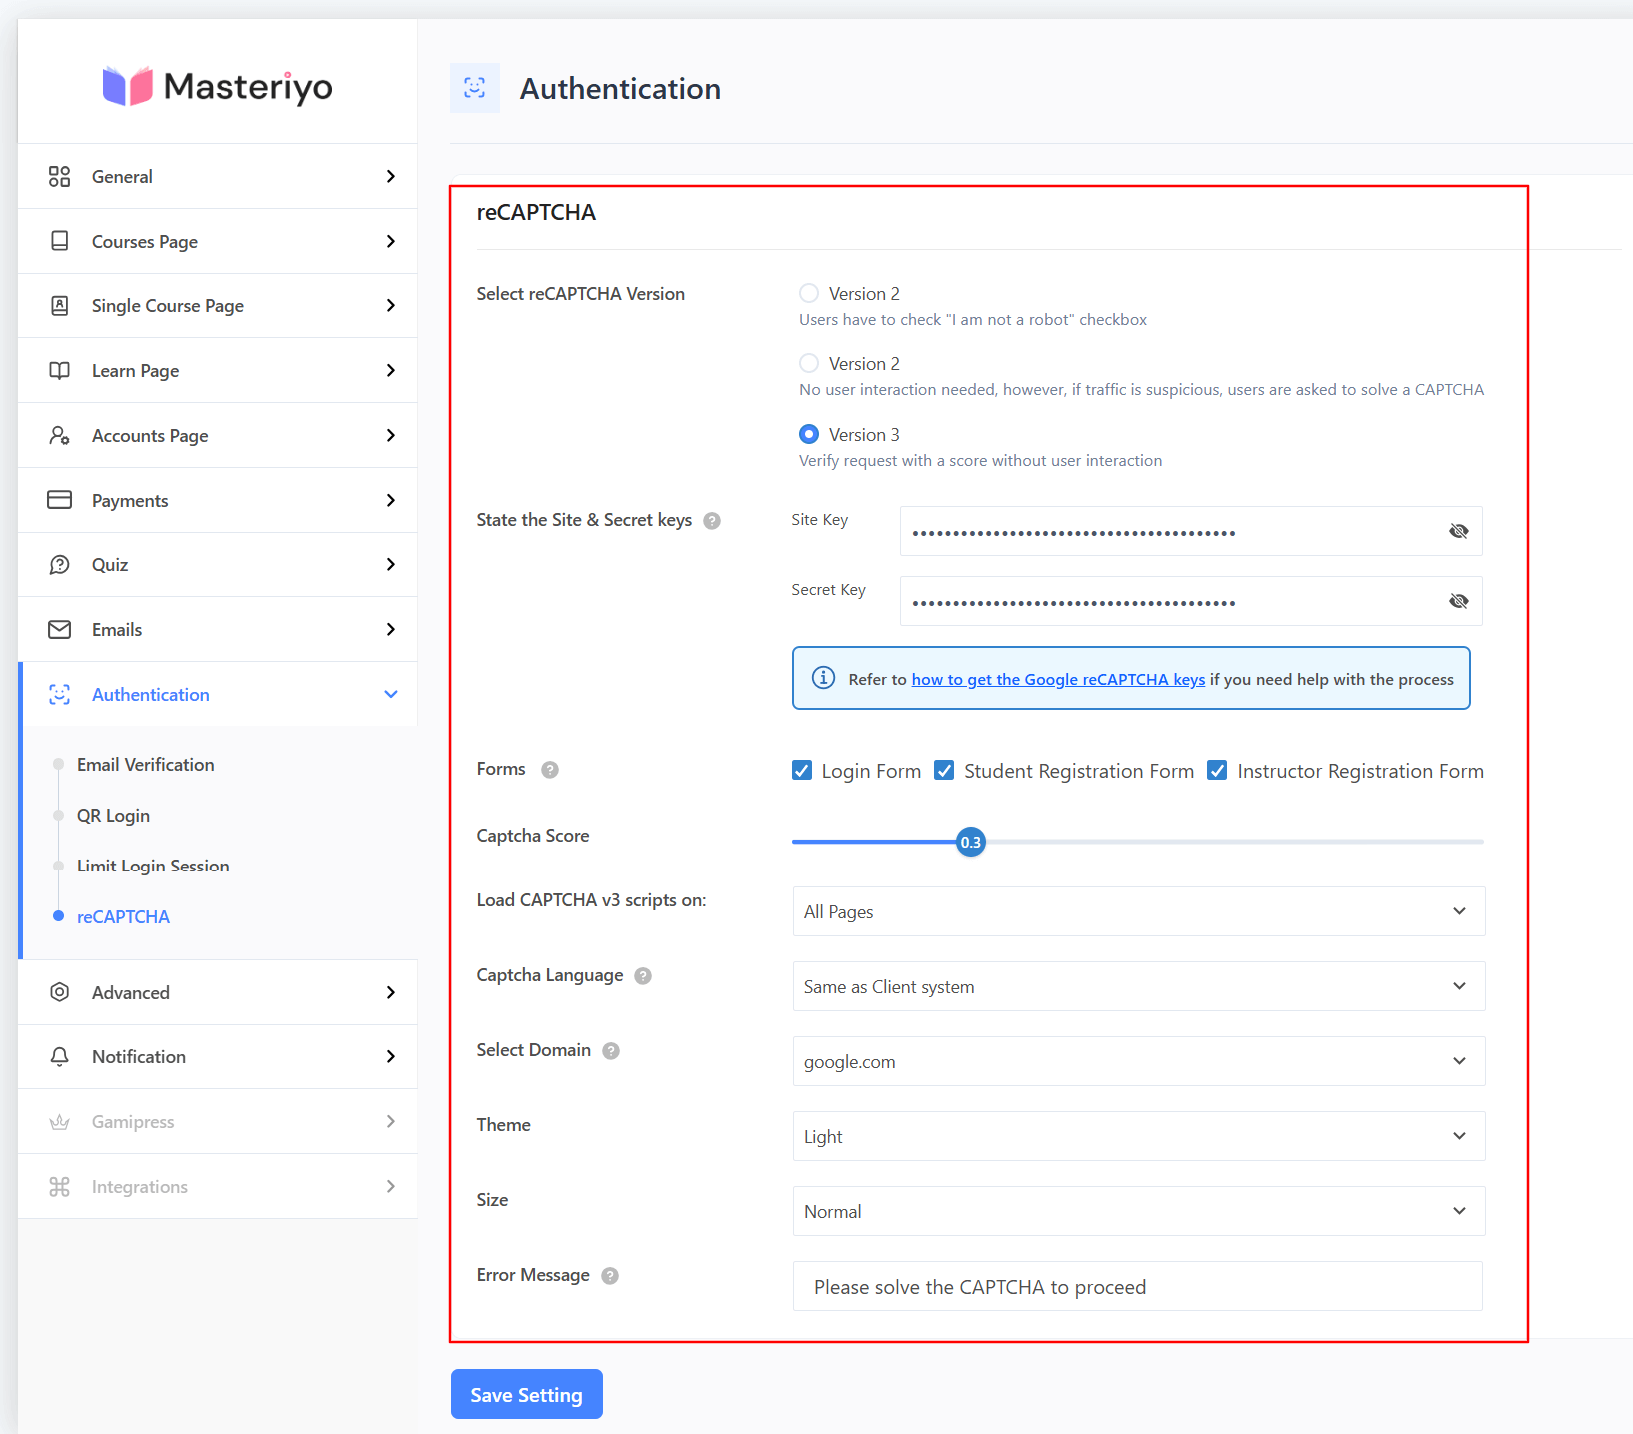
You can go to Masteriyo > Settings > Authentication > reCAPTCHA. Now, you’ll see the page for reCAPTCHA configuration. For configuration, you’ll require Google reCAPTCHA Keys:
reCAPTCHA Version Support
Masteriyo's Google reCAPTCHA addon supports reCAPTCHA v2 ("I'm not a robot" Checkbox) and reCAPTCHA v3 (invisible background verification). Choose the version that best fits your user experience requirements:
reCAPTCHA v2
-
Checkbox: Users click "I'm not a robot".
-
Invisible: Runs in the background, shows challenge when needed.
-
Best for: Sites where user interaction confirmation is preferred.
reCAPTCHA v3
-
Score-based: Analyzes user behavior and assigns risk scores.
-
Invisible: Completely seamless user experience.
-
Best for: High-traffic sites prioritizing user experience.
So, visit Google reCAPTCHA console and click on the Get Started button to generate the required keys.
Step 3: Register Your Site
Enter all the necessary information to register your site:
- Label: Enter a descriptive name (e.g., Masteriyo).
- Choose reCAPTCHA type:
- Score based (v3)
- Challenge (v2)
- Domains: Add your website domains.
- Google Cloud Platform: Under the Project Name, give a descriptive name to your project (e.g., Masteriyo Testing).
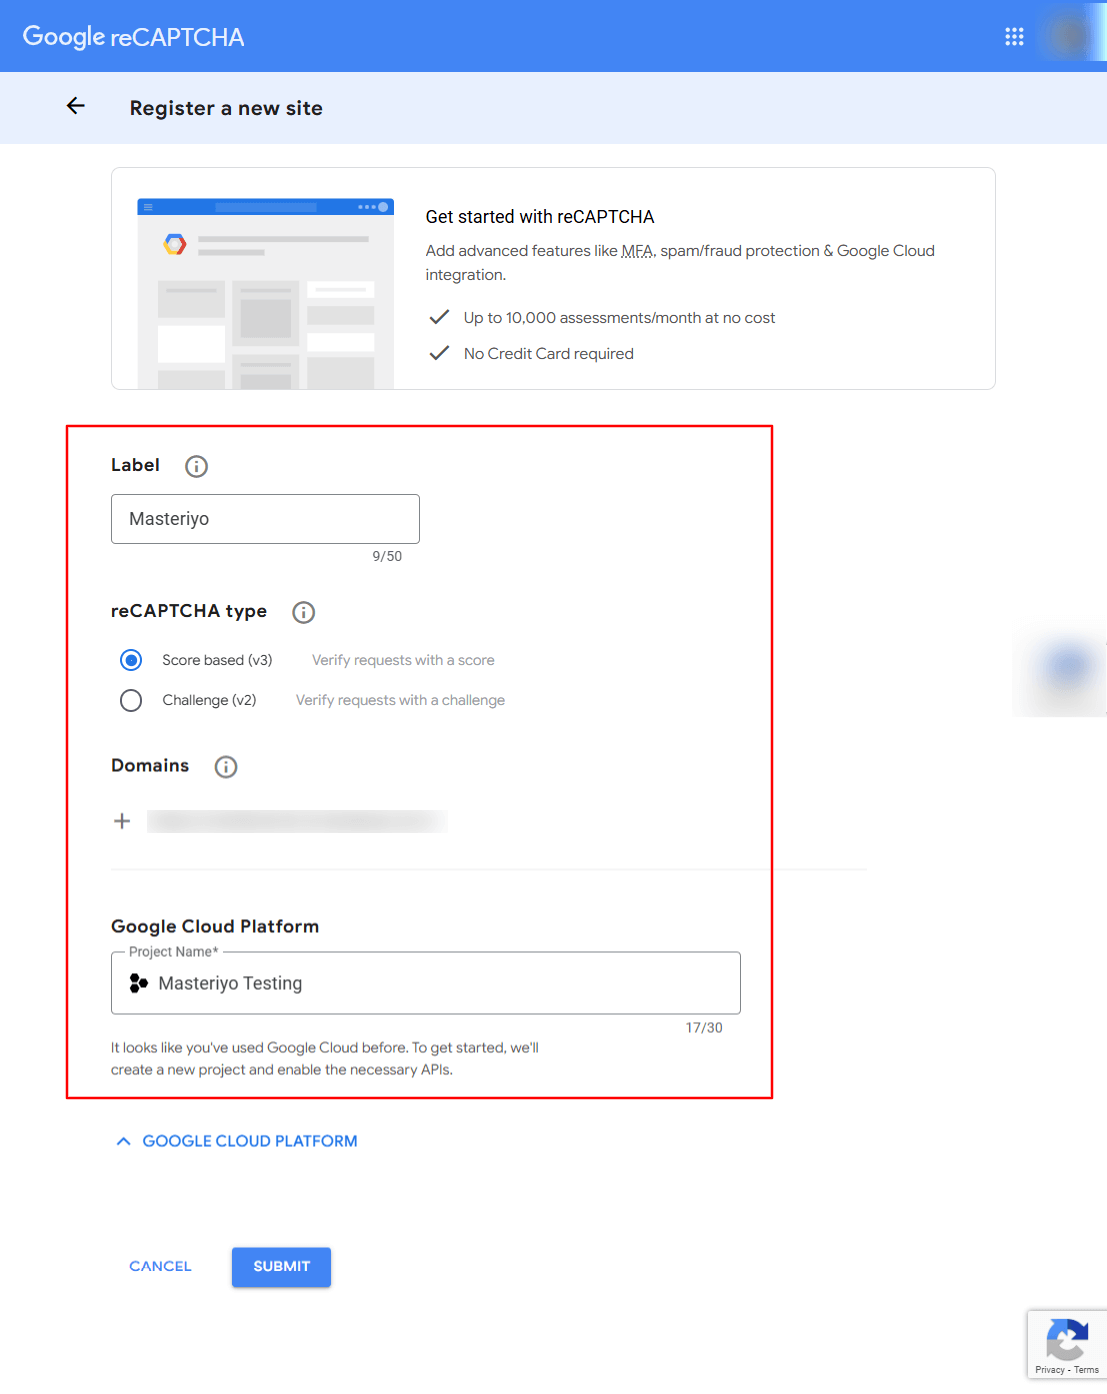
Click on the Submit button to register your site.
Now, you can retrieve API Keys:
- Site Key: Public key for frontend integration.
- Secret Key: Private key for server-side verification.
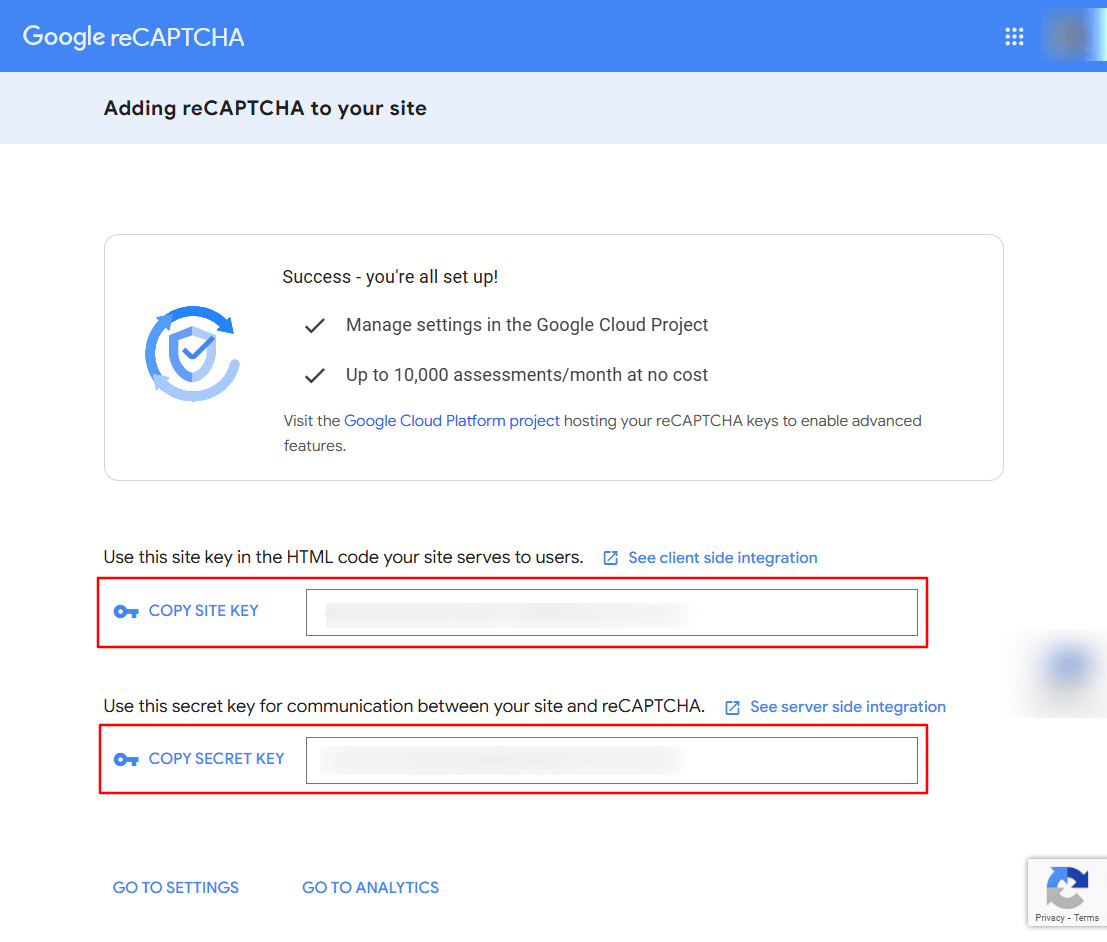
Security Note: Keep your secret key confidential and never expose it in frontend code.
Step 4: Configure reCAPTCHA in Masteriyo
You can access settings through your dashboard, as you did in Step 2. So, navigate to Masteriyo > Settings > Authentication > reCAPTCHA.
Next, select the reCAPTCHA Version for which you have generated the site key. Now, paste the keys under their respective fields.
Forms: Select which forms you would like reCAPTCHA to appear in.
reCAPTCHA v3 Settings (if using v3)
Captcha Score: You can adjust the captcha score from 0.1 to 0.9 for reCAPTCHA v3.
Load CAPTCHA v3 scripts on: Select where the CAPTCHA should appear on all pages or only on form pages.
Additional Configurations
Captcha Language: You can use the same language as the client system or another language using the dropdown.
Select Domain: This specifies which reCAPTCHA service endpoint to use.
- google.com: Standard Google reCAPTCHA service
- Alternative option: "recaptcha.net" for regions where google.com might be blocked
Theme: Choose between light or dark theme for reCAPTCHA. Here's how the dark theme appears:

Size: Choose either normal or compact size for the reCAPTCHA.
Error Message: Customize error message for users who don’t complete the captcha.
Step 5: Save and Test Configuration
Save Settings
- Review all the configuration options.
- Click on Save Settings, and wait for a confirmation message.
Test Implementation
- Open your site in private/incognito mode.
- Visit the form page where you have added reCAPTCHA.
- Verify if the reCAPTCHA appears on the selected form.
- Complete a test registration to ensure functionality.
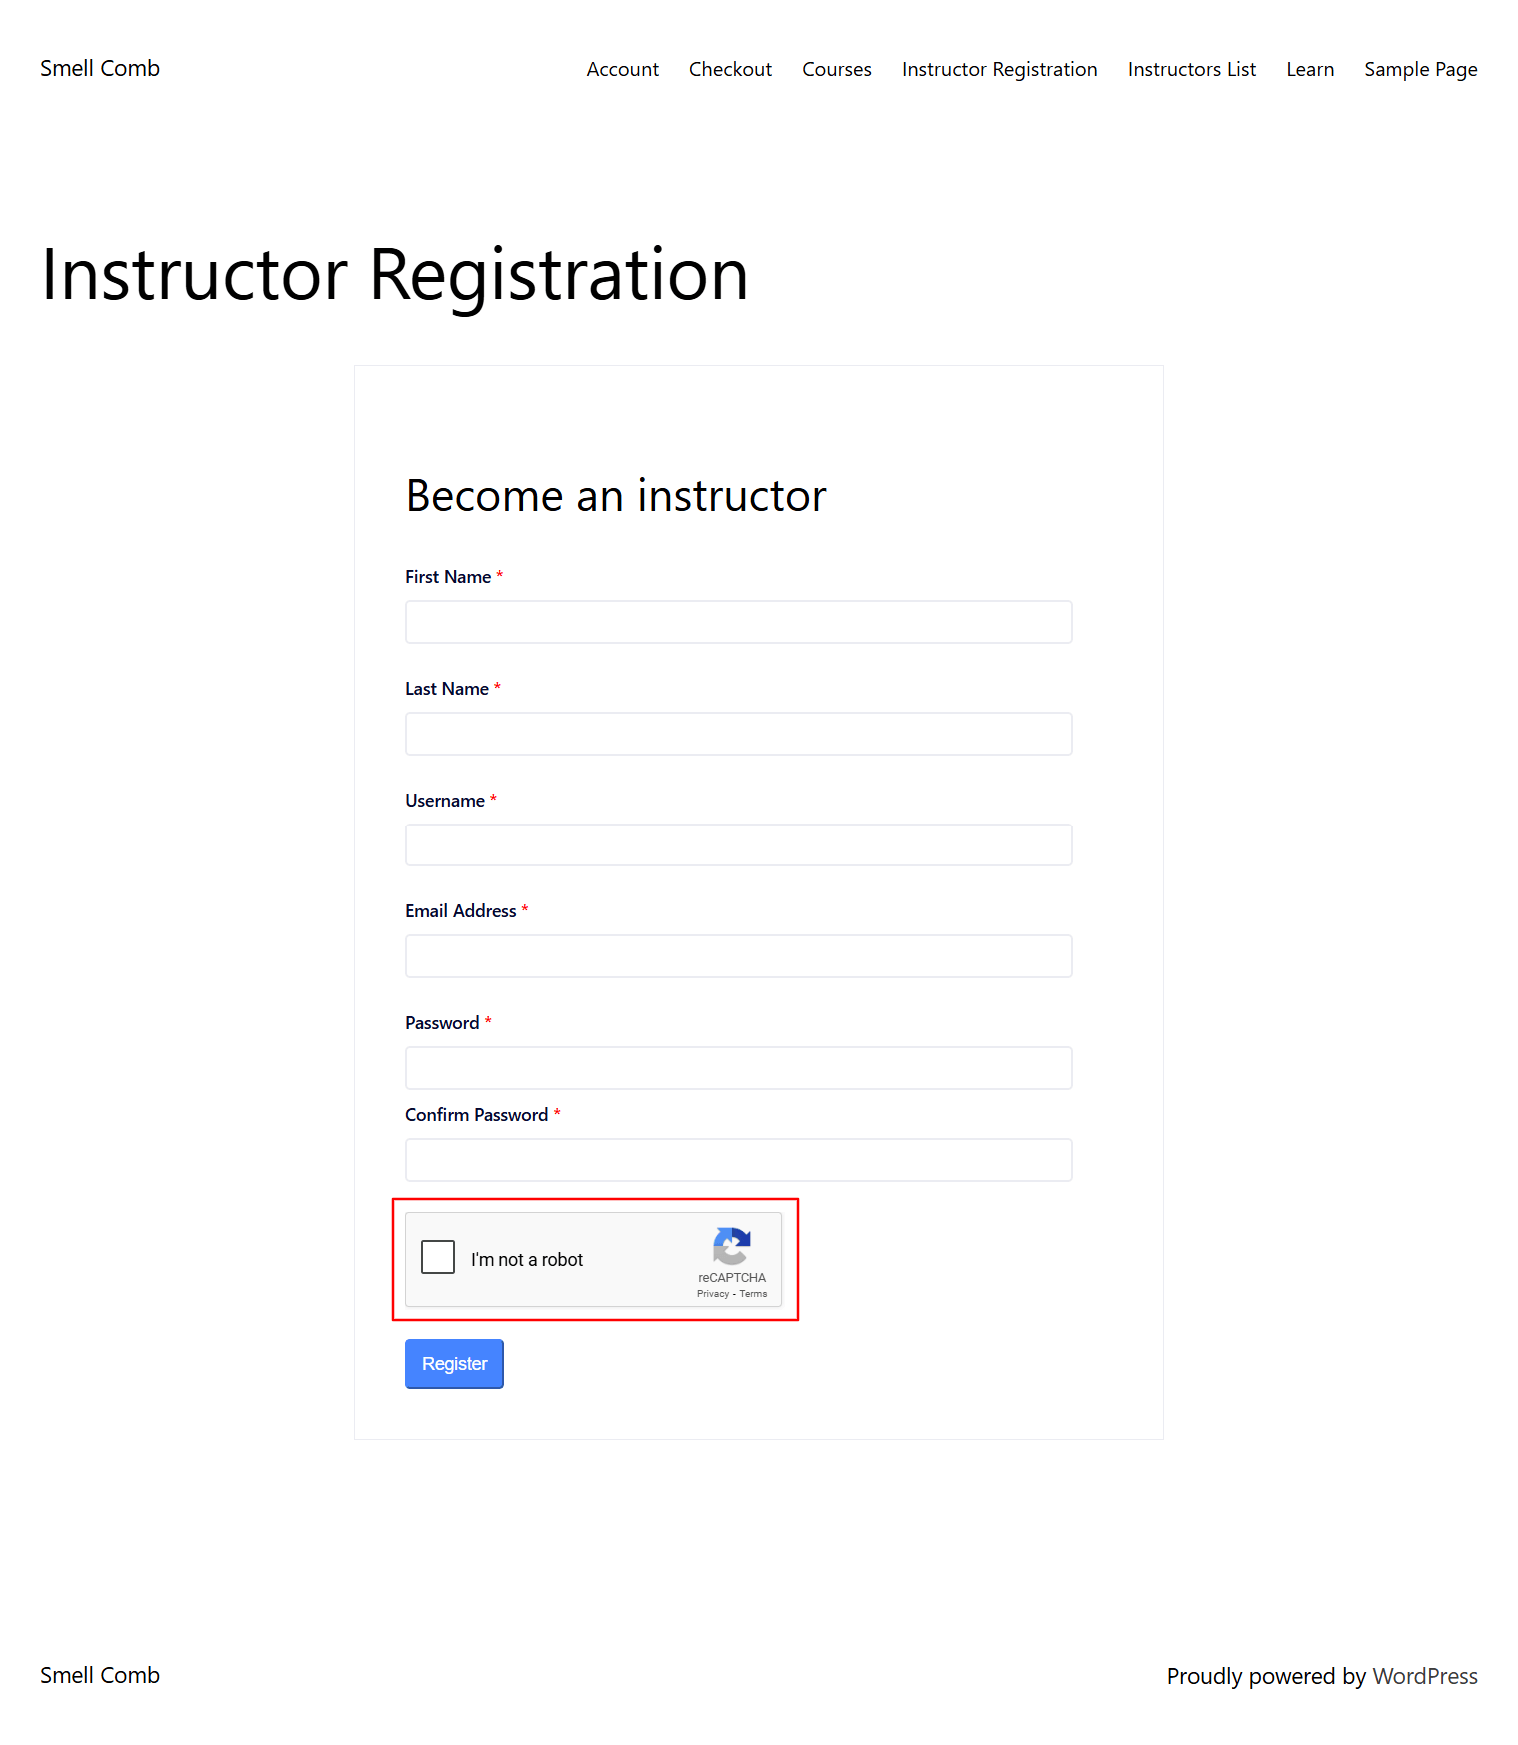
Here's how reCAPTCHA v2 might appear on your form:
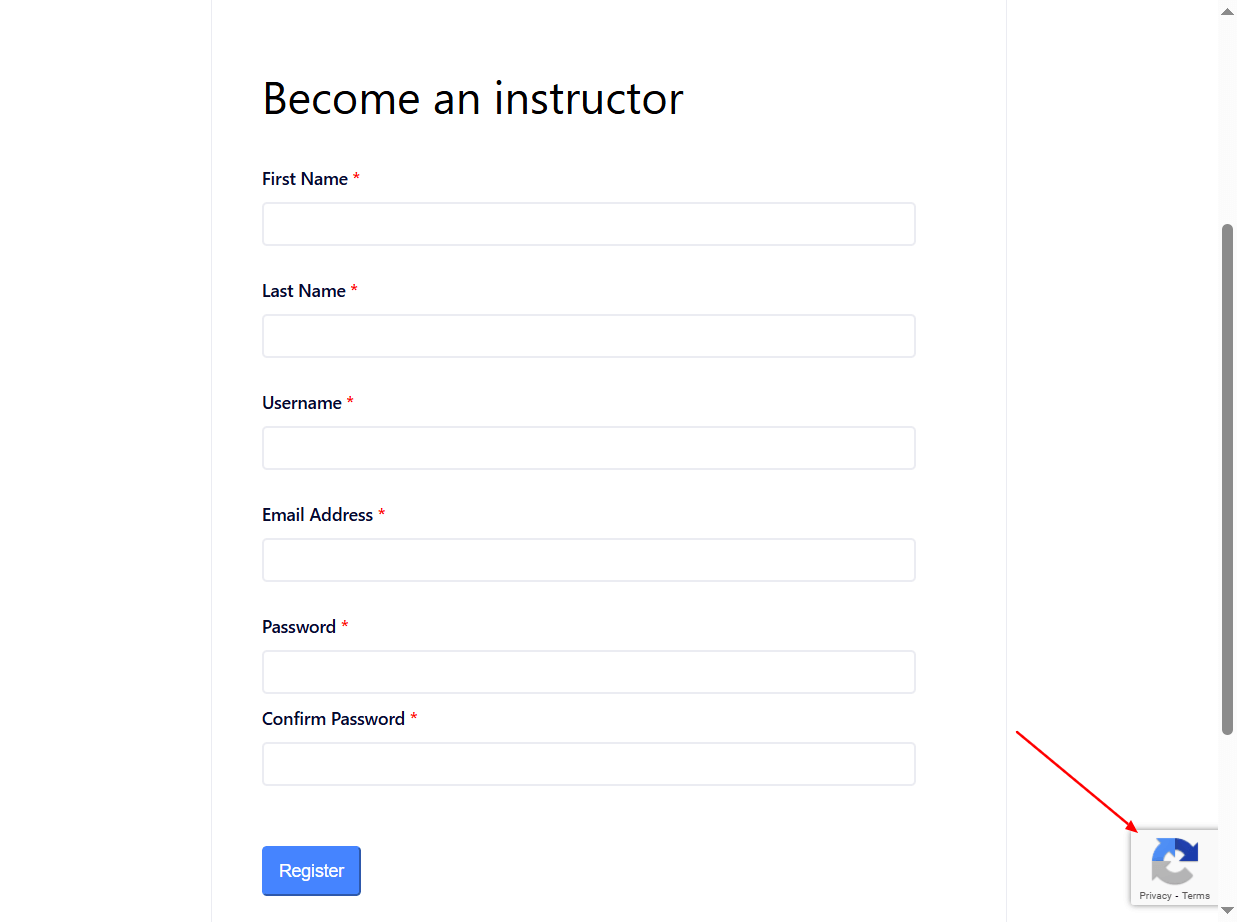
Here's how reCAPTCHA v3 might appear on your form:
Need Help? If you encounter issues during setup, contact Masteriyo support with your specific configuration details.
Was this article helpful to you?
Give us Rating
Last edited on July 28, 2026.
Edit this page