Certificate Builder
Learn how to create Certificate templates and assign them to the courses. Provide certificates to encourage students to complete the course.
Transform course completions into memorable achievements with Masteriyo's powerful Certificate Builder. This intuitive visual editor empowers you to design stunning, personalized certificates that students will be proud to share and display.
Prerequisites:
Note: Masteriyo LMS offers a single template in its Free plan, while all the templates and custom font options are available in the Pro plan or above.
Getting Started with Certificate Builder
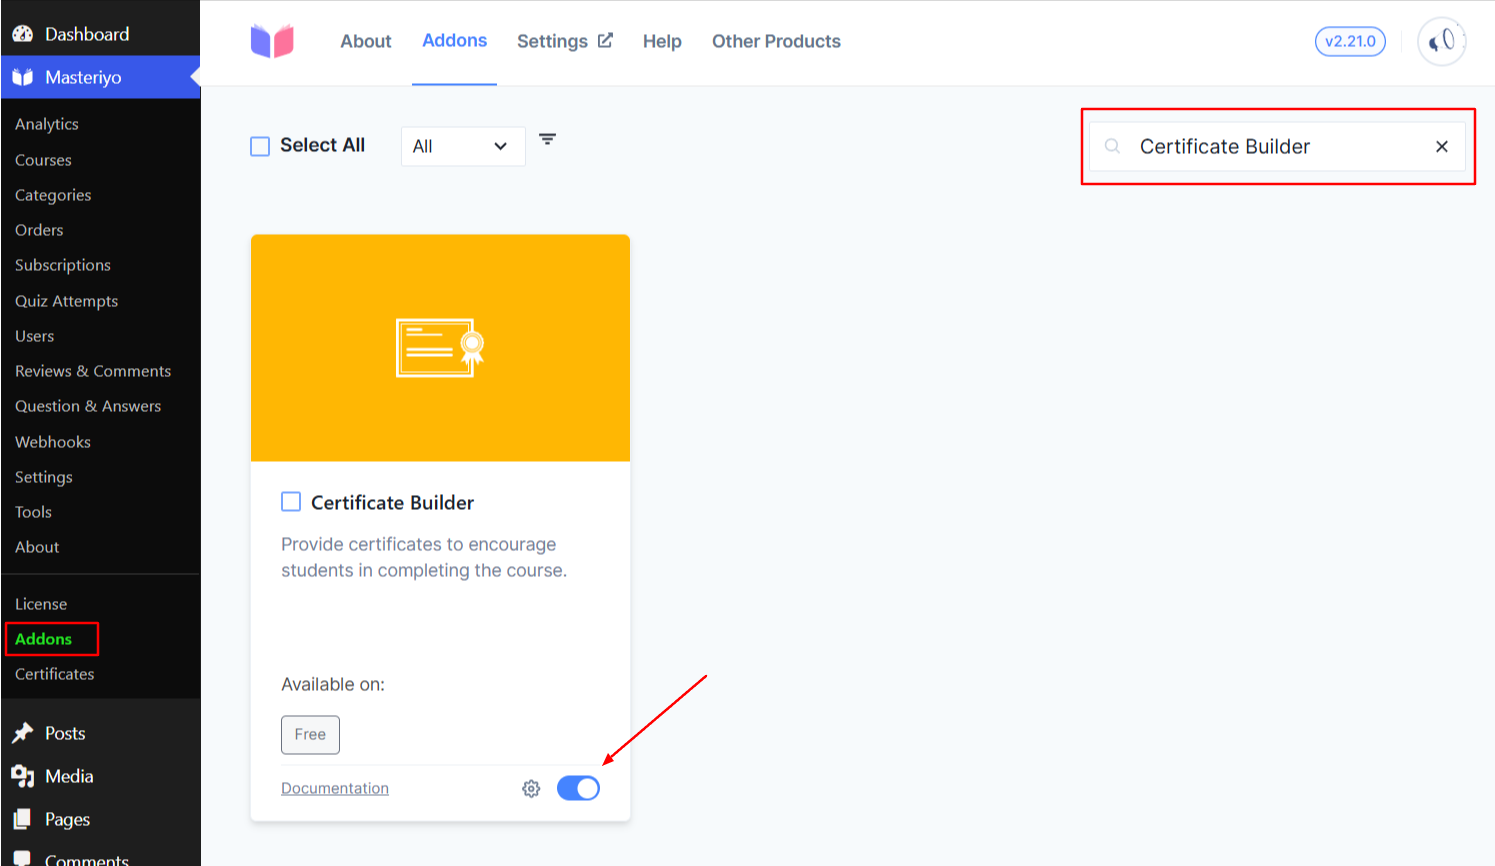
To activate the addon, navigate to Masteriyo > Addons and search for Certificate Builder. As soon as you see the addon, toggle it to enable it.
Now, follow these steps:
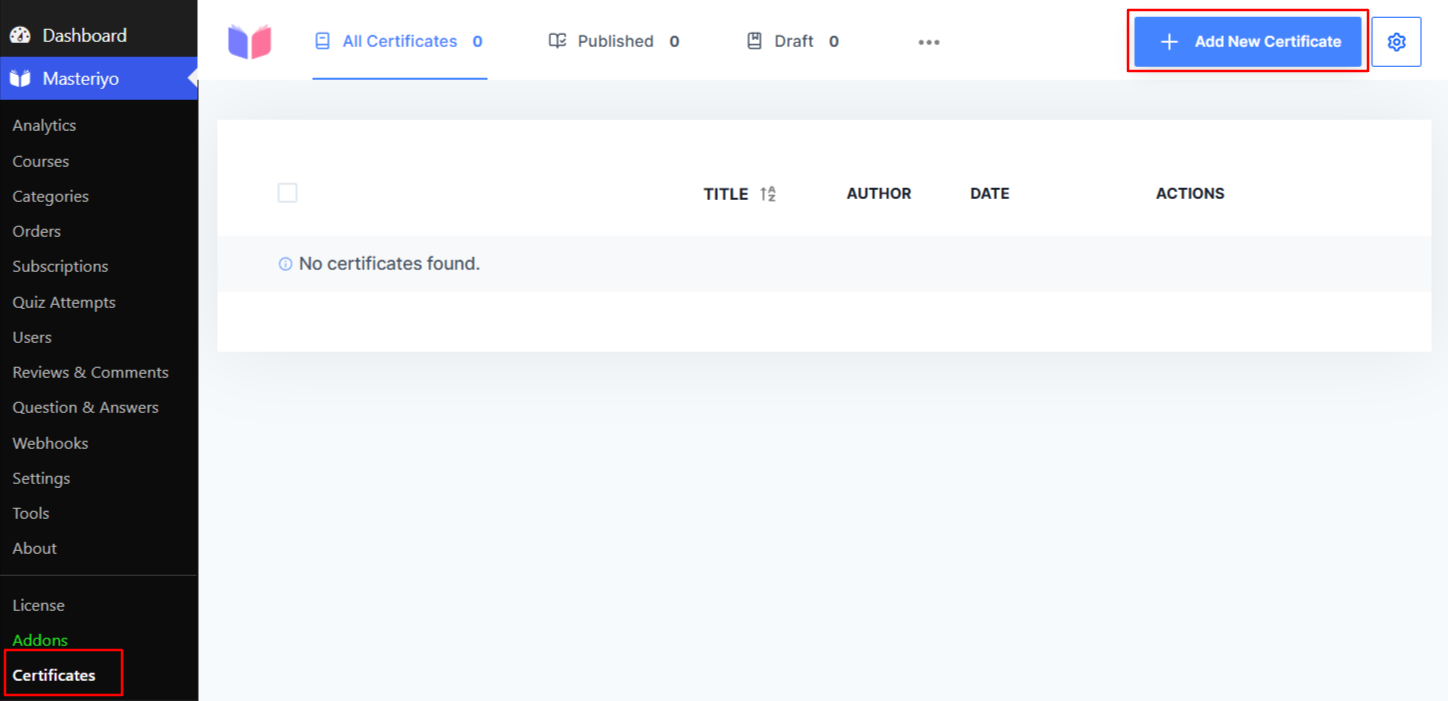
- Go to your Dashboard and navigate to Masteriyo > Certificates.
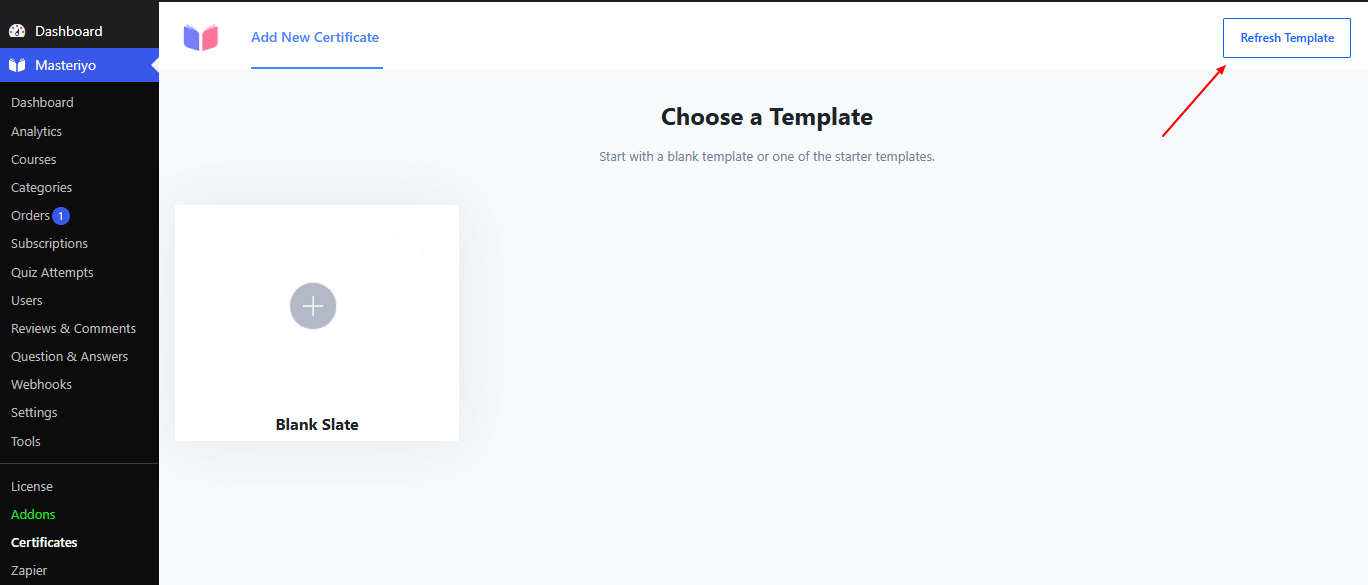
- Click on Add New Certificate.
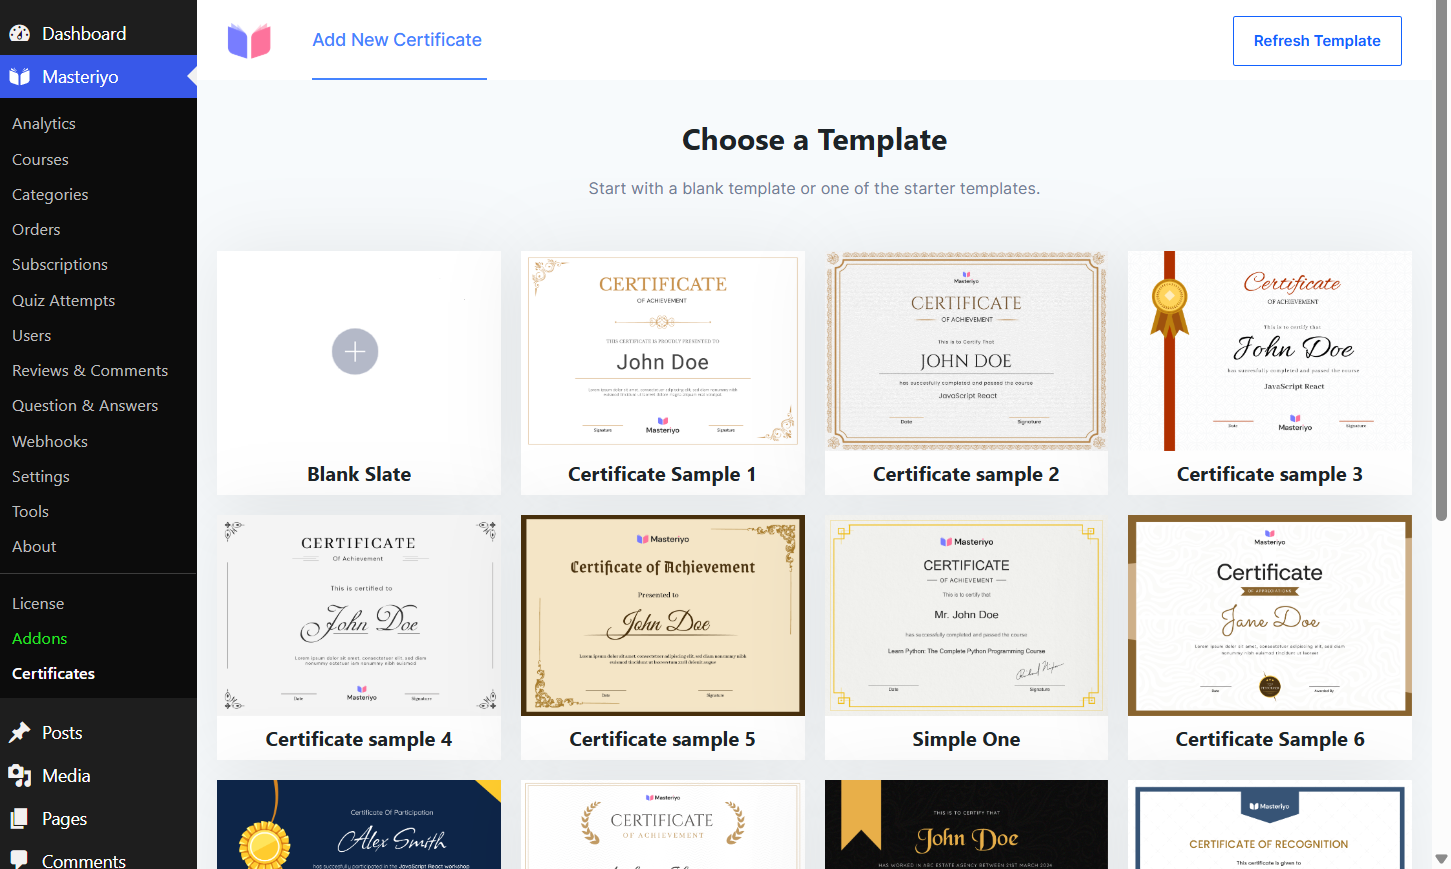
- You'll now see templates for a certificate. Choose a blank template or one of the starter templates to build a certificate.
-
Blank Slate: Create a certificate template from scratch using the Gutenberg editor.
-
Certificate Samples: In the free version of the plugin, you only get a single sample, while you’ll find multiple certificate samples in the premium versions; if you like any of them, you can use the one you want.
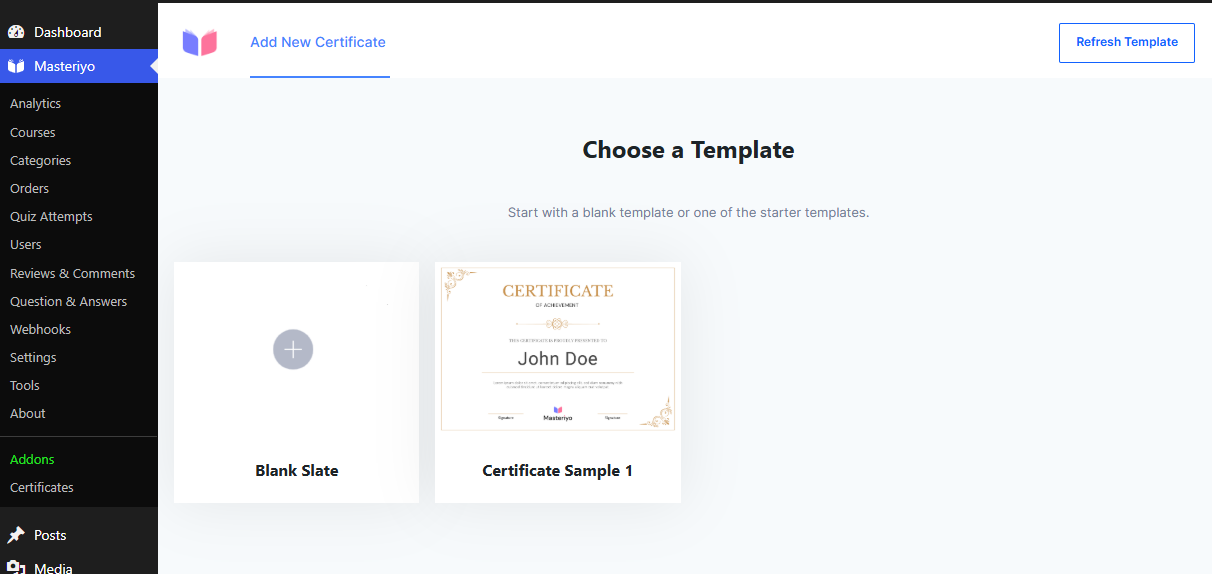
Note: If you dont see the templates, click on Refresh Template button.
Customize Your Certificate
After you select the sample or blank certificate, you can click on the full-screen icon to edit the certificate.
Gutenberg Blocks Available for Certificate Builder
You can enhance your certificate design by adding these dynamic Gutenberg blocks that automatically populate with student and course information.
For example:
Student Name: The student's name is automatically generated on the certificate.
Course Title: The course's title is automatically generated on the certificate.
To add the block, click on the Block Inserter and add your preferred blocks. Here are all the blocks available with Masteriyo LMS that you can use to customize your certificate:
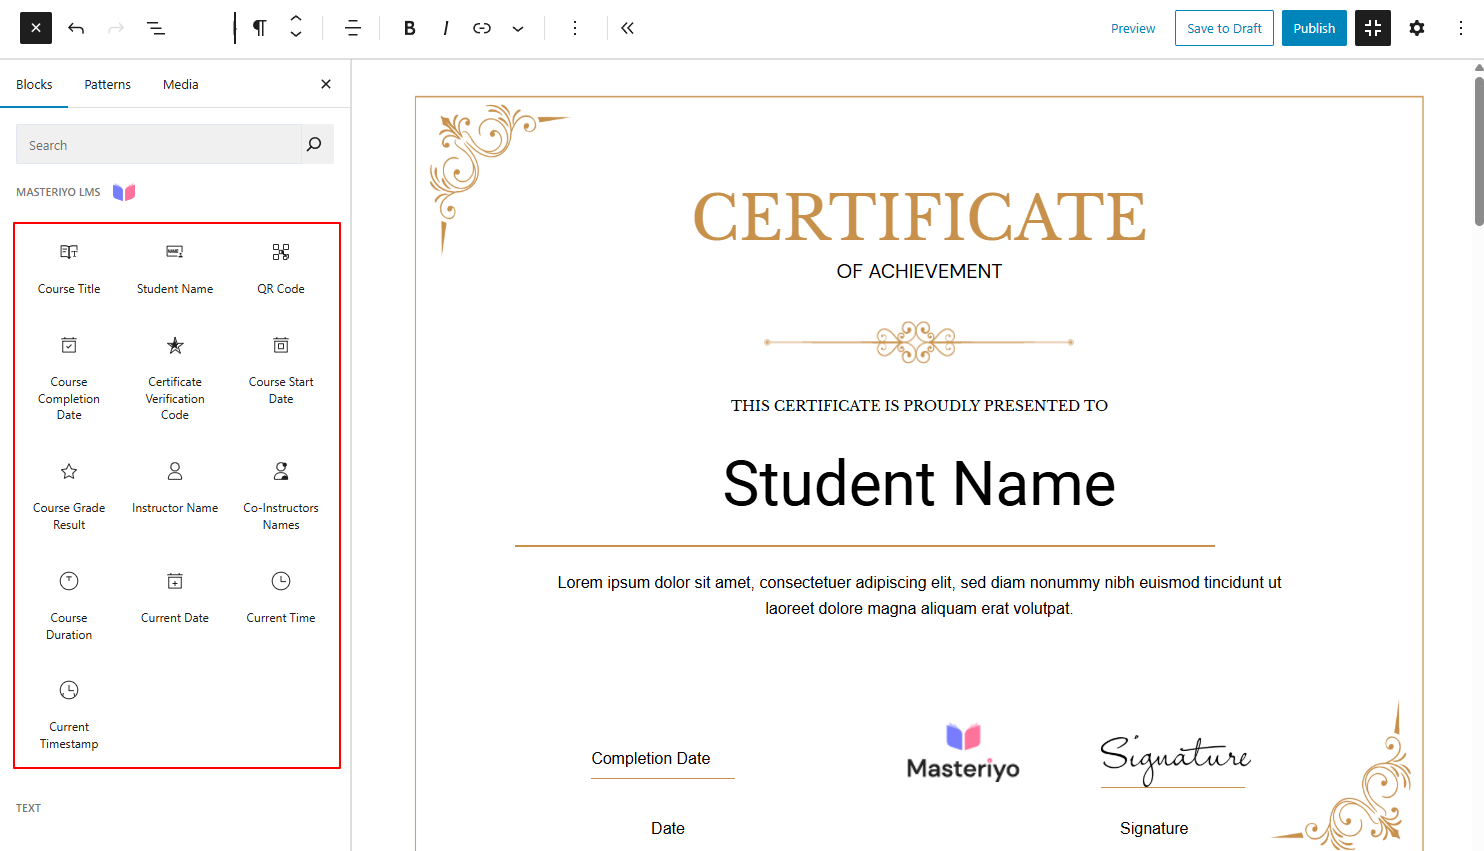
- Course Title: Dynamically displays the name of the completed course on the certificate.
- Student Name: Automatically inserts the enrolled student's full name who earned the certificate.
- QR Code: Generates a unique QR code containing certificate verification information for instant authenticity checks.
- Course Completion Date [Pro]: Shows the exact date when the student successfully finished the course.
- Certificate Verification Code [Pro]: Adds a unique alphanumeric code for manual certificate verification and fraud prevention.
- Course Start Date [Pro]: Displays when the student first began taking the course.
- Course Grade Result [Pro]: Shows the student's final grade or score (requires Gradebook Addon activation).
- Instructor Name [Pro]: Includes the primary course instructor's name on the certificate.
- Co-Instructors Names [Pro]: Lists all additional instructors for the course (requires Multiple Instructors addon).
- Course Duration [Pro]: Calculates and displays the total time the student spent completing the course.
- Current Date [Pro]: Inserts today's date when the certificate is generated or downloaded.
- Current Time [Pro]: Adds the current time when the certificate is created.
- Current Timestamp [Pro]: Provides a complete date and time stamp for precise certificate generation tracking.
QR Verification for Certificates Pro
You can create a QR verification for the certificates you have created. For this, follow the steps below:
- Click on the block inserter icon'+'.
- Search for QR Code and drag and drop the block.
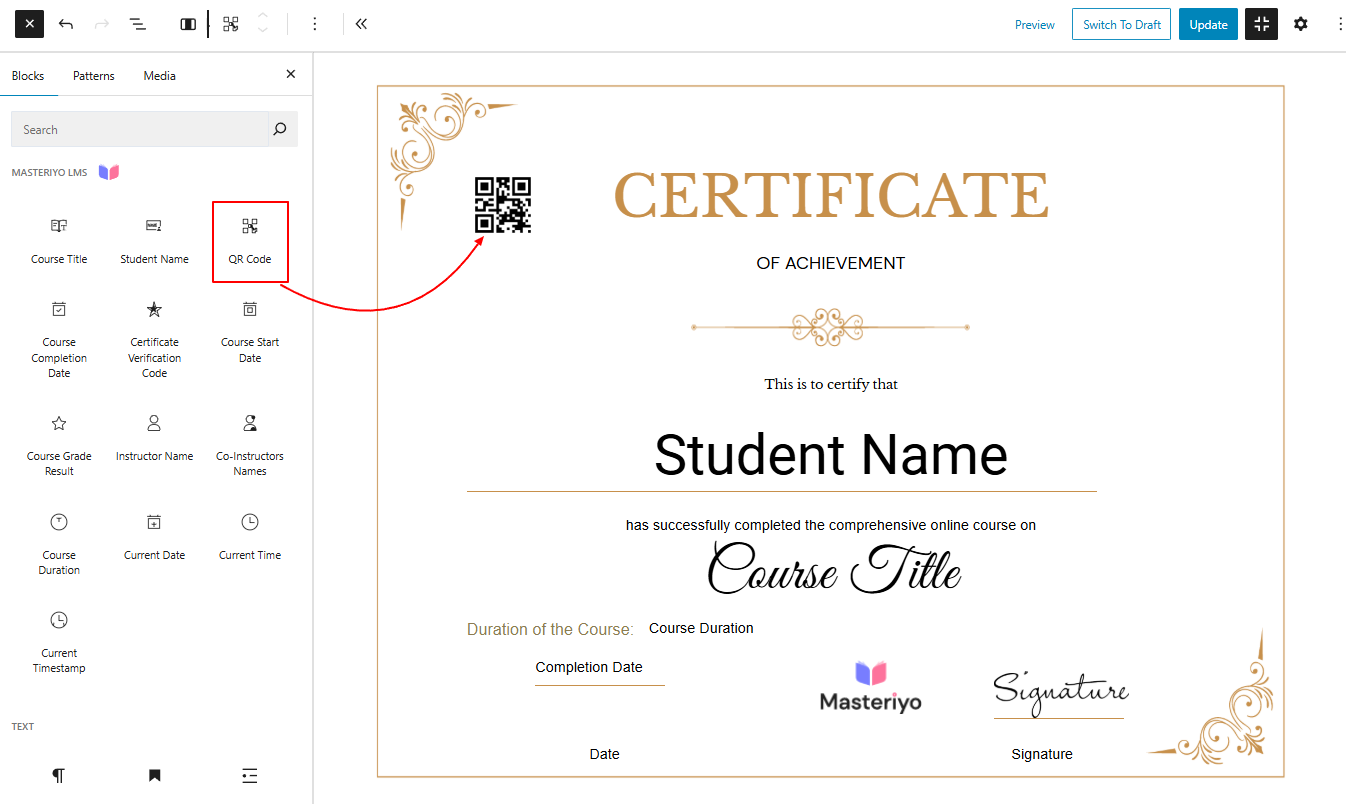
Once the course is completed, users can download their certificate containing the QR code.
Certificate Settings
You can also configure further settings through Certificates > Settings:
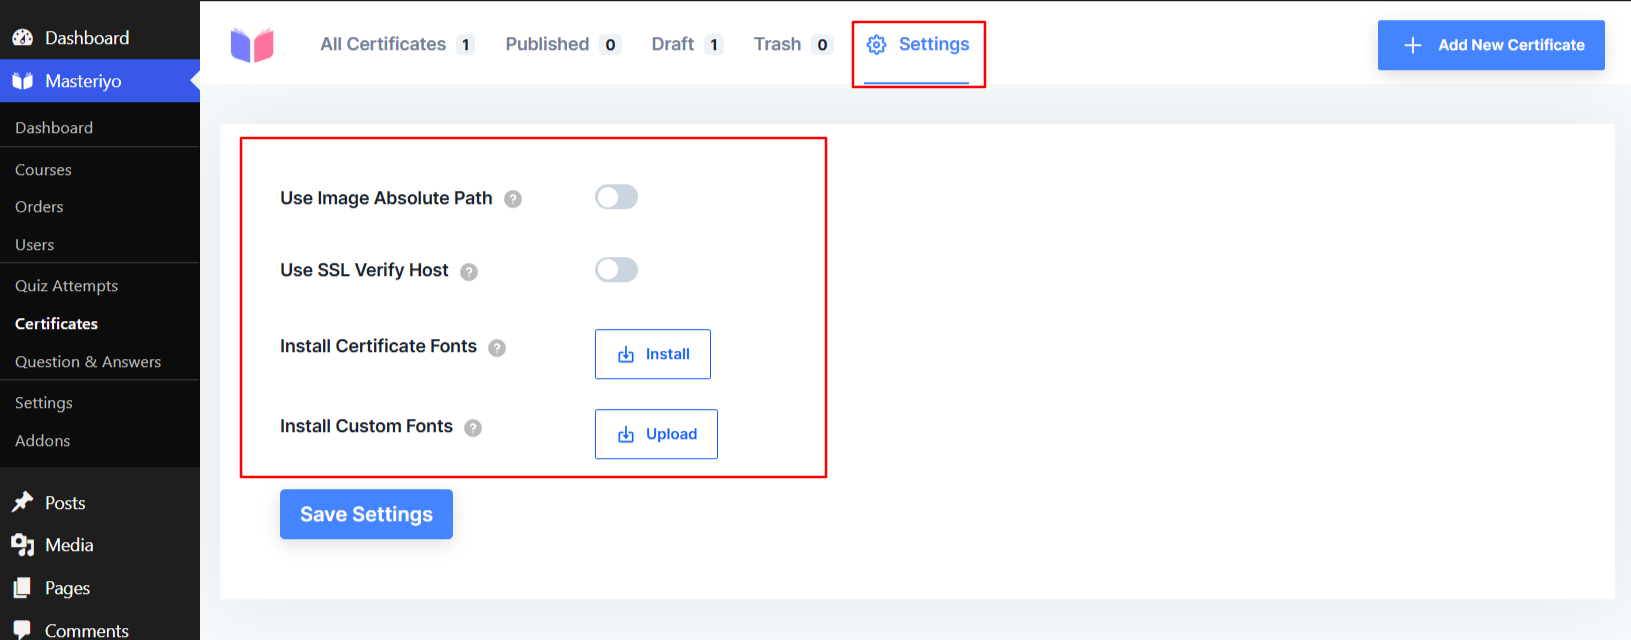
- Use Image Absolute Path: Controls how images in certificates are referenced. When enabled, it uses full URL paths for images instead of relative paths
- Use SSL Verify Host: Security setting for certificate generation, when enabled, it verifies SSL certificates when connecting to external hosts
Install Custom Fonts Pro
By default, Masteriyo will have multiple fonts that you can use to customize the certificate. From here, you can install the other fonts. To change the fonts, on the certificate builder, click the block and then the Settings. Now, scroll down to find Typography > Font. From the dropdown, you can choose any fonts you wish.
Install Custom Fonts
It lets you upload and use custom fonts that are unavailable with the plugin. Click the Upload button to upload the zip file of custom fonts.
Click on Save Settings and return to the certificate builder.
You can see the custom fonts you just uploaded under Typography > Fonts. Select to use on your certificate.
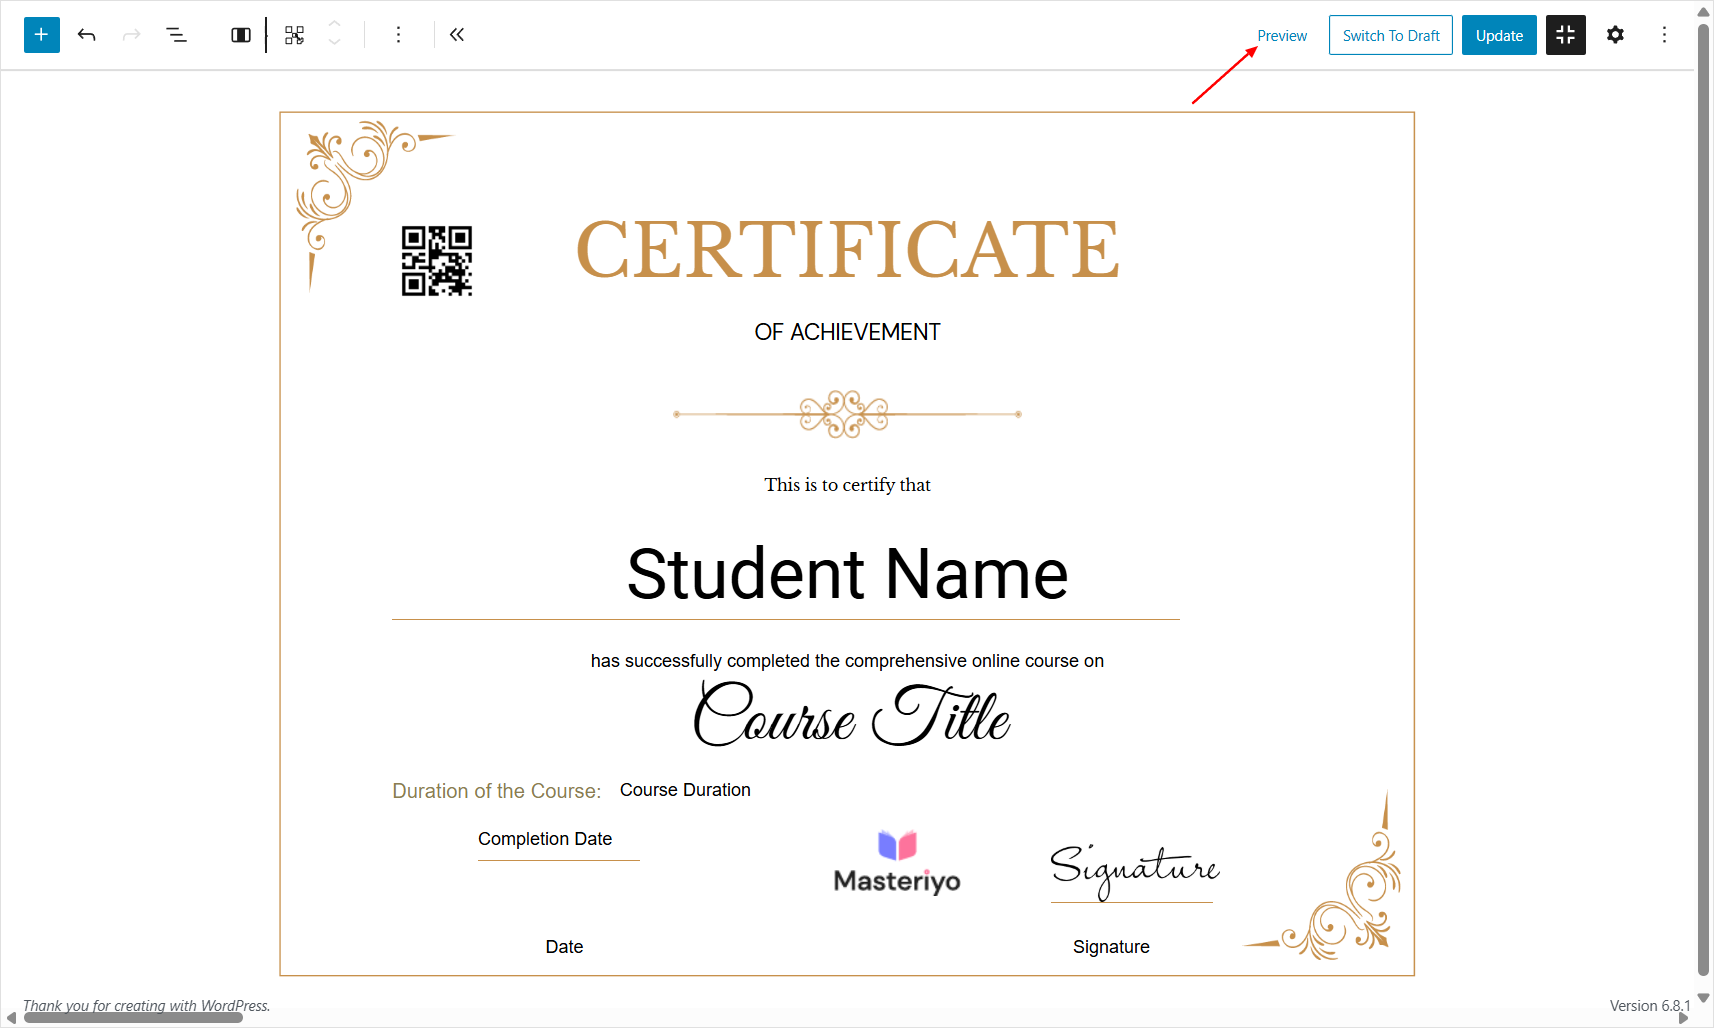
After adding the necessary blocks, fonts, and information to your certificate, you can preview the certificate through the Preview button in the top-right corner:
Add Certificate to Course
Once you create the Certificate template, you must assign that template to your specific courses. Follow the instructions below to assign Certificates to courses.
- Go to your Dashboard and navigate to Masteriyo > Courses.
- Select and Edit the course on which you want to add a Certificate.
- Navigate Settings > Certificate.
- Click on the toggle button to activate the Certificate.
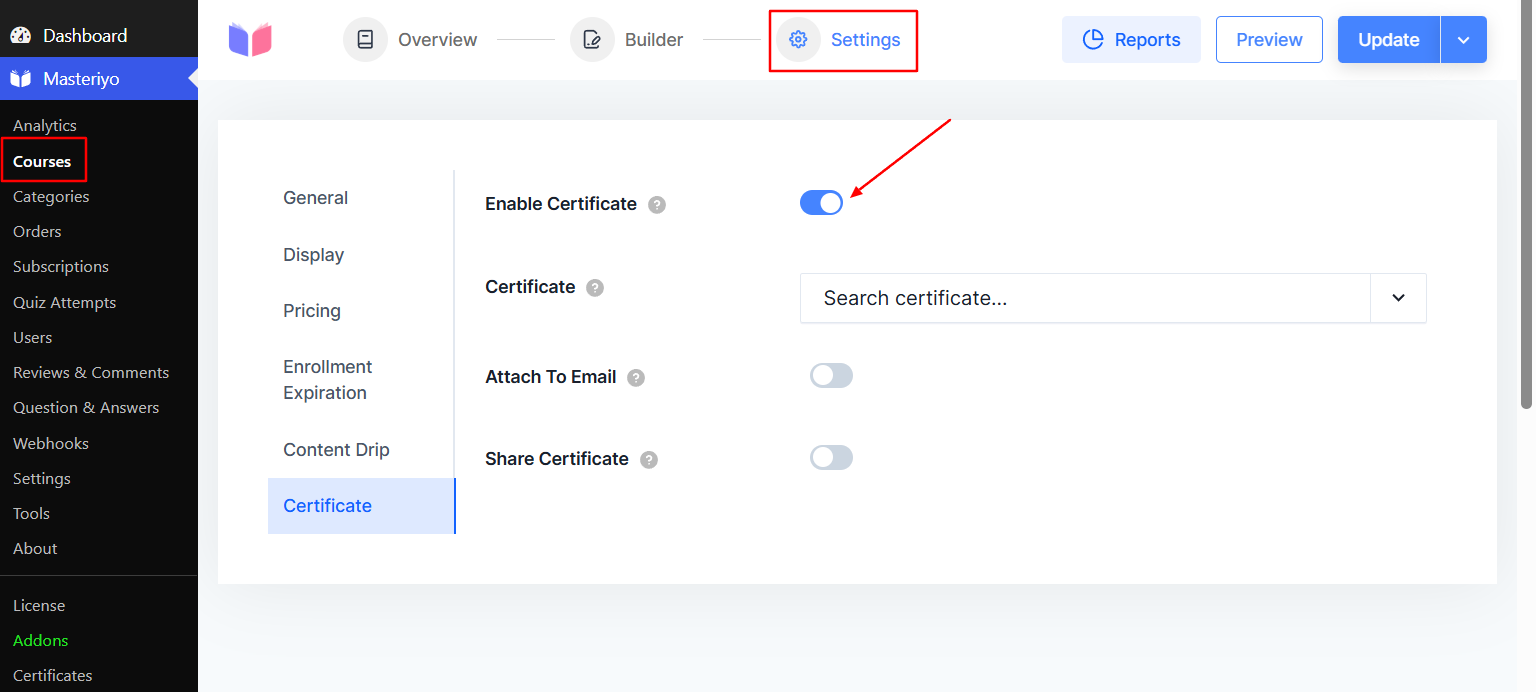
- Select the Certificate for the Course.

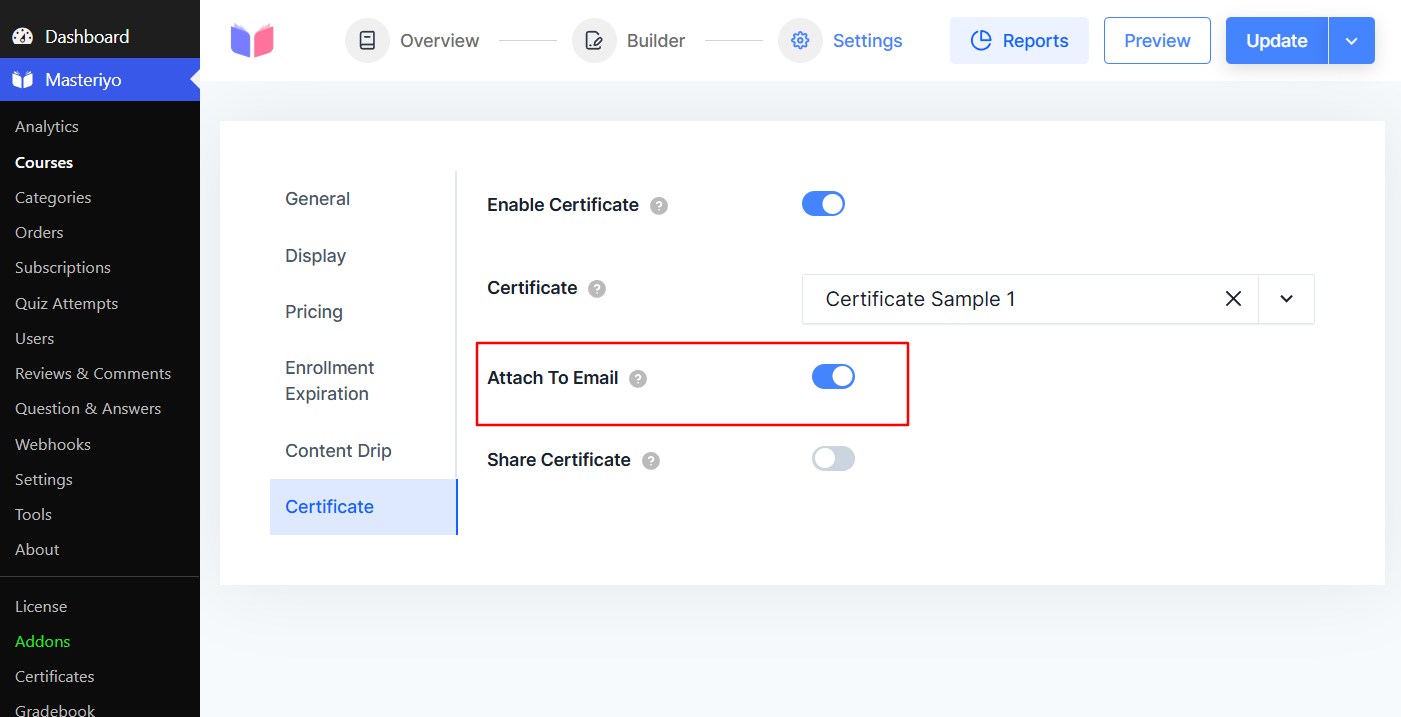
Send Certificate via email after Course Completion Pro
Enabling this option will send the certificate directly to the user's email after completing the course.
Allow to Share the Certificate of Your Course
To let users share certificates of the course, you can enable the Share Certificate option.
Now, Update the course to save your changes.
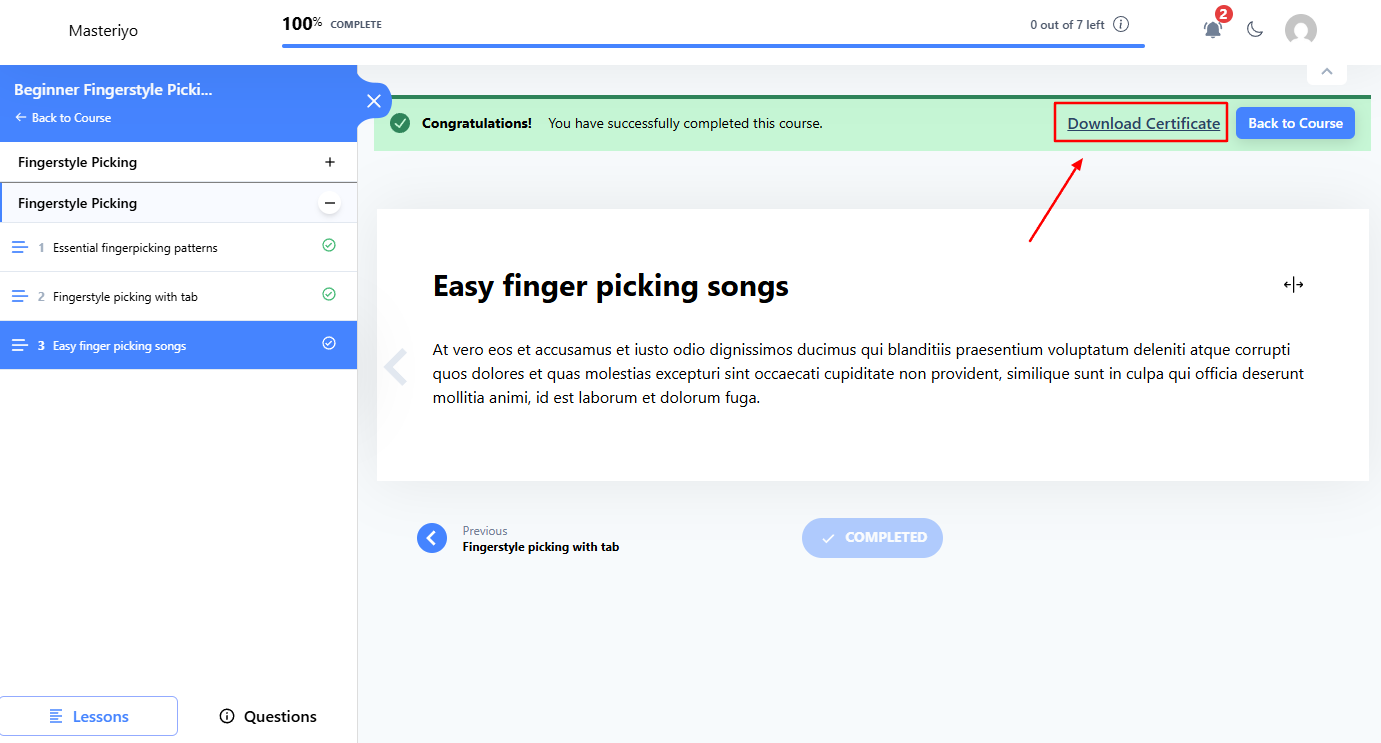
Sample of Student Experience with Certificate
After completing the course, student can easily download the certificate from their account. The download link will appear just after they complete their course.
After clicking on the download link, the certificate will be saved on their device:
Was this article helpful to you?
Give us Rating
Last edited on June 25, 2026.
Edit this page