WooCommerce Integration
Sell courses through WooCommerce checkout and payment gateways. Students enroll automatically when their order completes.
The WooCommerce Integration addon connects your LMS to WooCommerce, letting you sell courses through any WooCommerce payment gateway. Students complete checkout through WooCommerce, and enrollment happens automatically — no manual action needed.
Requirements
- Masteriyo LMS (installed and activated)
- WooCommerce (installed and activated)
- WooCommerce Integration add-on activated — go to Masteriyo > Addons and enable it (how to activate addons)
Setup
Step 1 — Link a Course to a WooCommerce Product
Each course sold through WooCommerce needs a linked WooCommerce product.
- Go to Masteriyo > Courses and open the course you want to sell.
- Go to Settings > Pricing, set the course to Paid, and enter a price.
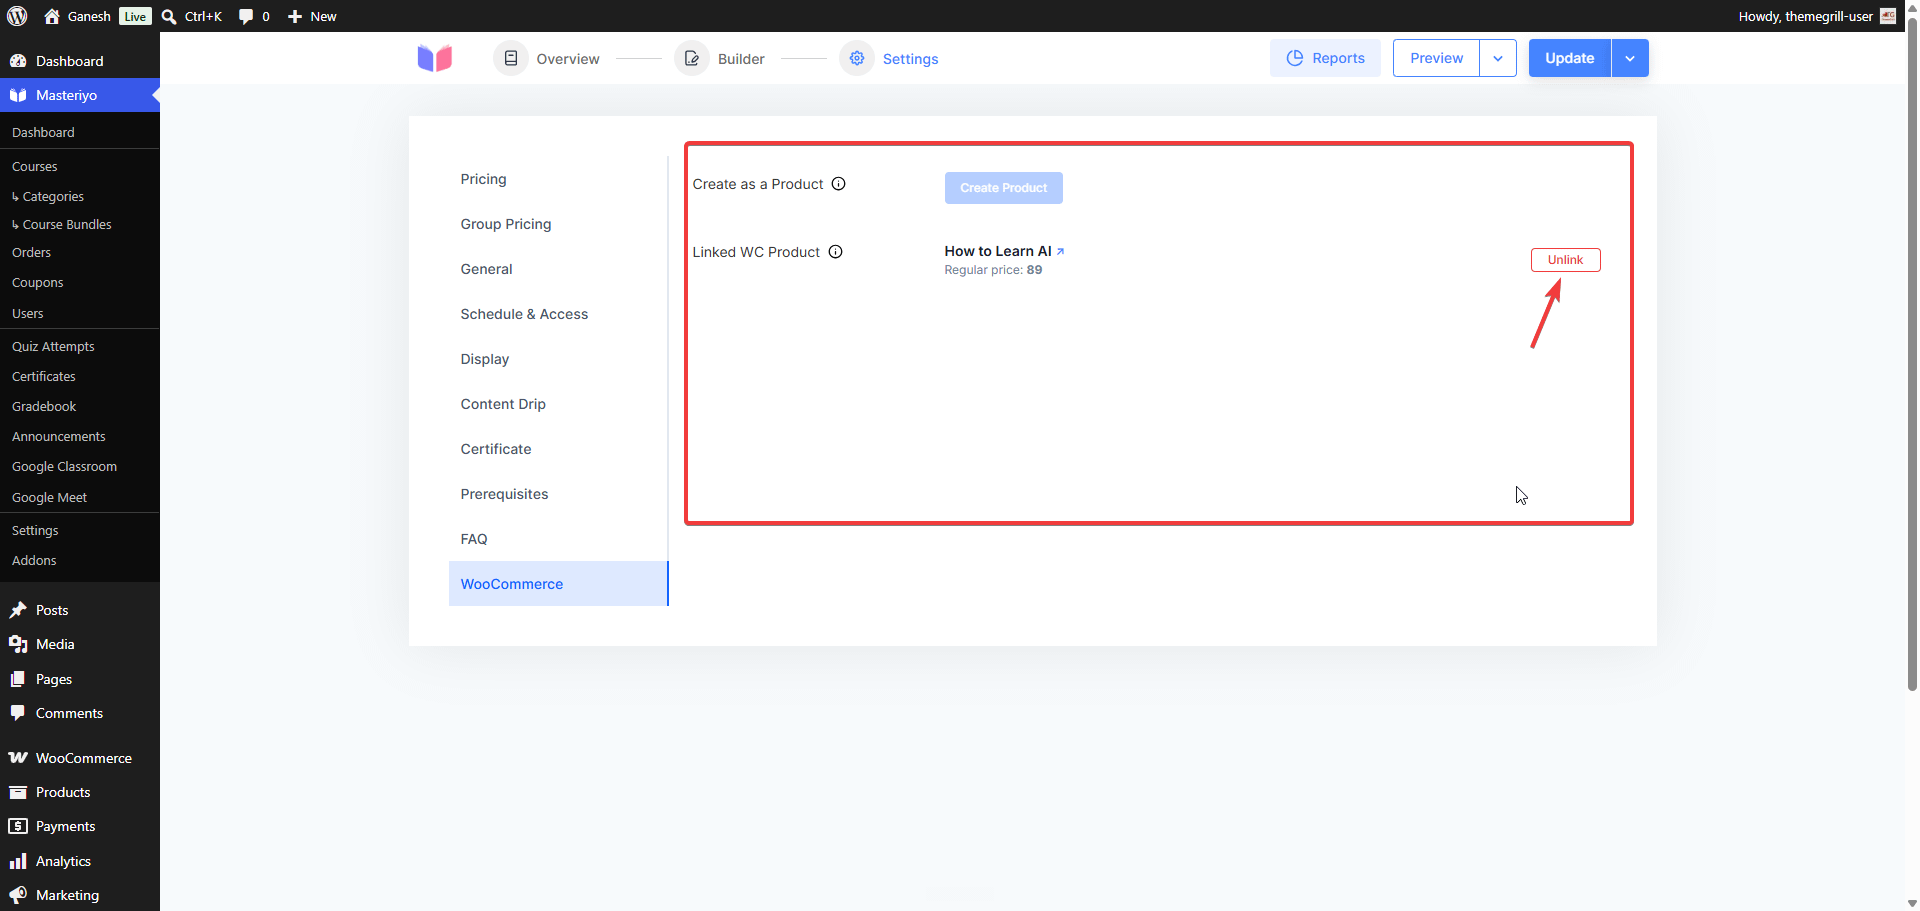
- Go to Settings > WooCommerce.
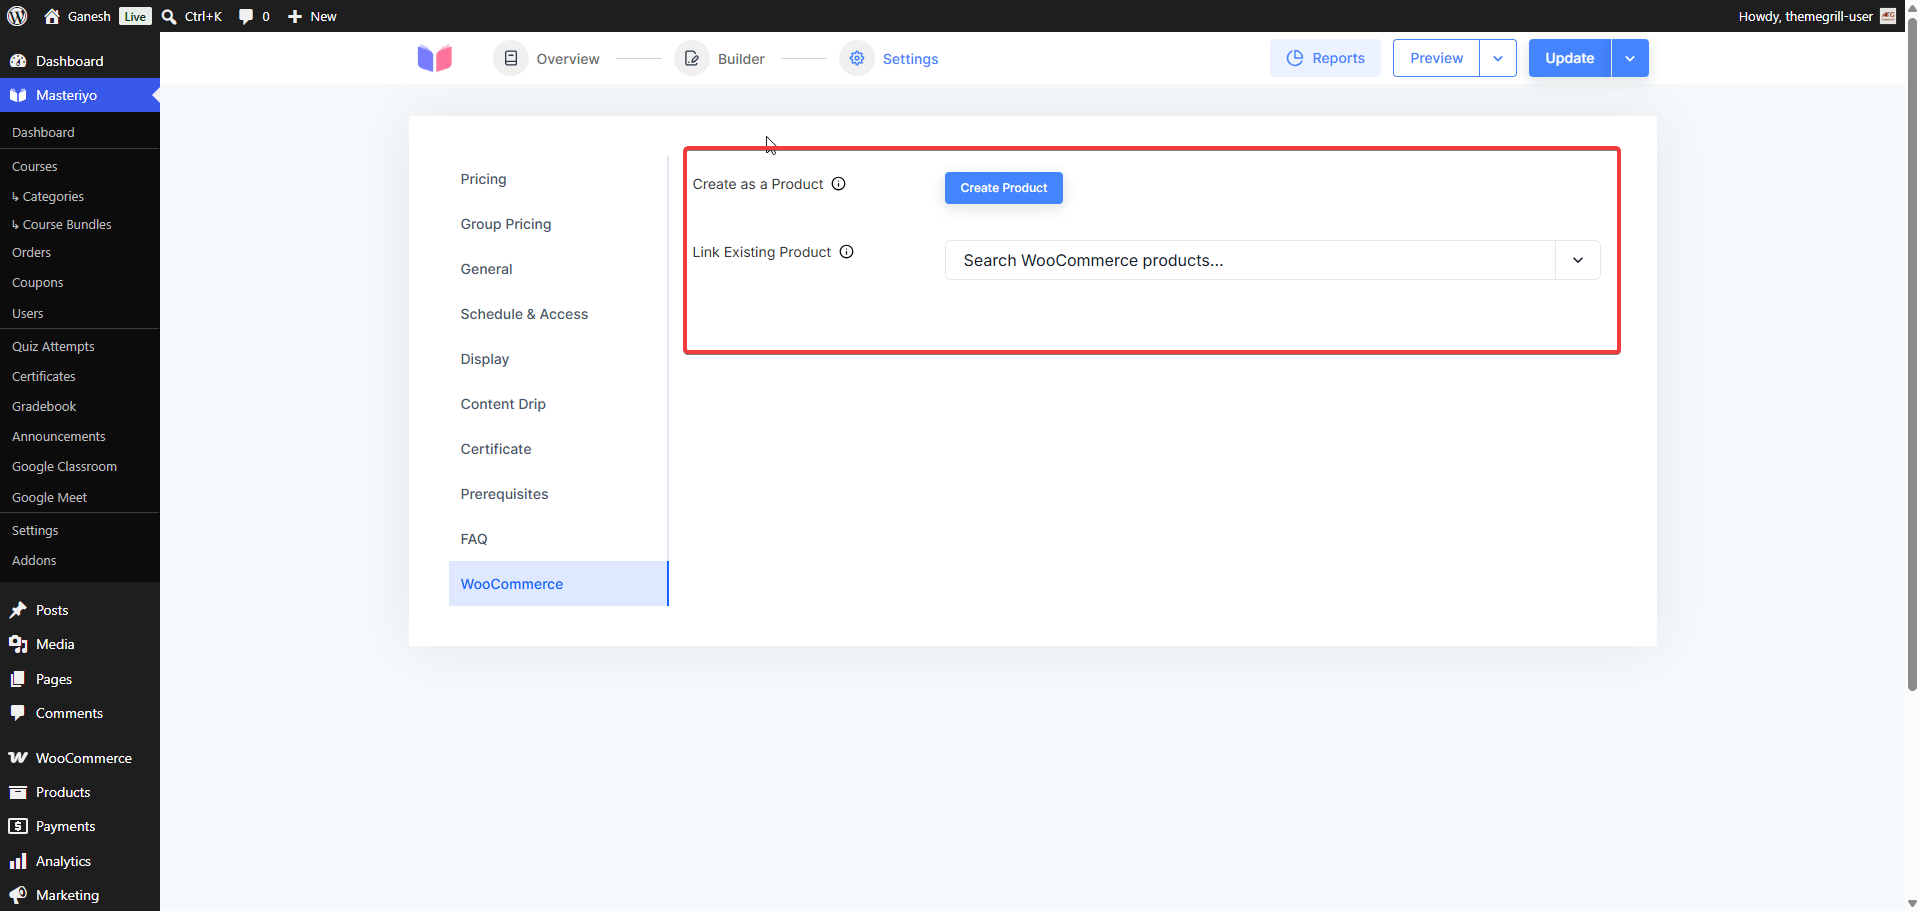
You have two options:
- Create Product — automatically creates a new WooCommerce product of type Masteriyo Course and links it to the course. The new product will appear under Dashboard > Products > All Products.
- Link Existing Product — select an existing WooCommerce product from the dropdown and click Link Product.
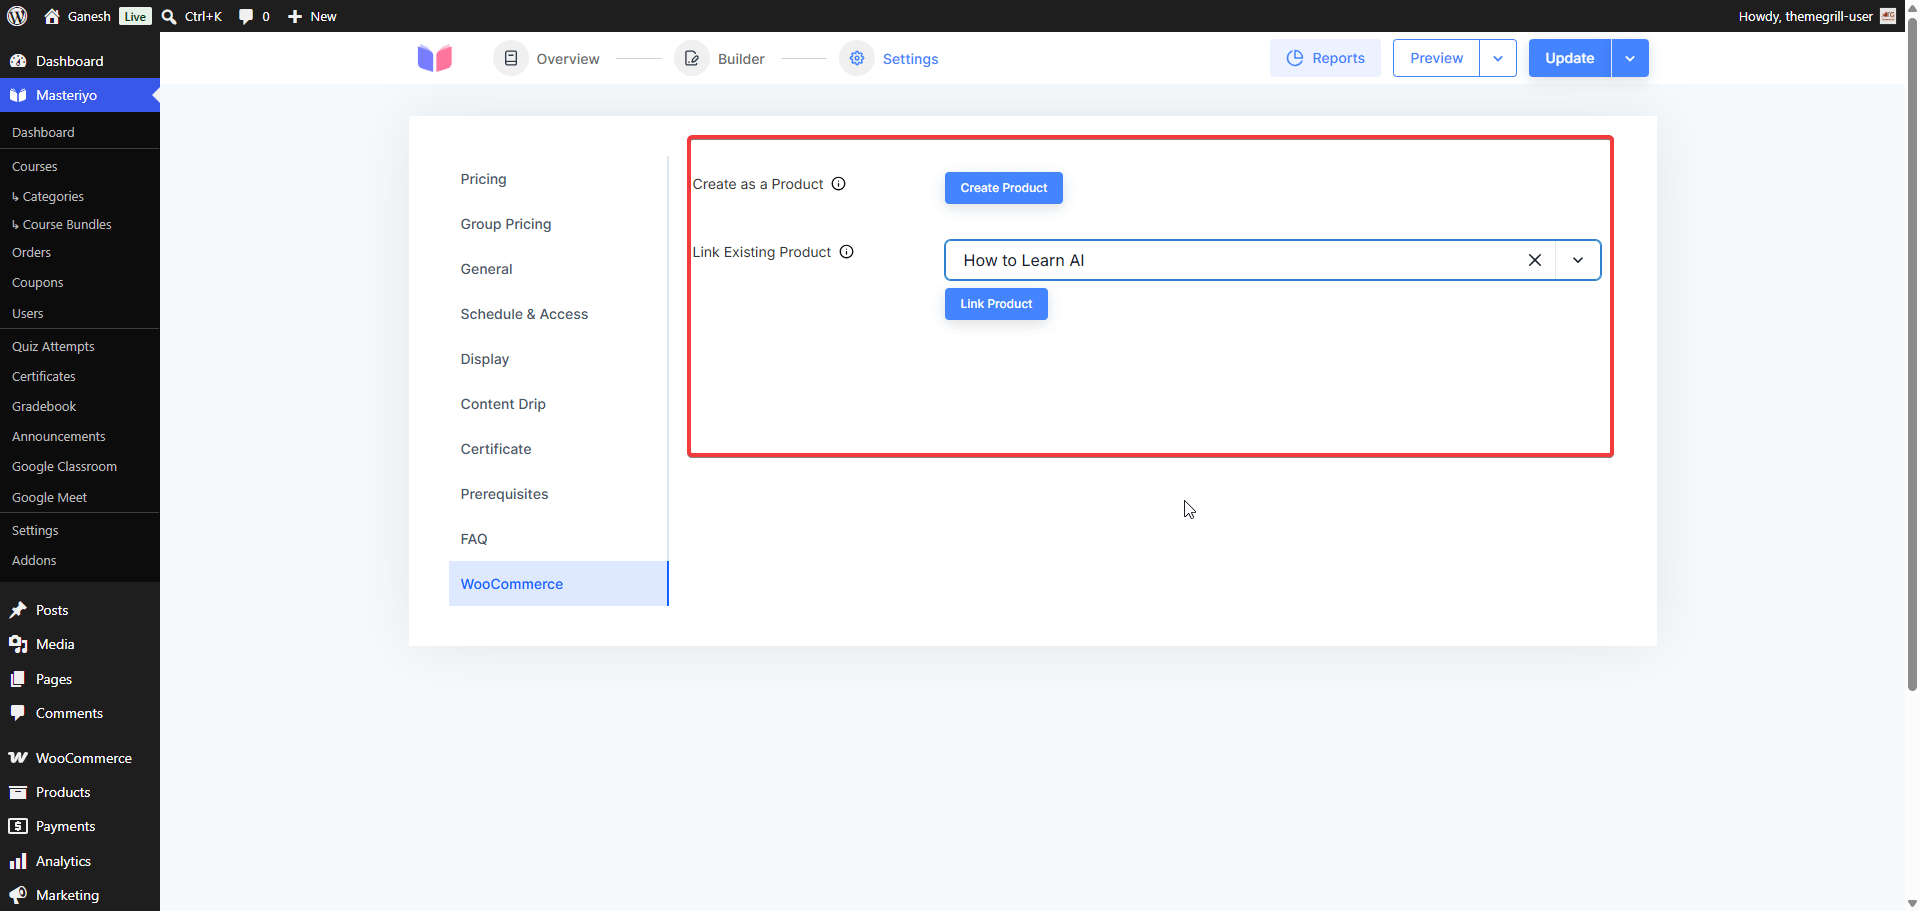
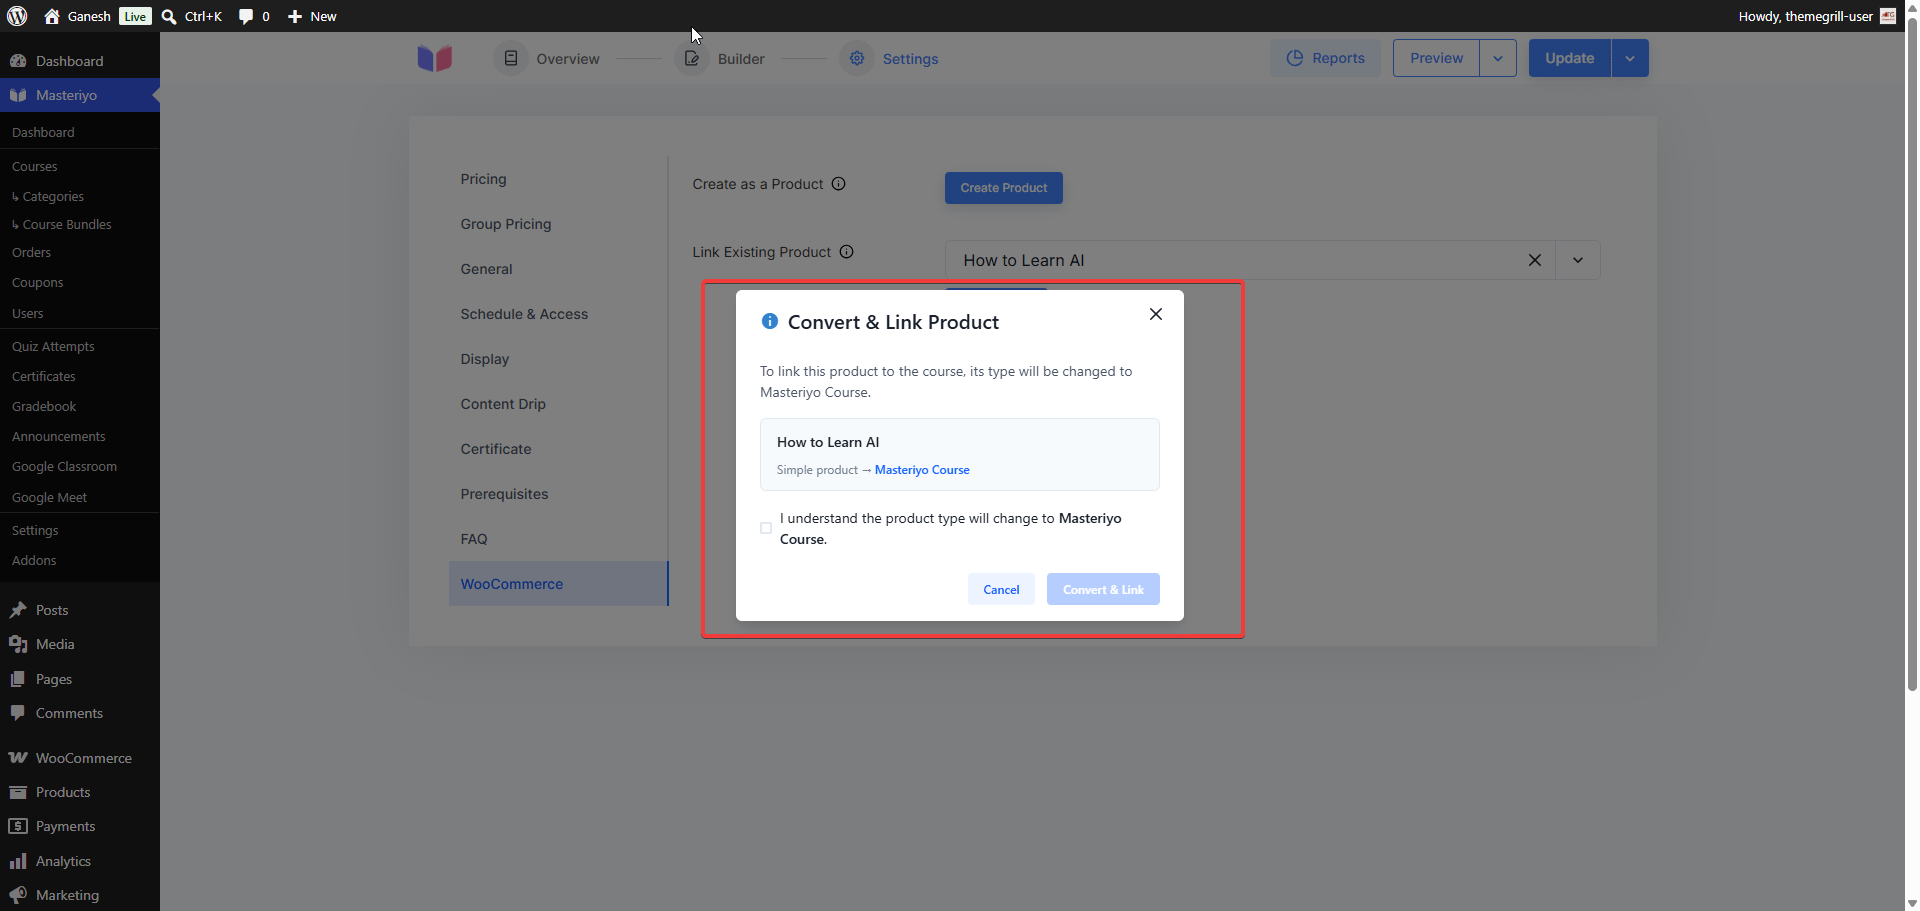
When using Link Existing Product, a Convert & Link Product confirmation dialog appears. Check the box confirming the product type will change to Masteriyo Course, then click Convert & Link.
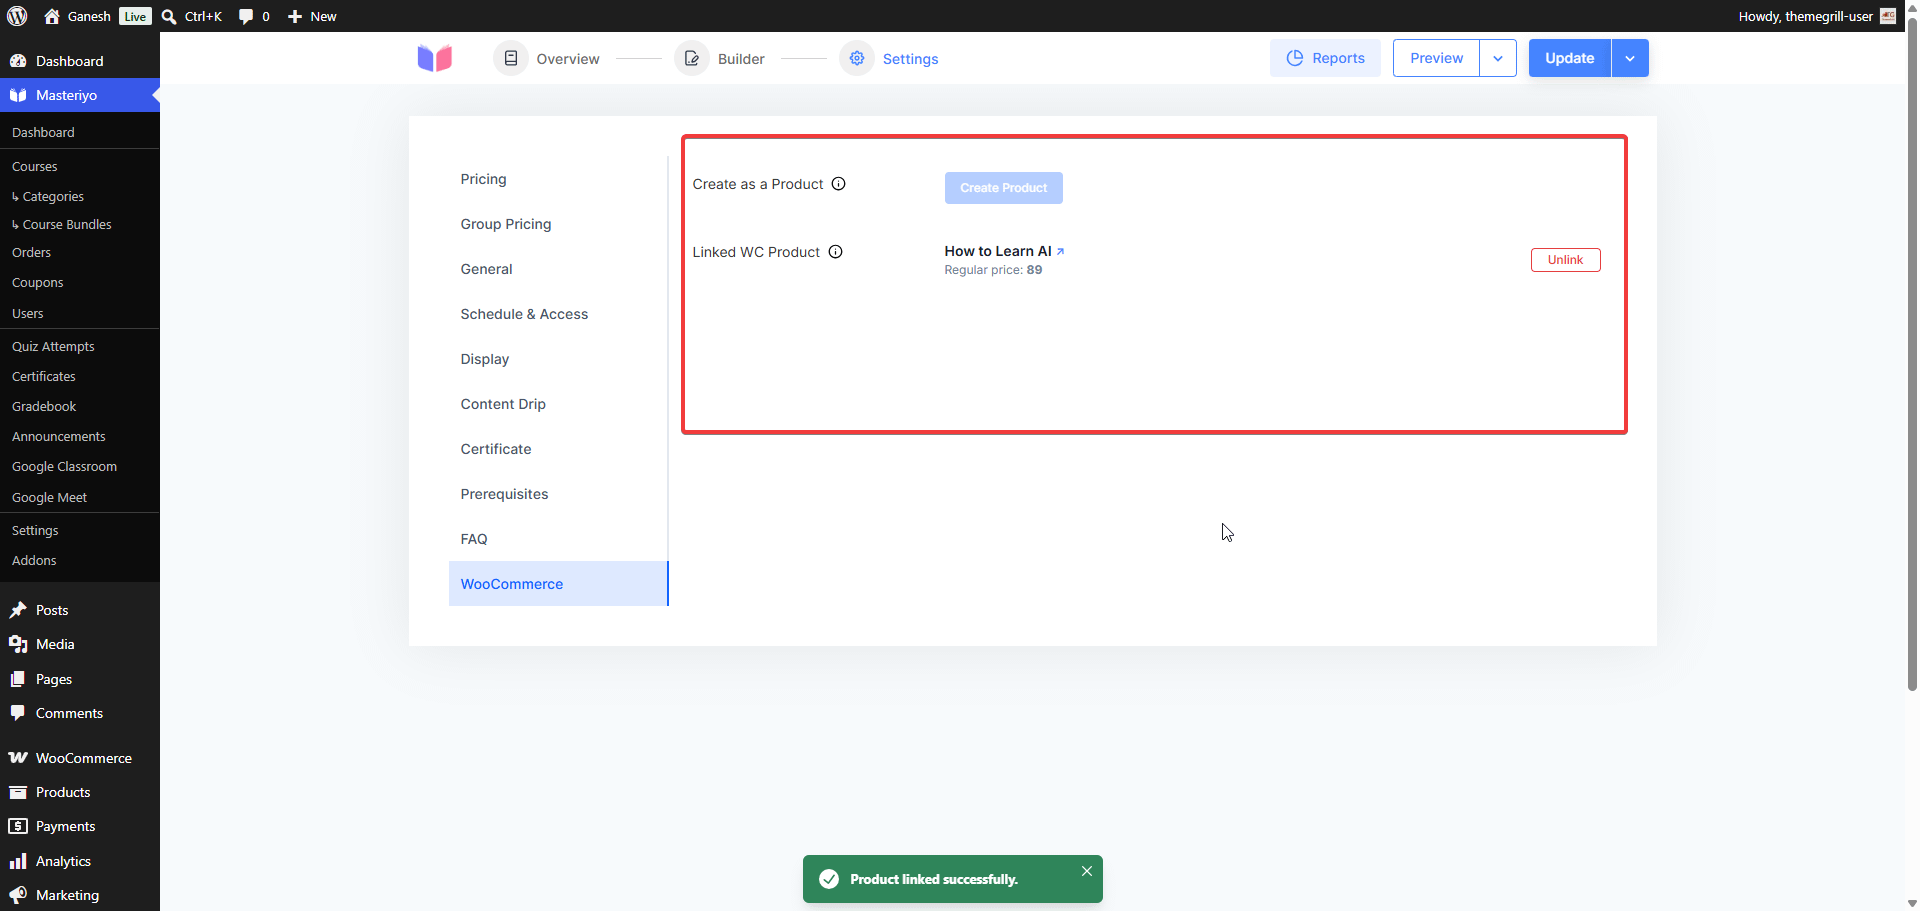
Once confirmed, the WooCommerce tab shows the linked product with its price and an Unlink button.
Step 2 — Students Buy and Get Enrolled
Once a product is linked, the course shows a Buy Now button on the courses page. Students click it, complete the WooCommerce checkout, and are automatically enrolled when the order status reaches Completed. If the Add to Cart setting is enabled, the button label changes to Add to Cart — the checkout flow and enrollment behavior remain the same.
WooCommerce handles payment, checkout, and order emails. Enrollment is triggered automatically once the order status reaches Completed.
Global WooCommerce Settings
Go to Masteriyo > Settings > Integrations > WooCommerce Integration to configure the following options.
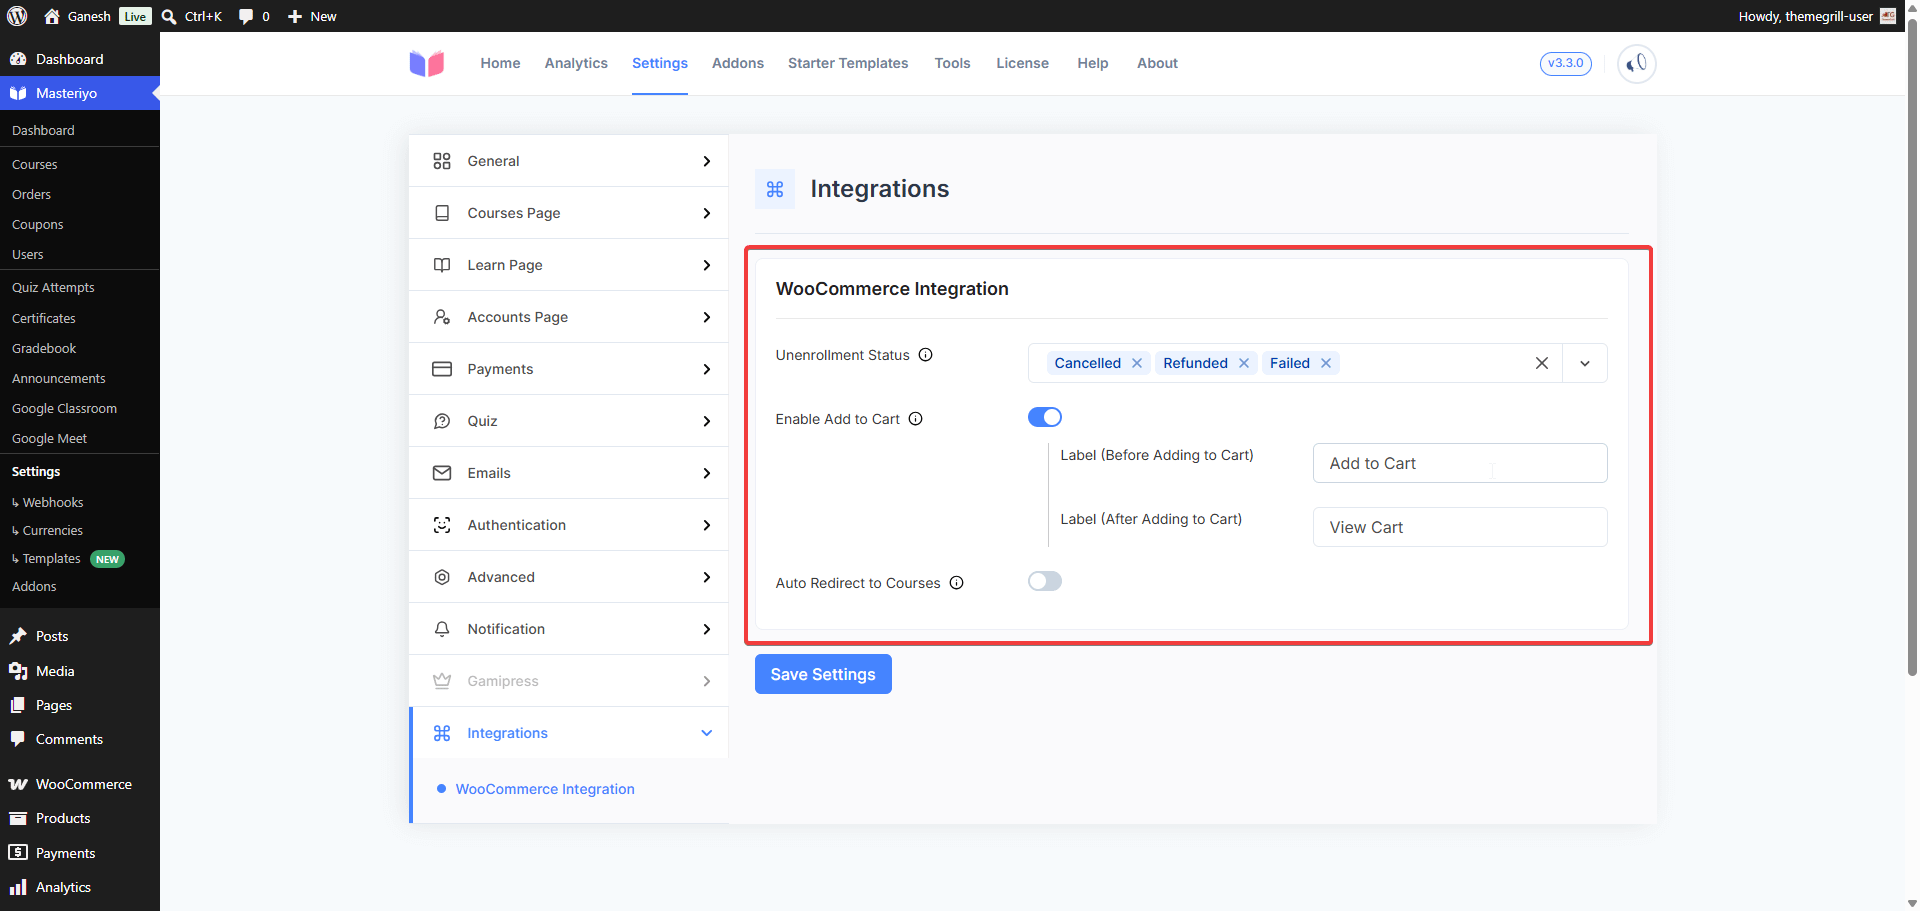
Unenrollment Status
Choose which WooCommerce order statuses automatically unenroll a student. The defaults are Cancelled, Refunded, and Failed. Add or remove statuses as needed.
Enable Add to Cart
By default, the course page shows a Buy Now button that sends students straight to checkout. Enabling Add to Cart lets students add multiple courses to the cart and buy them together.
When enabled:
- The Buy Now button becomes Add to Cart.
- After adding to the cart, the button changes to View Cart.
- Customize both labels using the Label (Before Adding to Cart) and Label (After Adding to Cart) fields.
This setting only affects courses that have a linked WooCommerce product. Courses without one are not sold through WooCommerce and will not show an Add to Cart button regardless of this setting.
Auto Redirect to Courses
When enabled, students are redirected to the course they purchased immediately after completing checkout — instead of landing on the standard WooCommerce order confirmation page.
Enrollment Confirmation Email
When a WooCommerce order reaches Completed, Masteriyo sends an order completion email to the student. The enrollment confirmation email is sent separately — it is triggered when the student manually starts the course for the first time, not at the moment of purchase.
To customize the email content, go to Masteriyo > Settings > Emails.
Guest Checkout
By default, enrollment requires every buyer to have a WordPress account. If you want to allow students to check out without creating an account upfront, configure WooCommerce as follows.
Go to WooCommerce > Settings > Accounts & Privacy:
- Under Checkout — Check "Enable guest checkout"
- Under Account creation — Check "After checkout" or "During checkout" — either option tells WooCommerce to create a WordPress account for the guest automatically, which is used to complete enrollment.
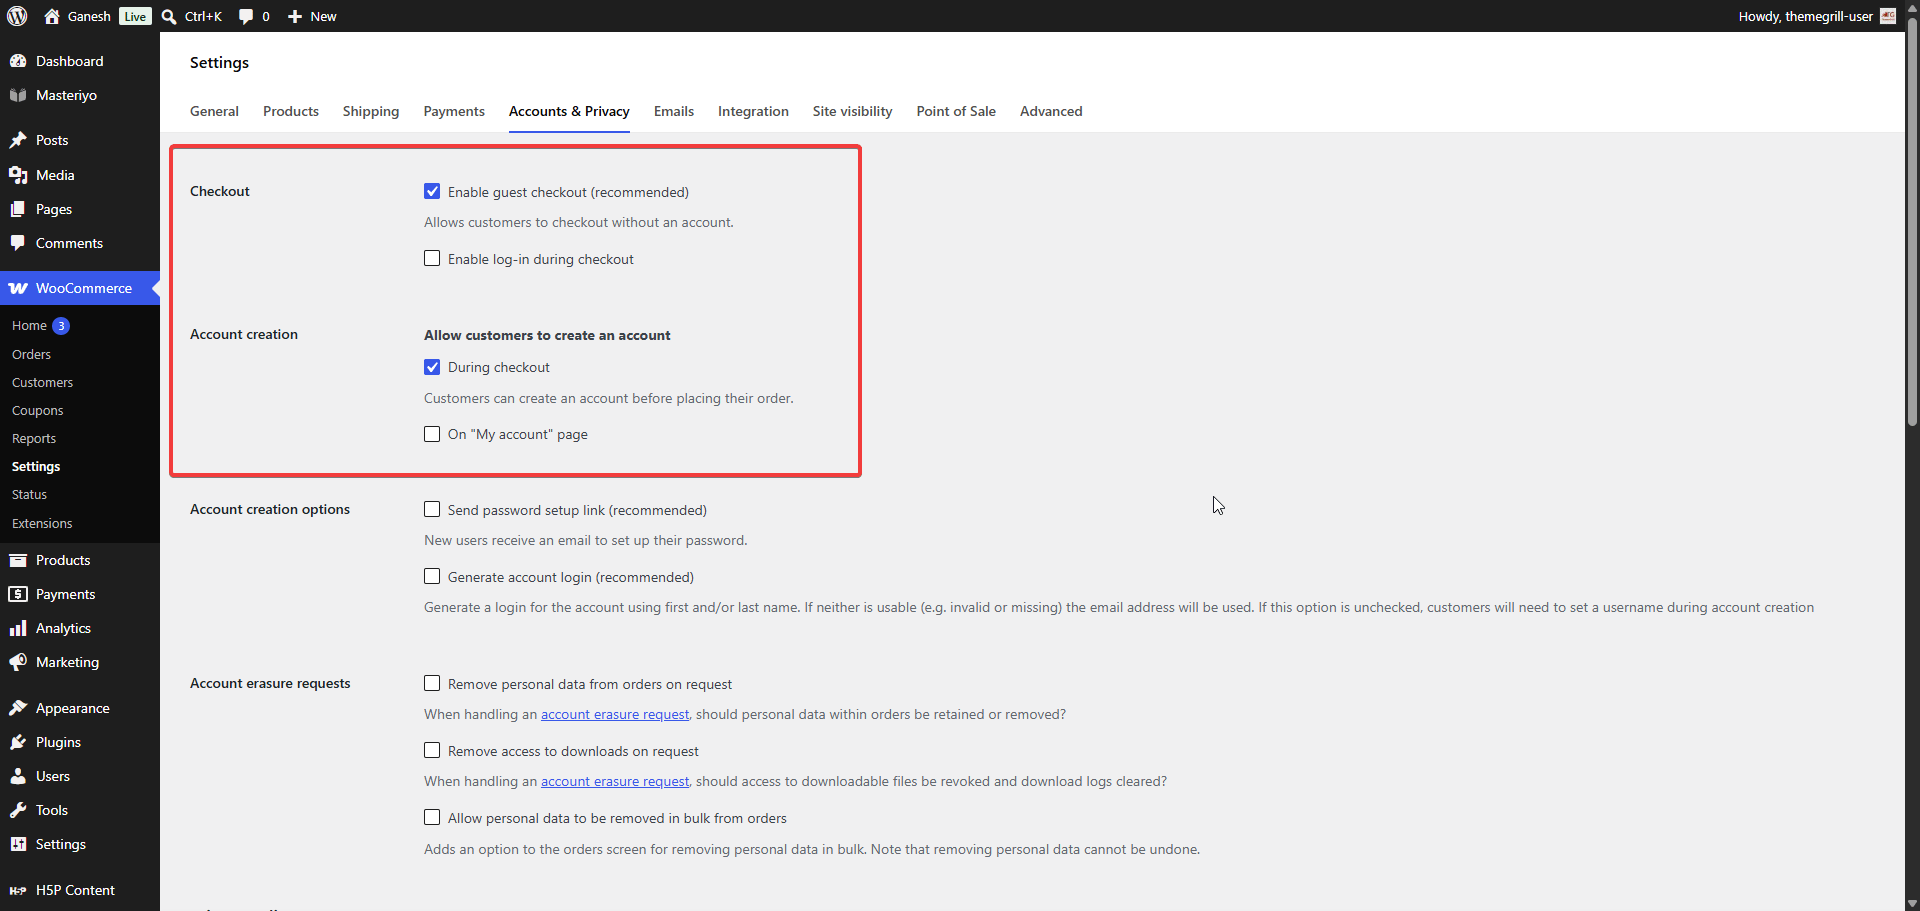
Enrollment happens once the account is created — no action needed from the student or admin.
Admin notice: If guest checkout is enabled here but WooCommerce is not set to create accounts during checkout, a warning appears in the admin with a direct link to the setting that needs fixing.
Create a Course from a WooCommerce Product
If you already have WooCommerce products and want to turn one into a course, you can do it directly from the products list — no need to start from the course editor.
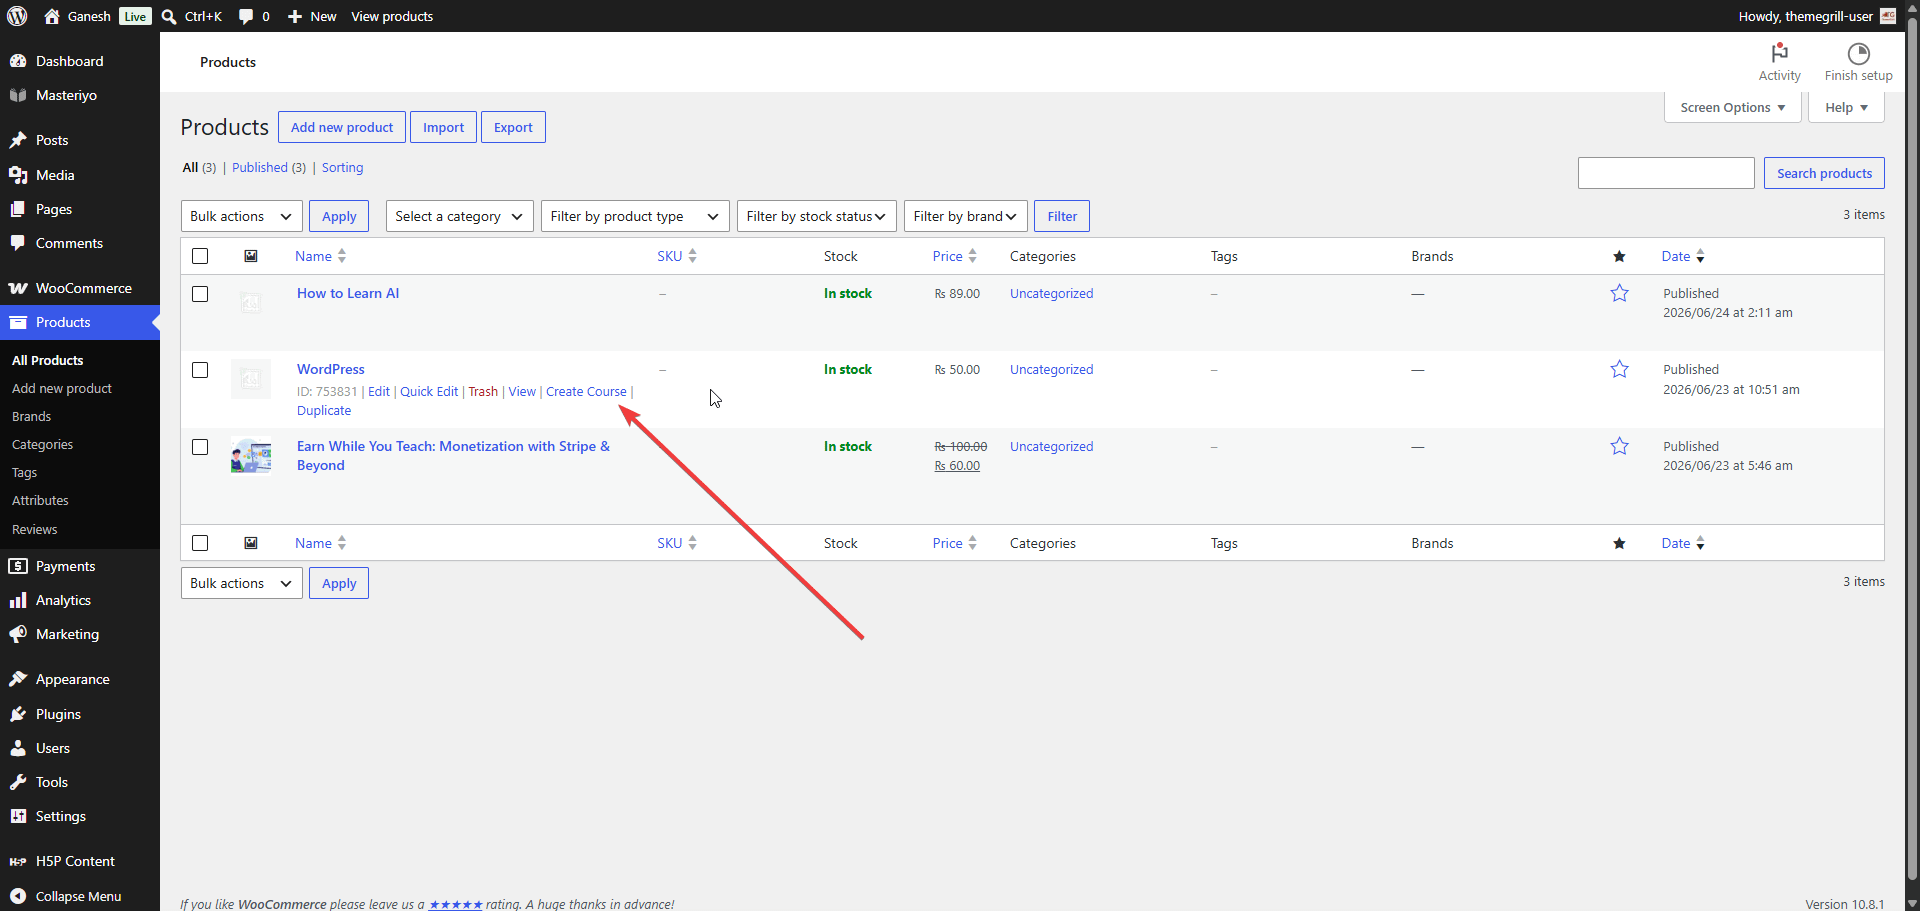
- Go to Dashboard > Products > All Products.
- Hover over the product to reveal the row actions.
- Click Create Course.
- A Convert to Masteriyo Course? confirmation dialog appears. Check the box confirming the product type will change to Masteriyo Course, then click Convert & Create Course.
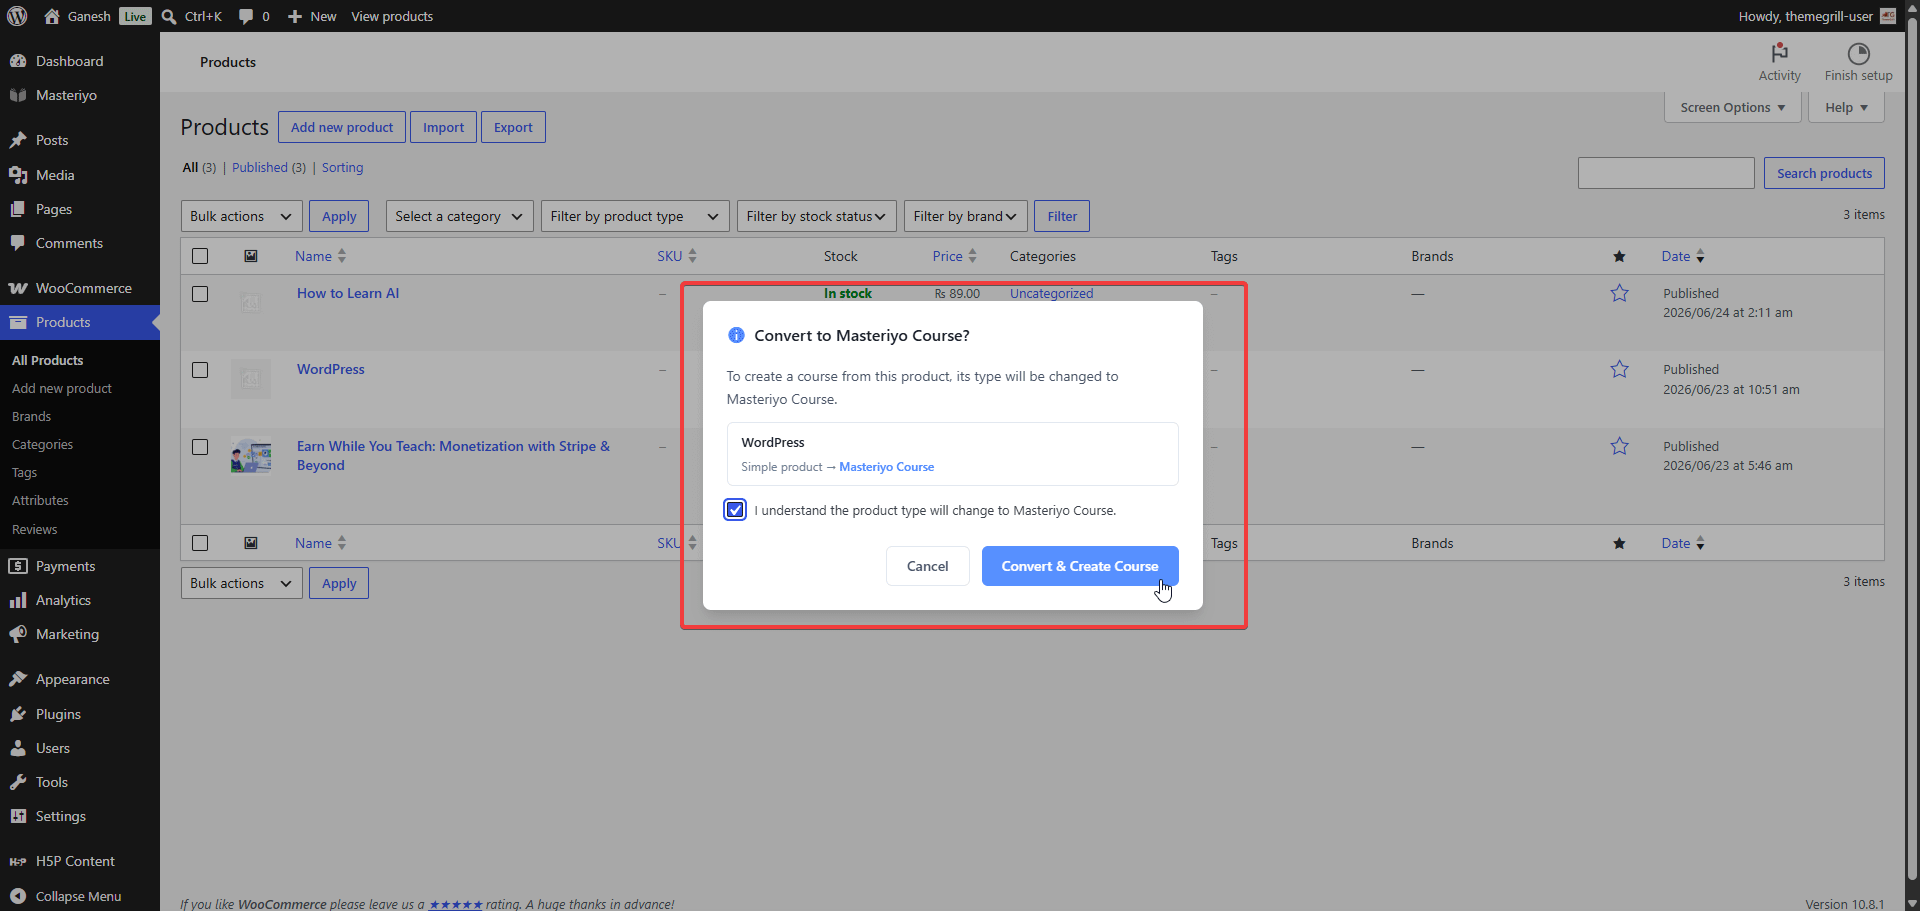
A new course is created in draft status and automatically linked to that product. Open it in Masteriyo > Courses to add content and publish it. If the product is already linked to a course, the row action shows Edit Course instead.
Managing the Course–Product Link
You can manage the link from either side:
From the course editor — Go to Masteriyo > Courses, open the course, and go to Settings > WooCommerce. From here you can create a new product, link an existing one, or remove the link.
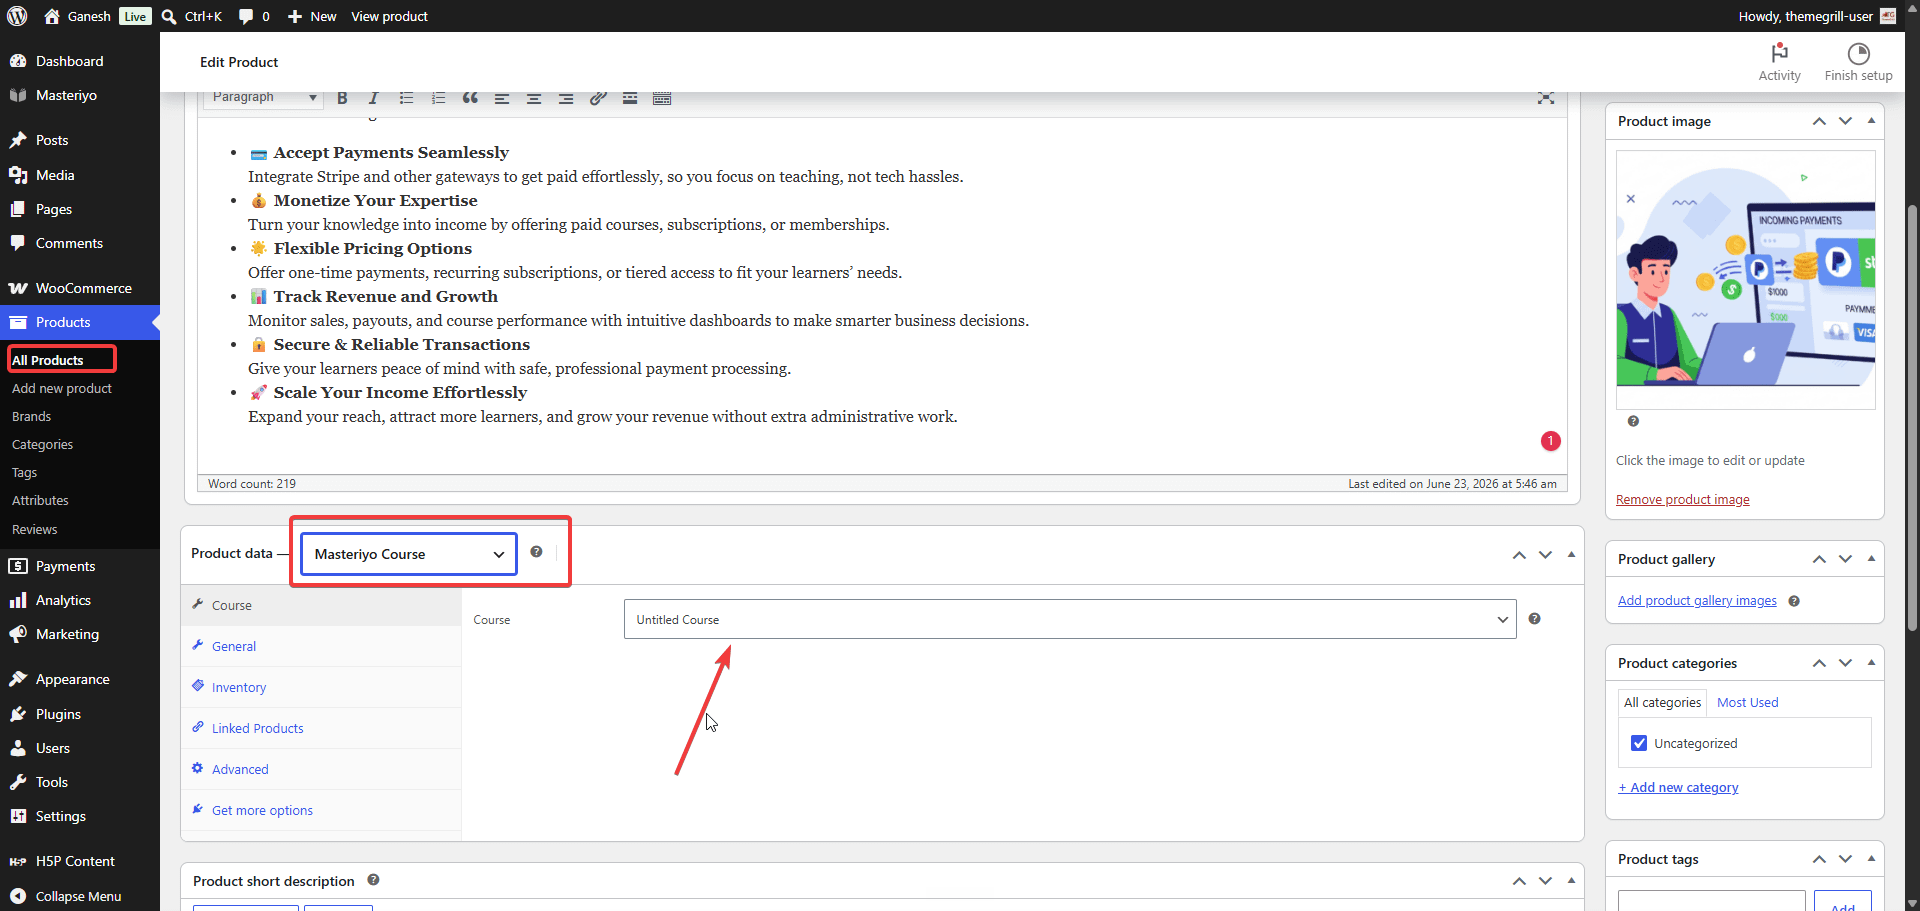
From the WooCommerce product editor — Open the product under Dashboard > Products > All Products. In the Product data section, set the type to Masteriyo Course and use the Course tab to select or change the linked course.
To remove the link entirely, delete the WooCommerce product. The course itself is not deleted — only the link is removed.
WooCommerce Subscription Support Pro
Integrate with WooCommerce Subscriptions to charge students on a recurring schedule. Students stay enrolled as long as the subscription is active.
Additional requirement: WooCommerce Subscriptions plugin (installed and activated).
Setting Up a Recurring Course
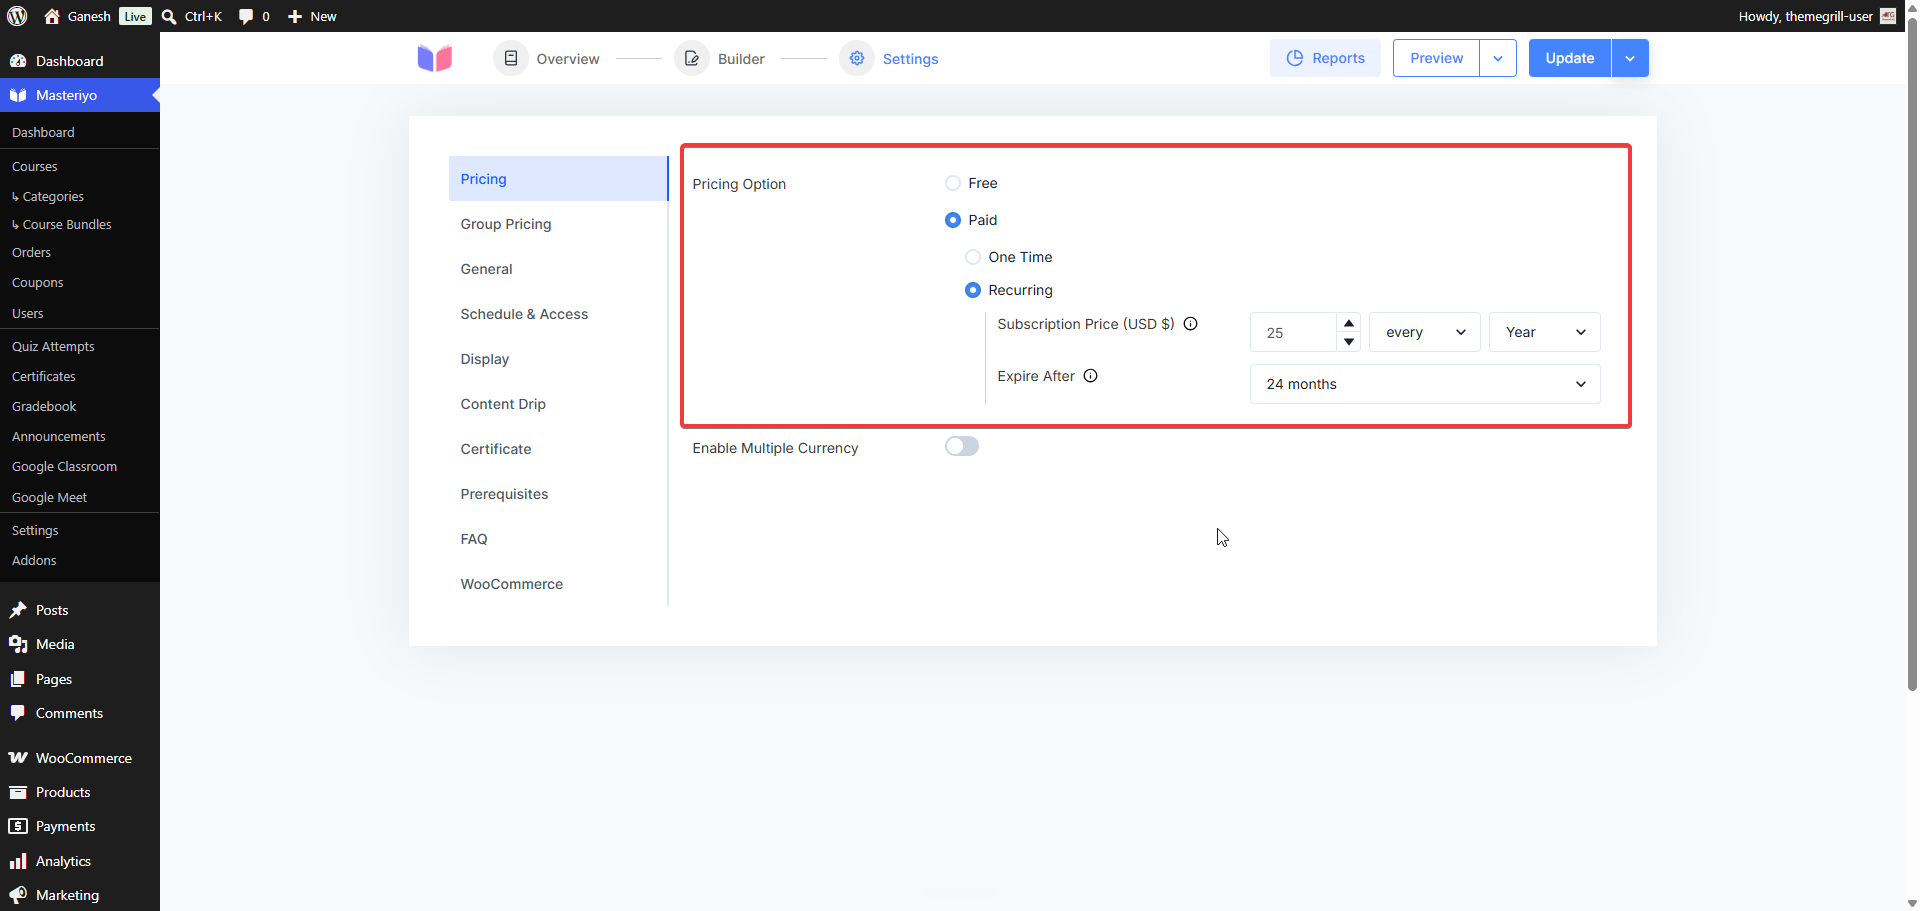
- Open the course editor, go to Settings > Pricing, set the course to Paid, and enable Recurring. Set the recurring amount and billing interval.
-
Go to Settings > WooCommerce and click Create Product.
-
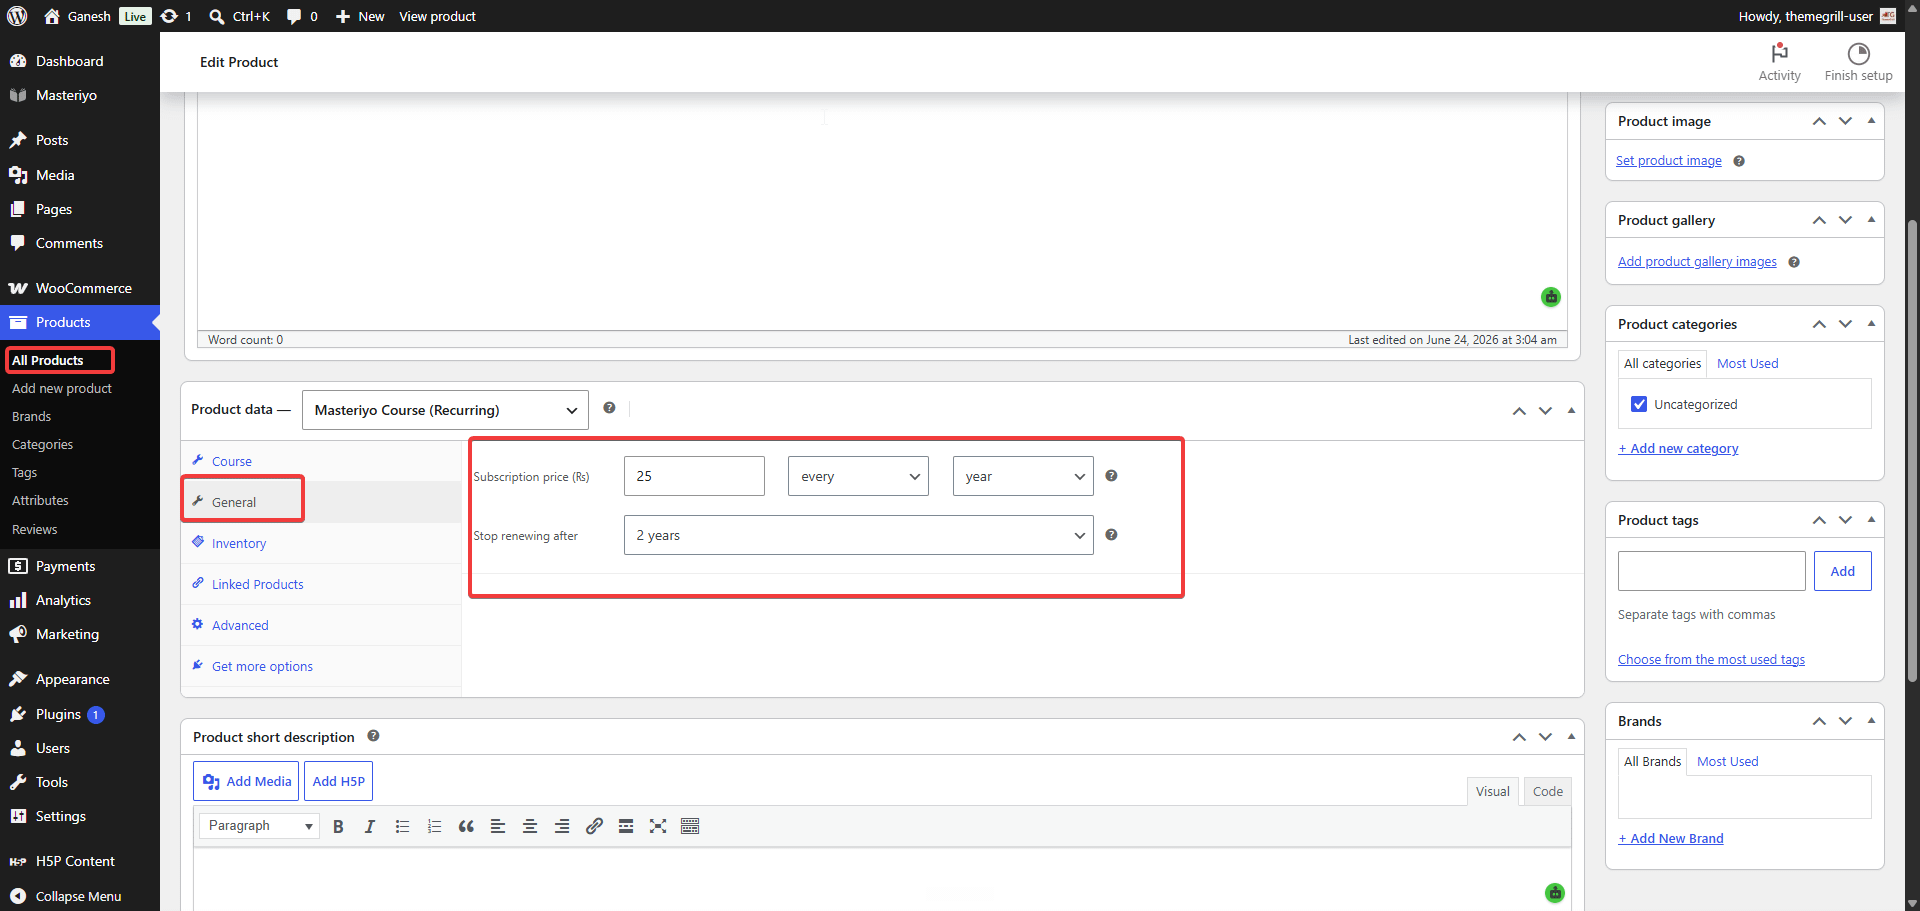
Go to Dashboard > Products, open the product that was just created, and on the General tab of the Product Data section, set the same recurring amount and billing interval as the course.
Once a student purchases the course, WooCommerce creates a subscription for them. View and manage all active subscriptions from WooCommerce > Subscriptions.
Course Bundle WooCommerce Integration Pro
Course bundles — collections of multiple courses sold together — can be sold through WooCommerce with support for both one-time and recurring subscription purchases.
Selling a Bundle via WooCommerce
- Open the bundle editor in Masteriyo > Course Bundles.
- In the right sidebar, set the Pricing Option to One Time or Recurring and enter a price.
- Click Create Product under the Create as a Product option in the same sidebar.
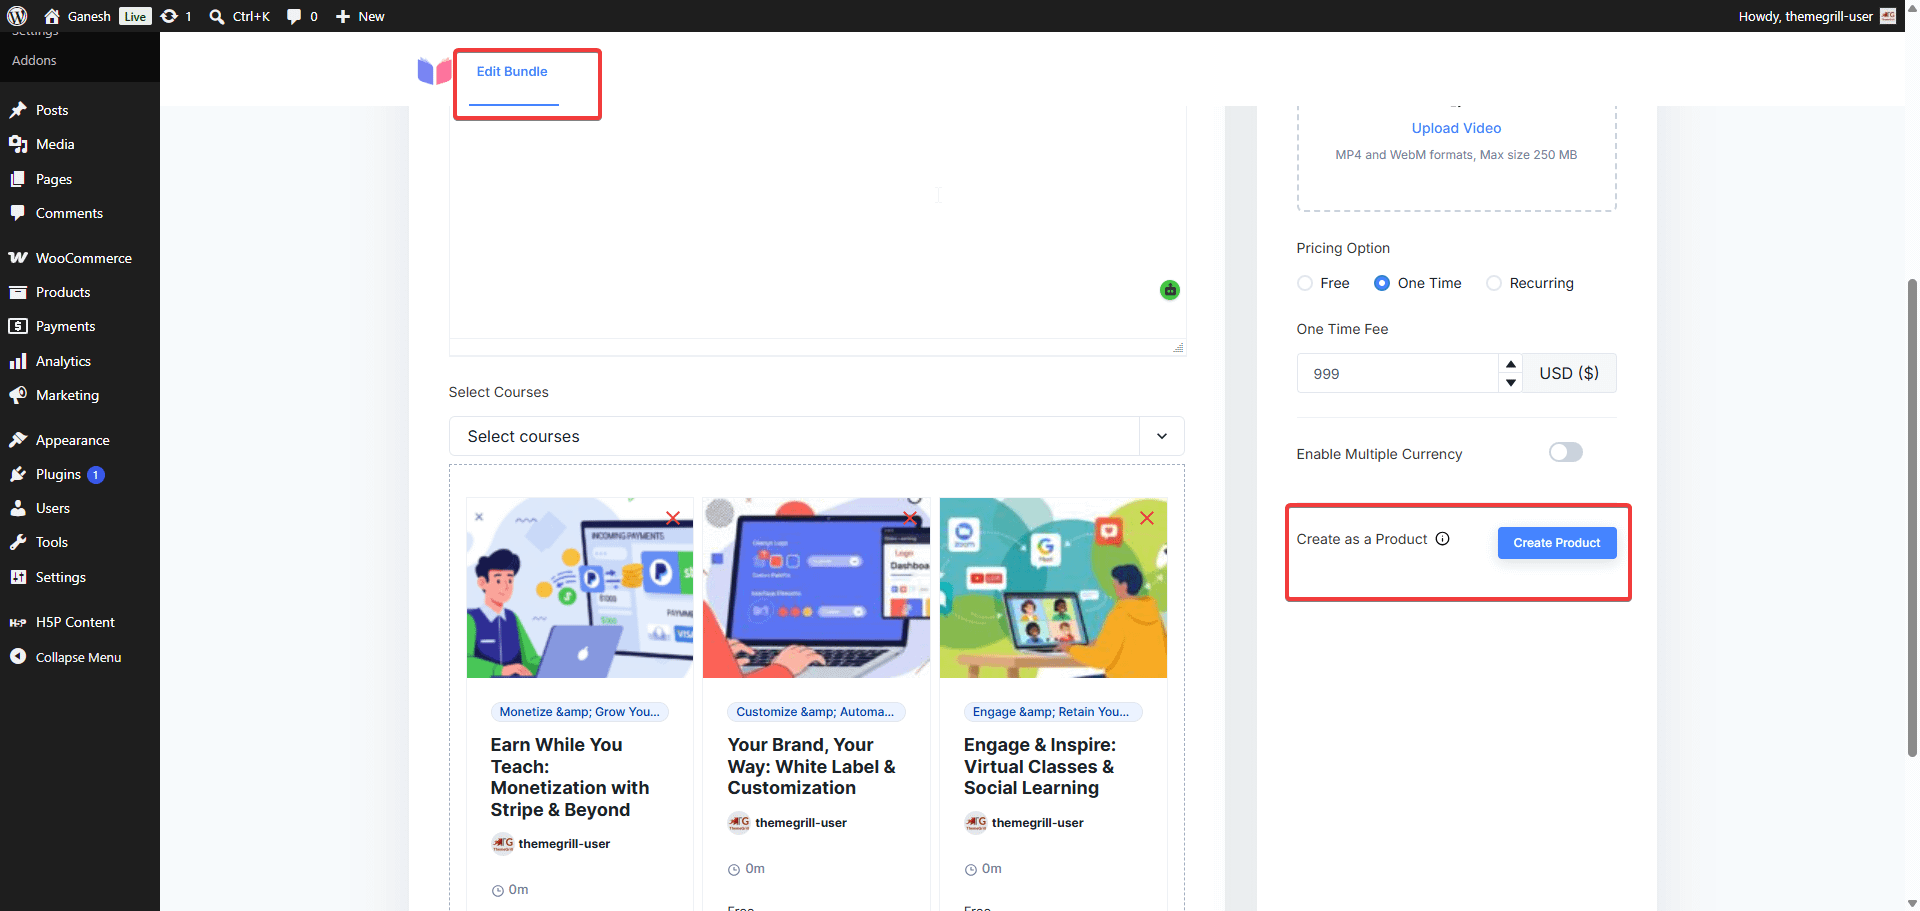
Once linked, the bundle listing and single bundle pages show a Buy Now button by default. If Add to Cart is enabled in the global settings, the button becomes Add to Cart and adds the bundle to the cart without a page reload. For recurring subscriptions, once an active subscription exists, the button changes to Explore — taking the student directly to the bundle.
Was this article helpful to you?
Give us Rating
Last edited on July 28, 2026.
Edit this page