WebHooks
This features let you send data to an external URL.
Webhooks are a powerful feature in Masteriyo that enables real-time communication between your WordPress LMS and external applications. This documentation covers both types of webhook functionality available in Masteriyo:
Trigger Webhooks (Outgoing): Send data from Masteriyo to external applications when specific events occur in your LMS.
Action Webhooks (Incoming): Allow external applications to trigger actions within Masteriyo.
What are Webhooks?
Webhooks allow different applications to communicate automatically with each other in real-time. When an event occurs in one application, it can notify another through webhooks, triggering specific actions or transferring data without manual intervention.
Trigger Webhooks (Outgoing Data)
Trigger webhooks send data from your Masteriyo LMS to external applications whenever specific events occur on your site.
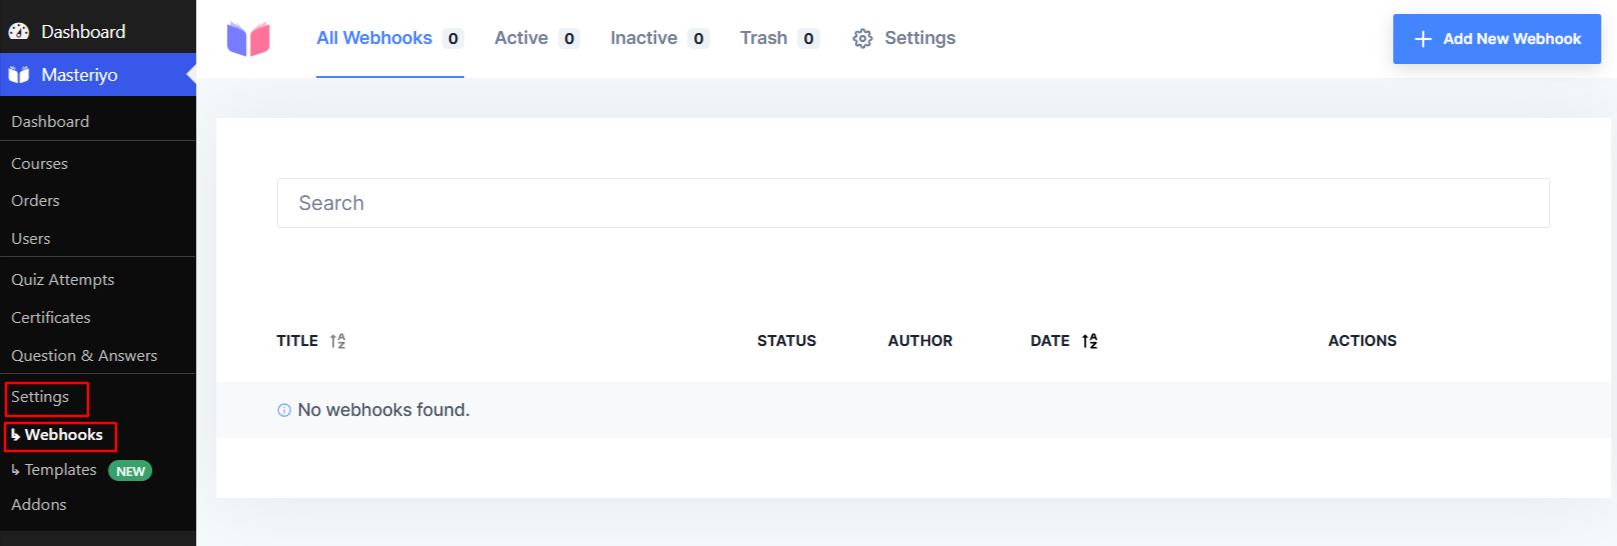
Setting Up Trigger Webhooks
- Navigate to Masteriyo > Webhoooks in your WordPress admin dashboard.
- Click Add New Webhook.
- Configure the webhook with the following settings:
- Webhook Name - Provide a name for the Webhook.
- Description - Describe the purpose of the Webhook.
- Status(Active) - Enable this to make the Webhook active.
- Delivery URL - Enter the URL where you want to send the data.
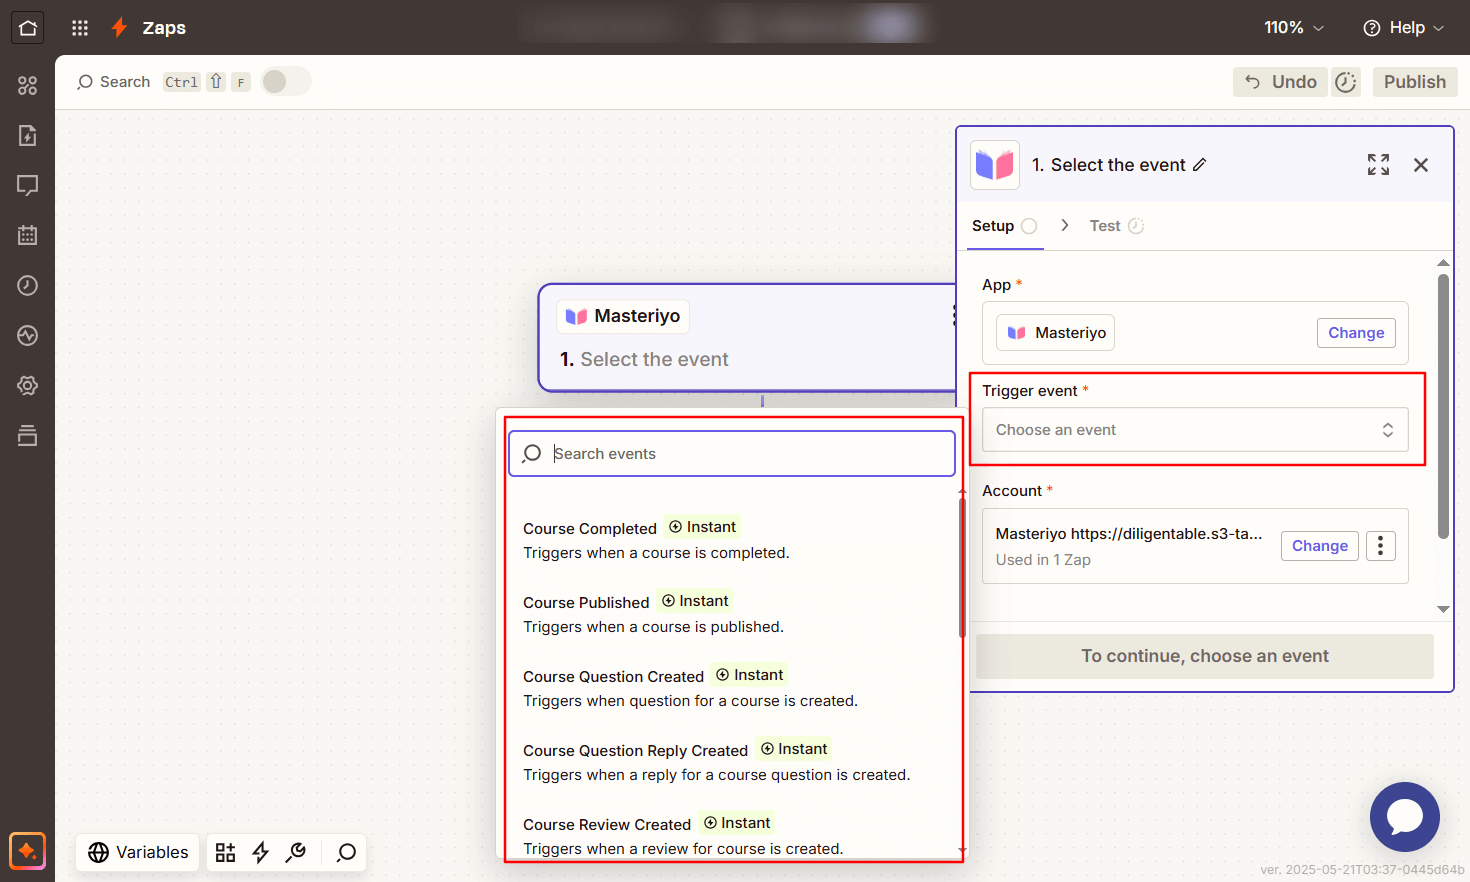
- Events - Lets you select the desired event for sending the data. There are various events available.
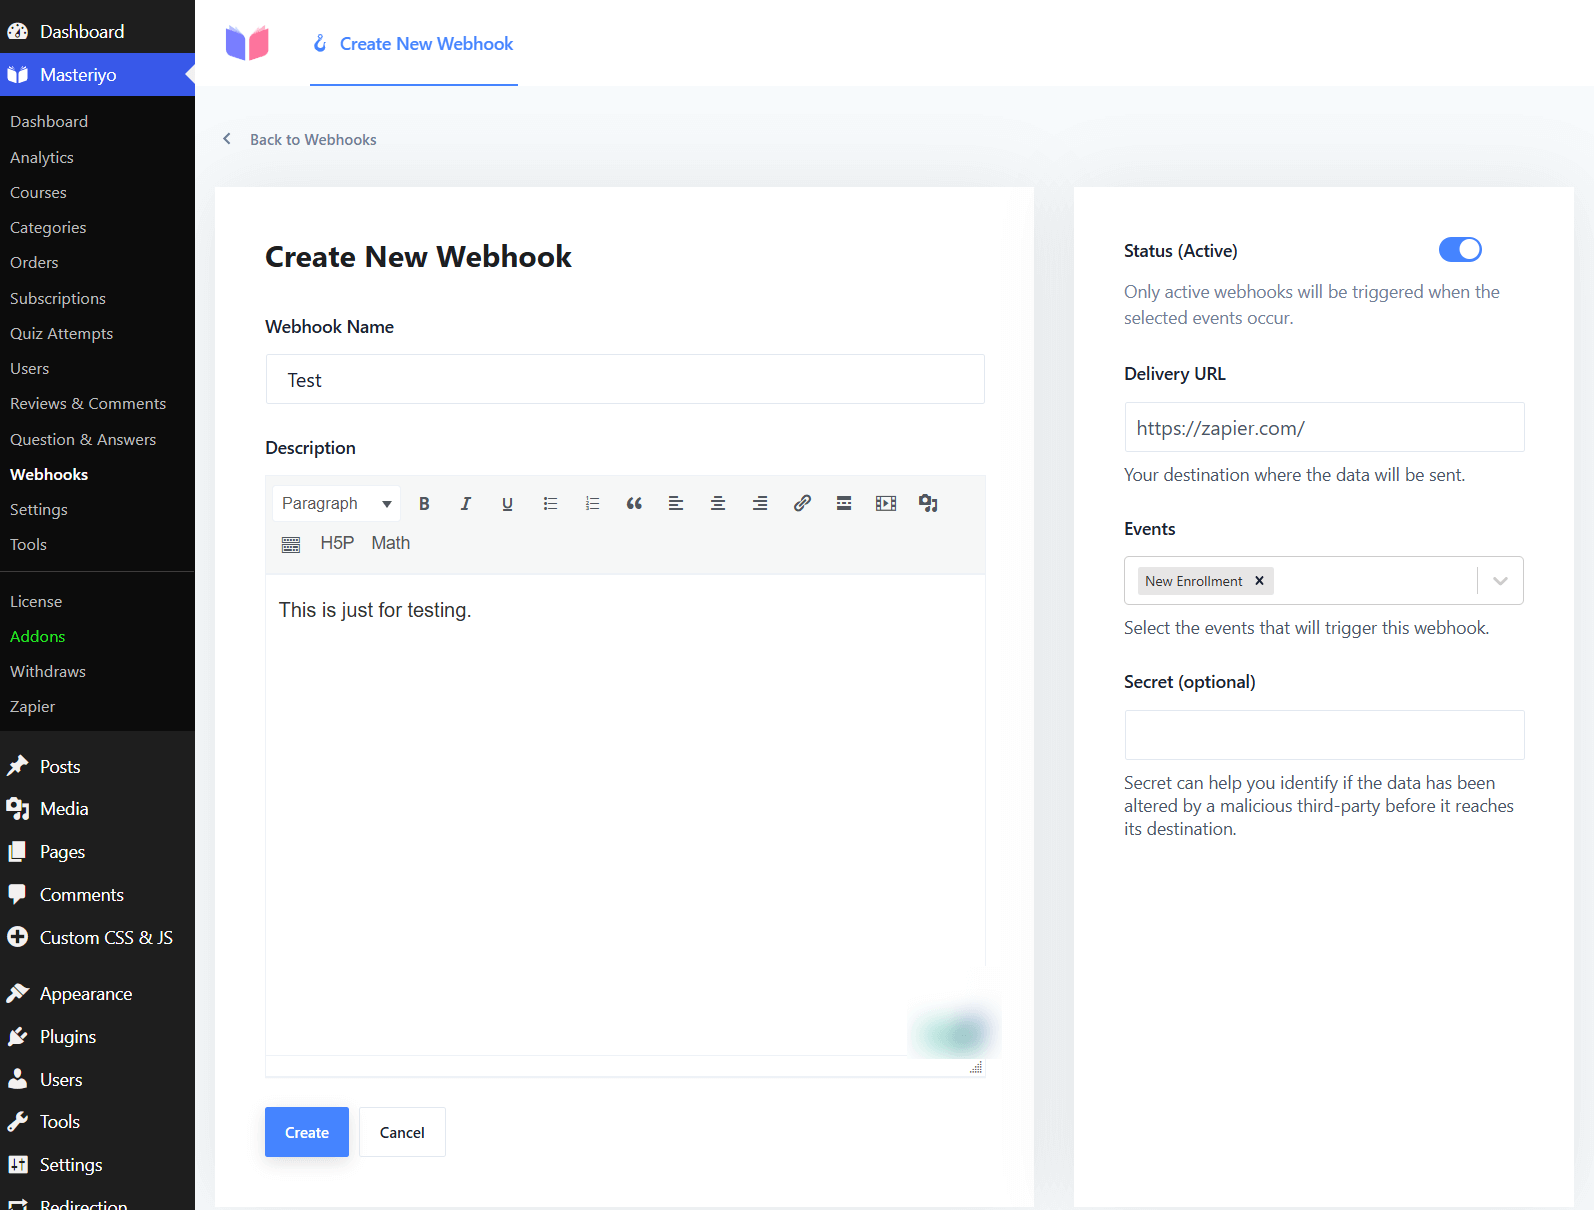
Note: The Event will vary for the admin and the instructors.
Secret(Optional) - This helps you identify if a malicious third-party system has altered the data before it reaches its destination.
After filling in all the required information, click on Create to save the webhook.
Available Trigger Events
Masteriyo offers various events that can trigger webhooks:
-
Course Completed
-
Course Published
-
Course Question Created
-
Course Question Reply Created
-
Course Review Created
-
Instructor Registration
-
Lesson Completed
-
Lesson Published
-
Quiz Completed
-
Quiz Published
-
Student Enrolled
-
Student Registration
Note: When logged in as an instructor, webhooks will only be triggered for events related to that specific instructor's courses and activities.
Trigger Webhook Payload Format
Masteriyo sends data to your specified URL using HTTP POST in JSON format when a trigger event occurs.
Action Webhooks (Incoming Data) Pro
Action webhooks allow external applications to perform actions within your Masteriyo LMS. This feature is available in the PRO version and enables you to integrate Masteriyo with CRM systems, automation tools, or other applications.
Supported Action Webhooks
Masteriyo supports the following action webhooks:
| Action Webhook | Description | Required Parameters |
|---|---|---|
masteriyo_user_enrolled_to_course | Enrolls a user in a specific course | user_id (number), course_id (number) |
masteriyo_create_student | Creates a new student account | email, user_name, firstname, lastname |
masteriyo_create_instructor | Creates a new instructor account | email, user_name, firstname, lastname |
masteriyo_complete_lesson | Marks a lesson as complete for a user | lesson_id, user_id, course_id |
masteriyo_course_progress_reset | Resets course progress for a user | course_id, user_id |
masteriyo_unenrolled_user_from_coursey | Unenrolls a user from a course | course_id, user_id |
masteriyo_course_user_completed | EMarks a course as completed for a user | user_id, course_id |
Setting Up Action Webhooks
To send action webhooks to Masteriyo from an external application (such as Zapier), use the following configuration:
Endpoint URL
https://your-site.com/wp-json/masteriyo/v1/webhooks/action
Method
Use the POST method for all action webhooks.
Headers
Include the following header for authentication:
X-WP-Webhook-Token: [your-webhook-token]
The webhook token can be generated and found in the Masteriyo Webhooks settings.
Payload Format
Use JSON format. For example,
{
  "event": "masteriyo_course_user_completed",
  "user_id": 123,
  "course_id": 456
}
The event parameter specifies which action to trigger, and additional parameters will vary based on the selected action.
Using Masteriyo Trigger Webhooks with Zapier
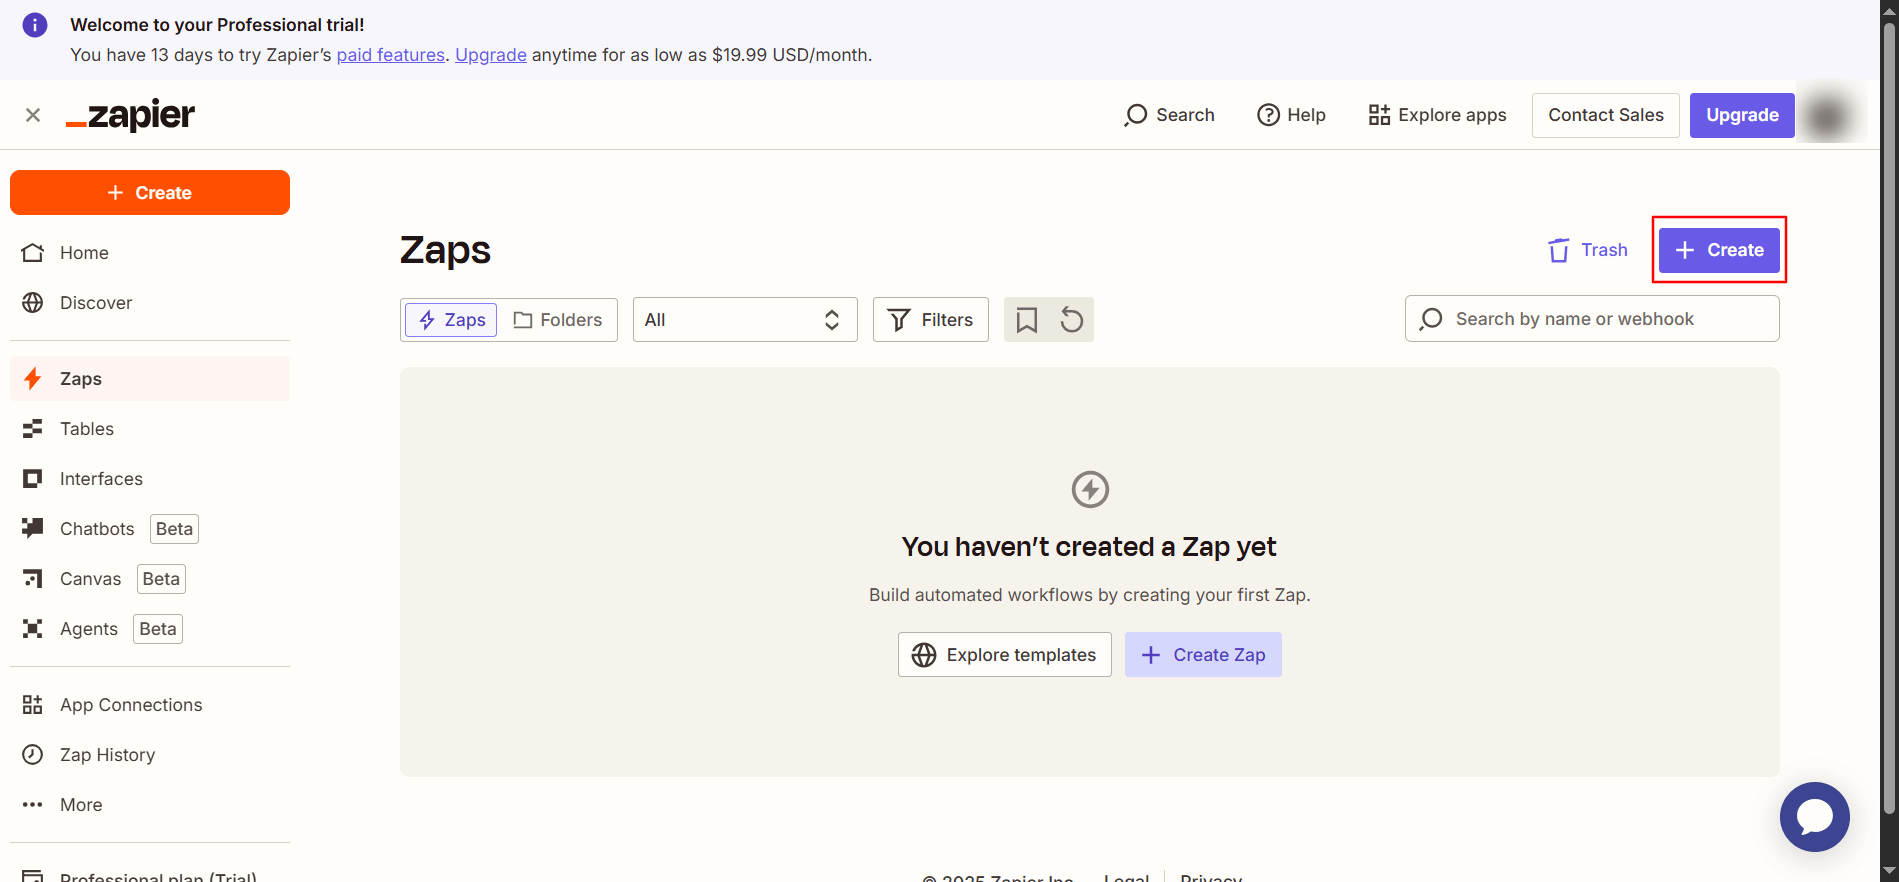
- First, enable Zapier addon.
- Log in to Zapier to create a new Zap and click on the trigger.
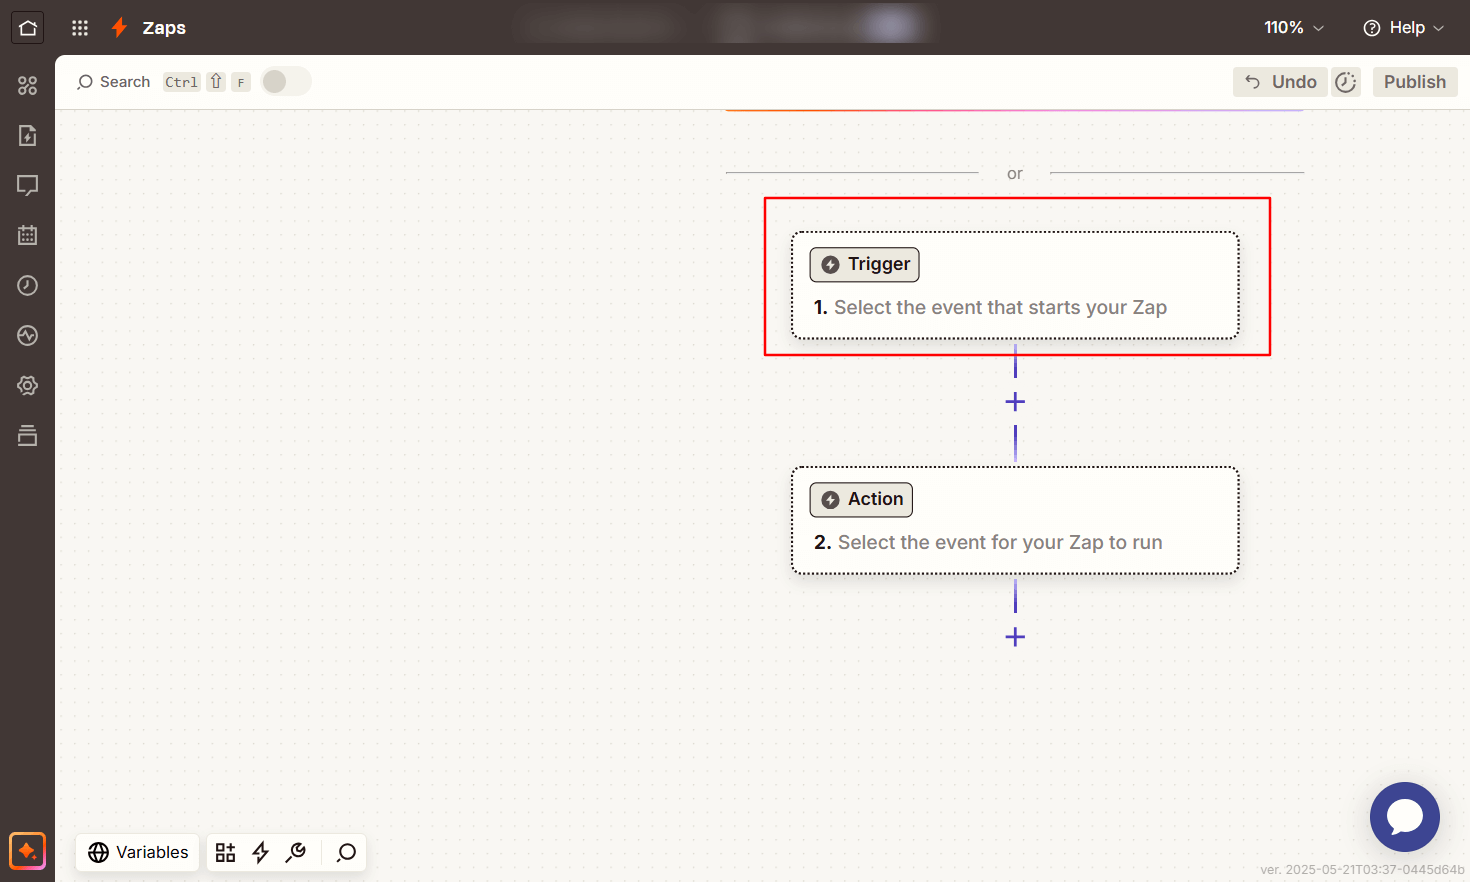
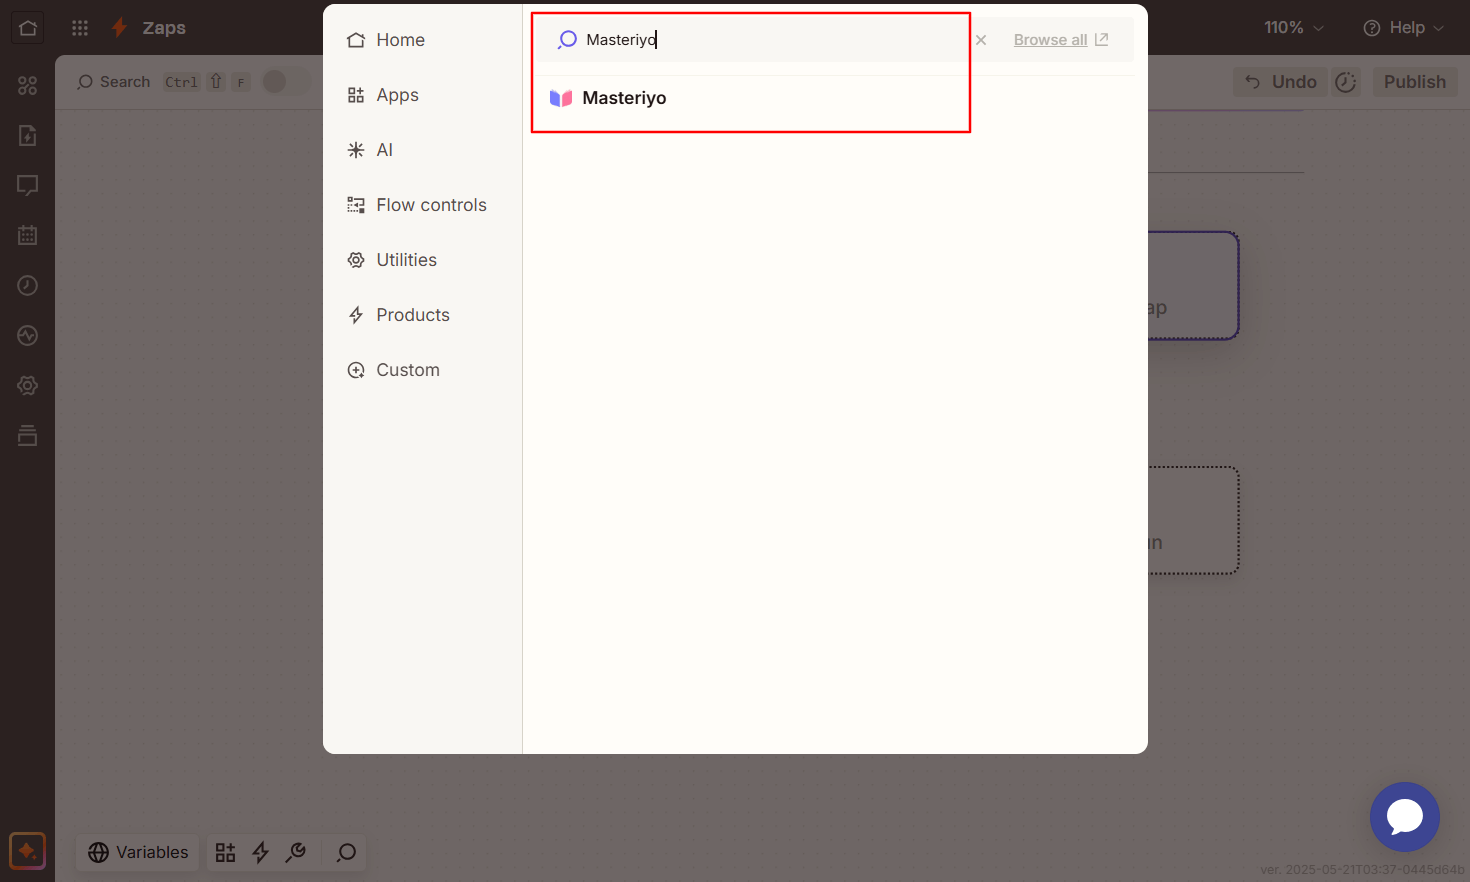
- Search for Masteriyo and select the app.
- For Trigger event, click on the drop-down menu and select an event.
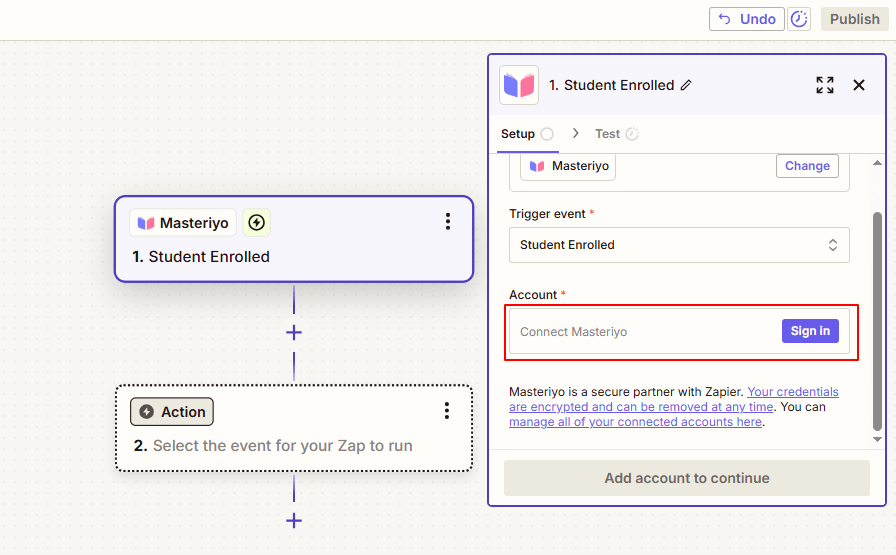
 5. Under Account, click on Sign In.
-
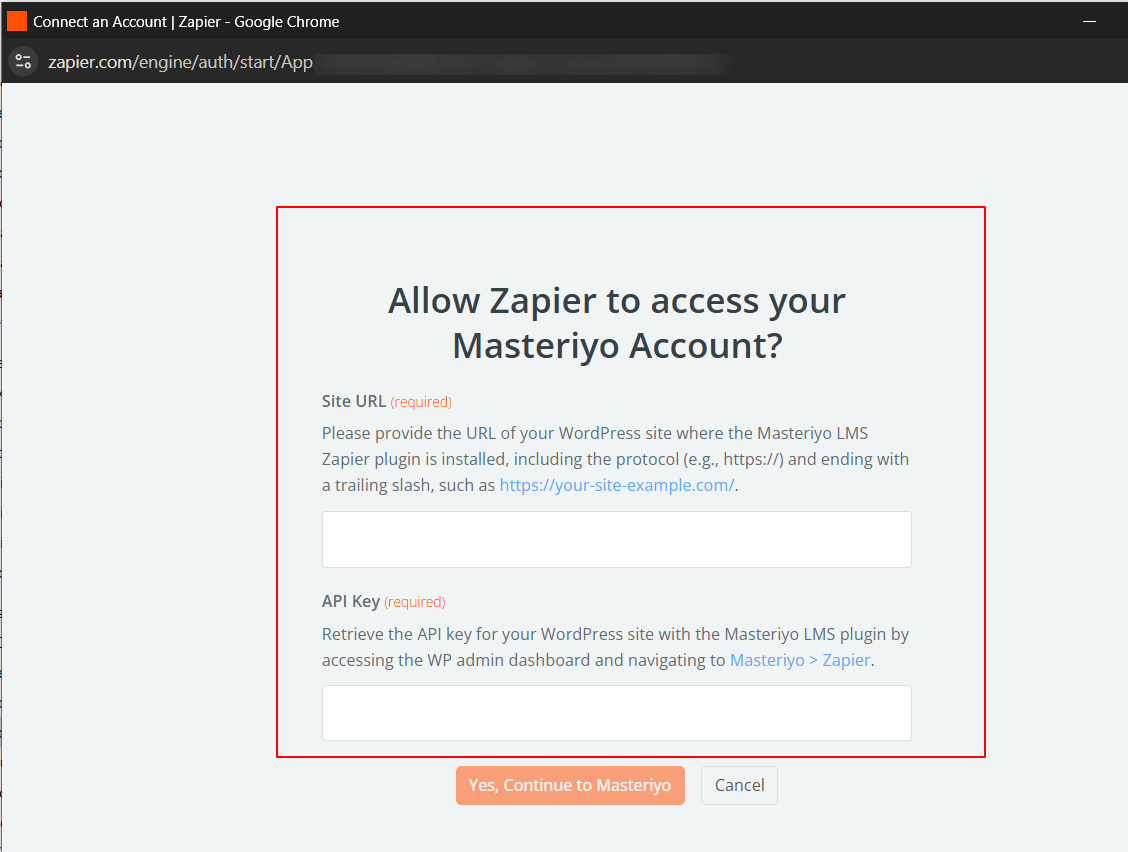
Now, you'll get a new interface asking for your site URL and the API key.
-
Go back to your WordPress website, and navigate to Masteriyo > Zapier.
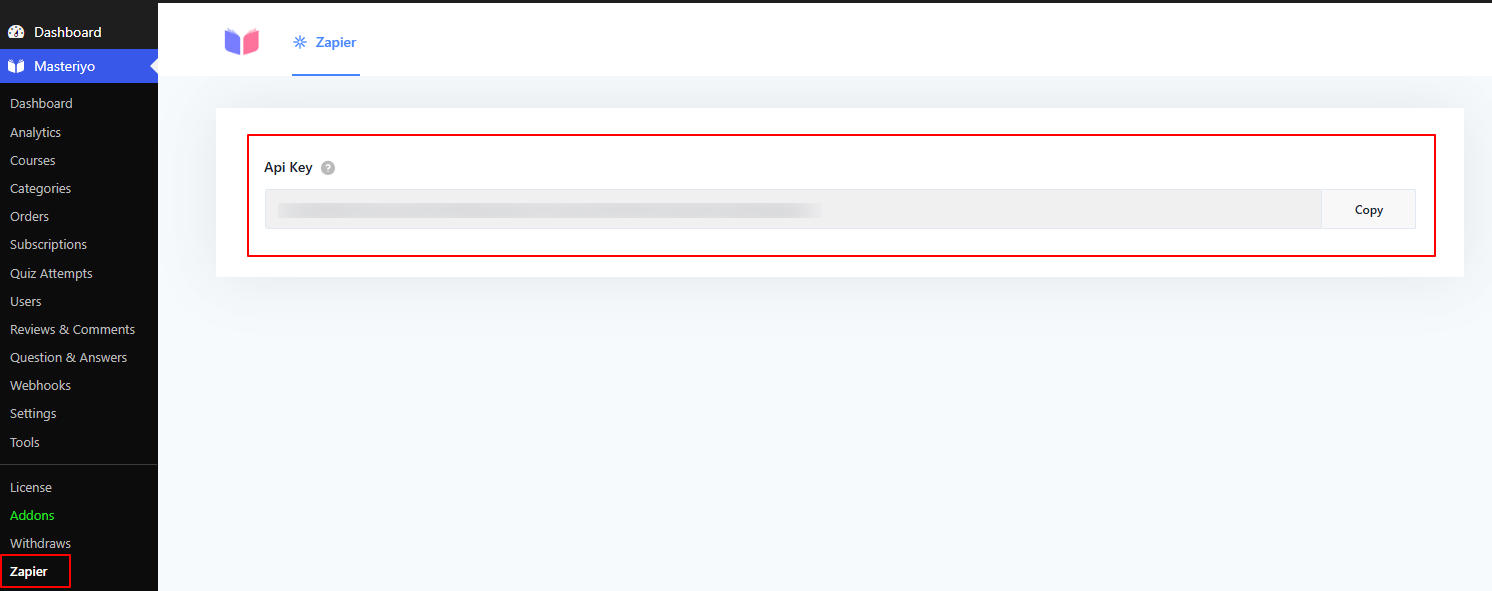
Here, you'll see the API key.
- Copy and paste the key and hit Yes, Continue to Masteriyo.
- Click on the Continue button to proceed further. It'll now provide you with the option to test the trigger to confirm your trigger. Test to confirm the trigger. If you see any records, it confirms that the trigger has been set.
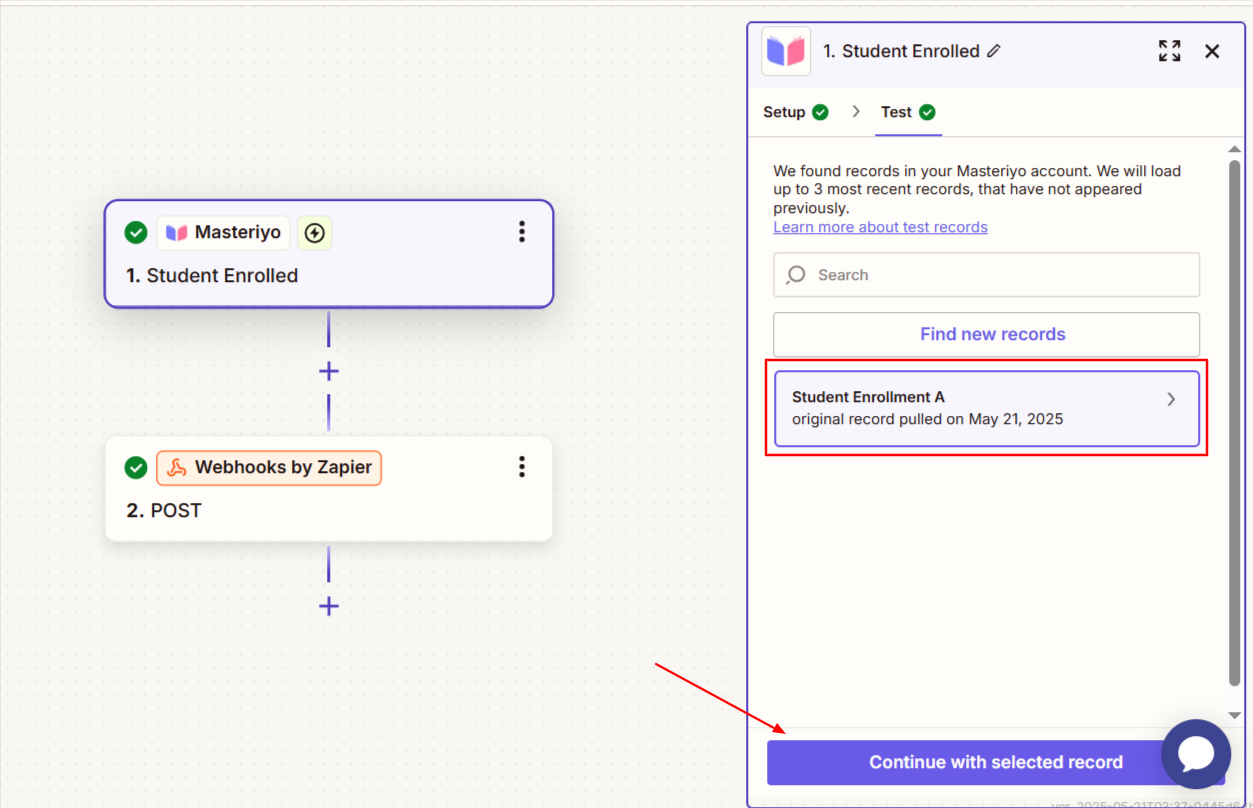
Once you see the record, you can click on Continue with selected record.
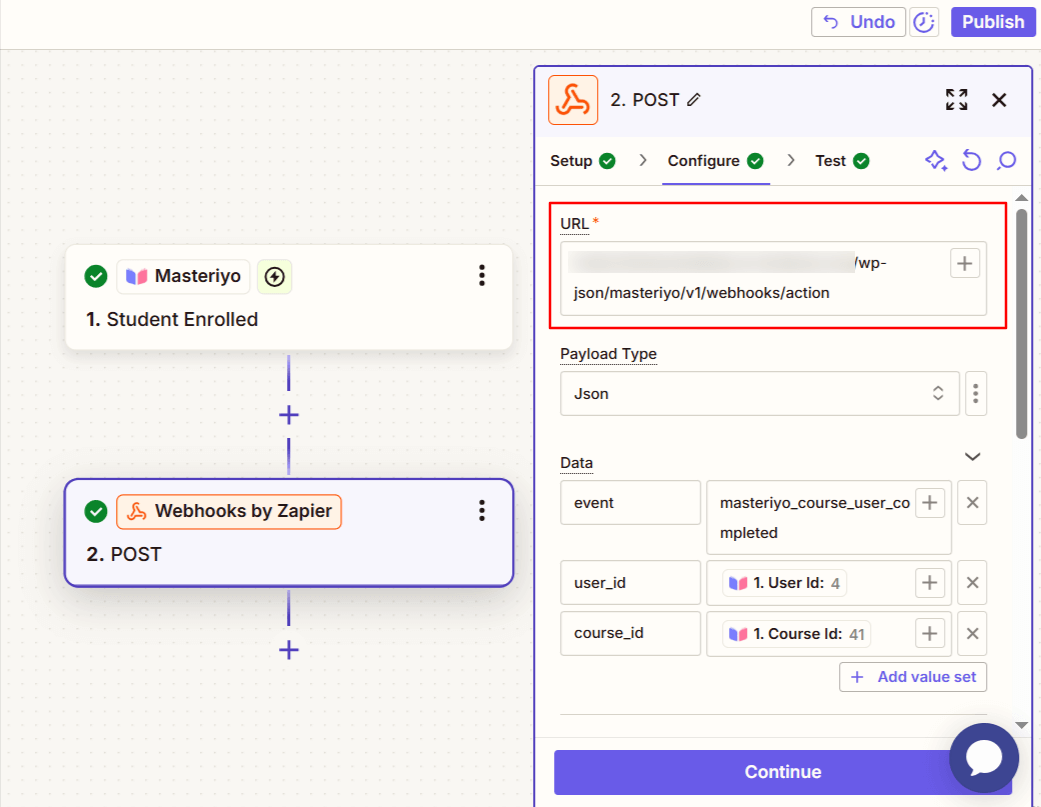
Using Zapier to Send Action Webhooks to Masteriyo
- Click on Action and search for "Webhooks by Zapier" as your action app.
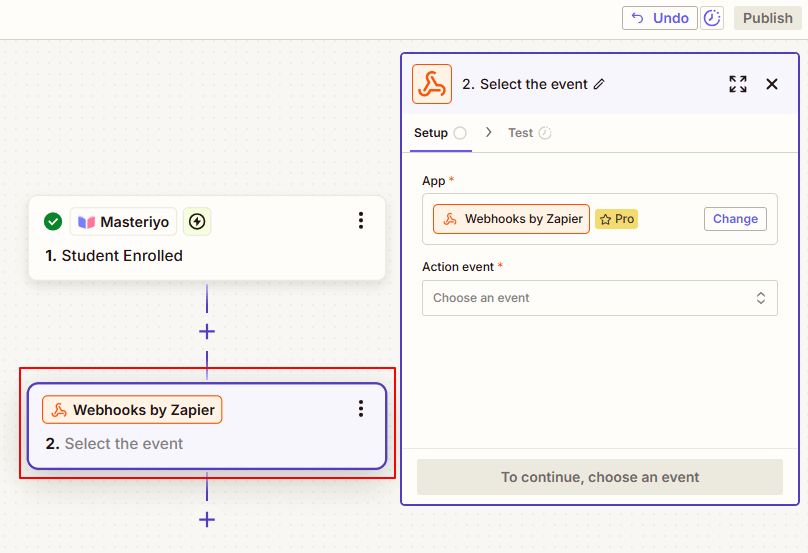
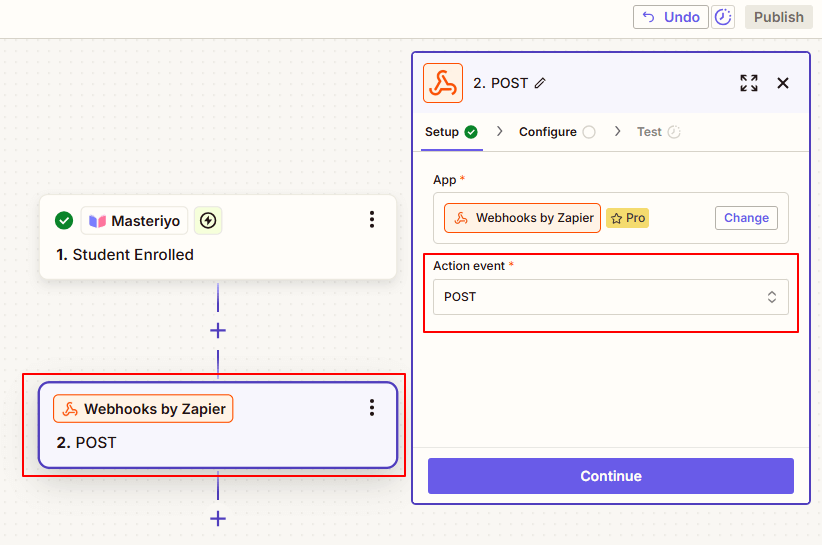
- From the dropdown of Action event, select "POST" as the event and click on Continue.
- Configure the webhook:
Example: URL: https://your-site.com/wp-json/masteriyo/v1/webhooks/action
Payload Type: JSON
Data:- event:
masteriyo_course_user_completed - user_id:
[user ID number] - course_id:
[course ID number]
- event:
Headers:
X-WP-Webhook-Token: [your-webhook-token]
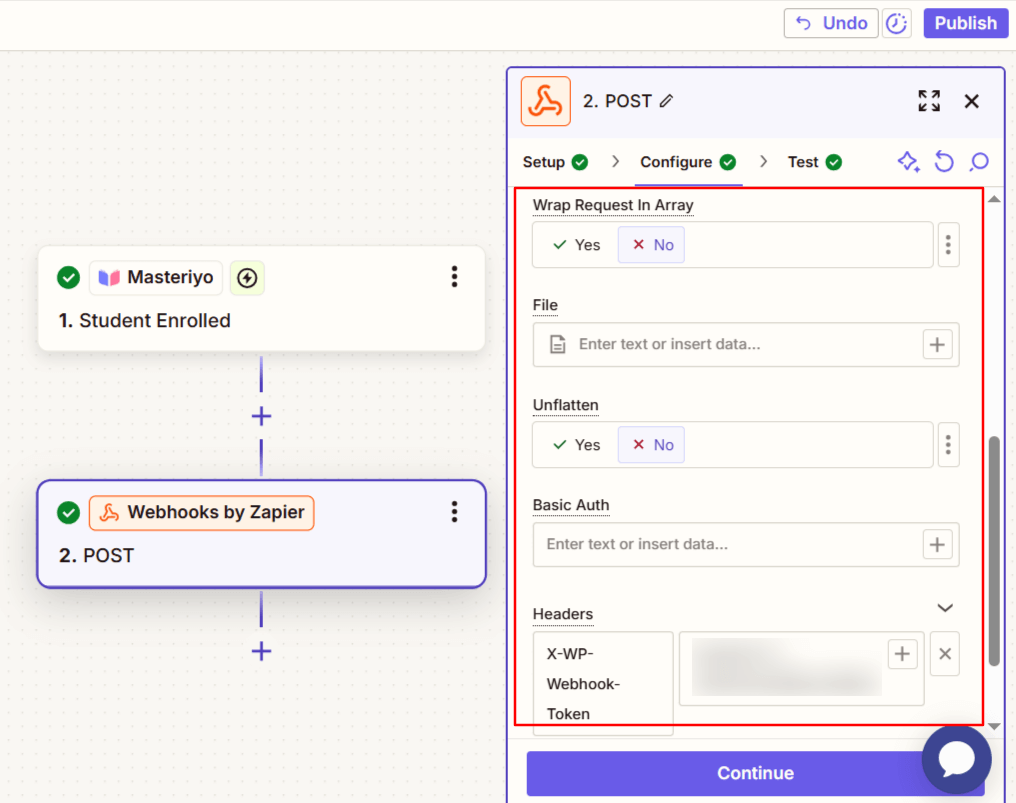
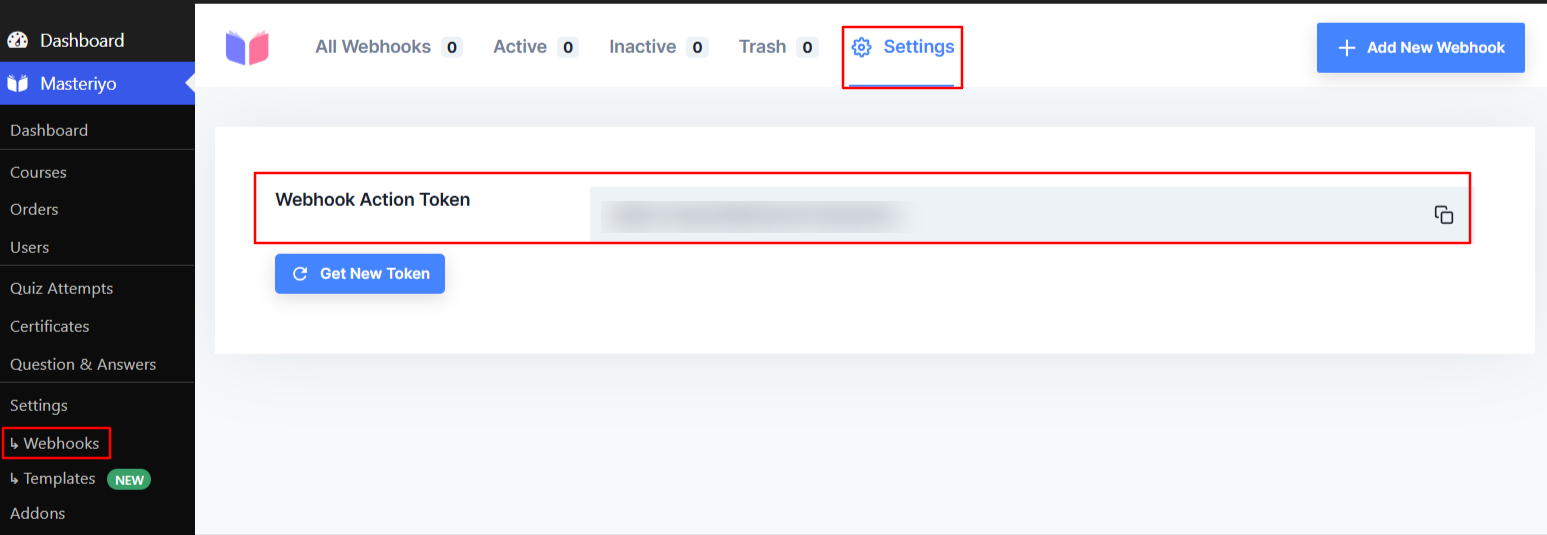
You can find the Webhook token from your WordPress dashboard. So, navigate to Webhook and click on the settings icon. Now, you'll see the webhook token in the side interface.
Copy this token and paste under Headers of the Zap you're currently creating.
-
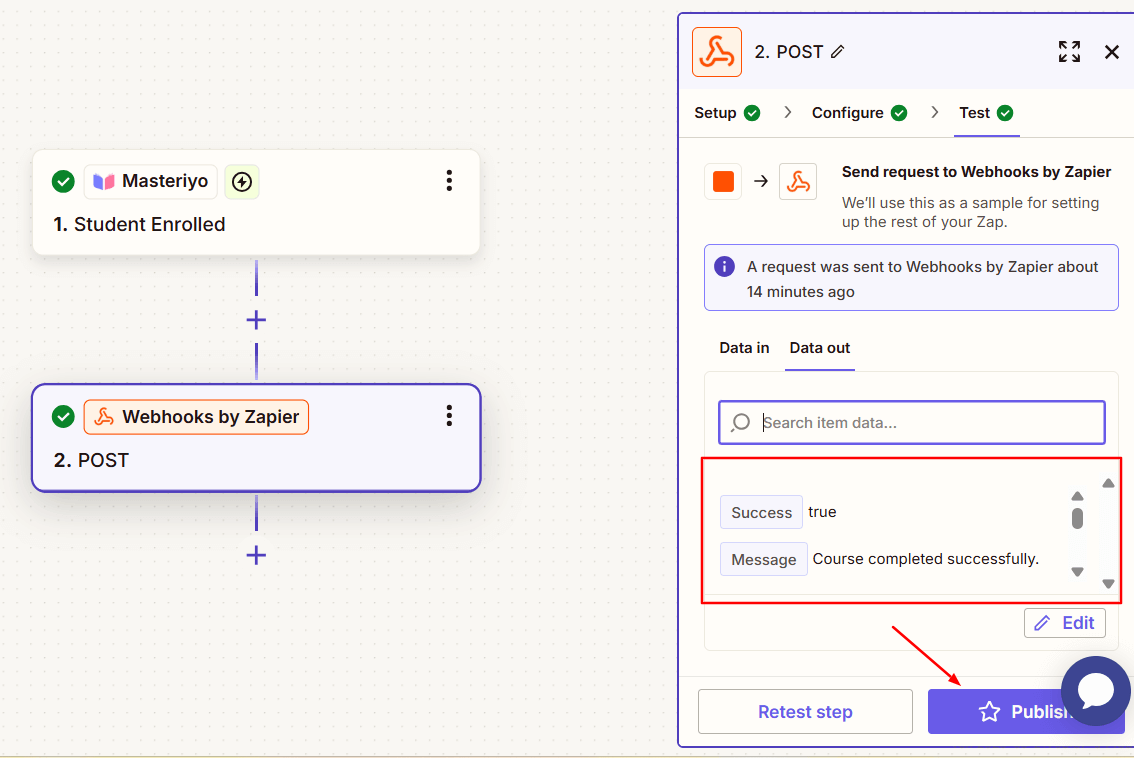
Click on Continue to test the Zap.
-
Under the Data out, you can see the relevant data.
This means you've successfully triggered webhooks with Zapier and sent the action to Masteriyo. Now, click on Publish to publish the zap.
Now, whenever a student is enrolled in the course, the webhook will mark the course as completed.
In this documentation, we used Student Enrolled as the trigger that leads to the action of Course Completion. Similarly, you can use other Triggers and set other Action.
Was this article helpful to you?
Give us Rating
Last edited on May 13, 2026.
Edit this page