Complete Course Creation
A quick guide on creating a course with sections and lessons.
This guide walks you through every step of building a professional WordPress course from initial setup to publication using Masteriyo LMS. From basic course information to advanced features like content dripping and enrollment management, discover how to leverage Masteriyo's full potential for your e-learning success.
Accessing Course Creation Interface
To access the crourse creation interface on your WordPress website:
- Navigate to Masteriyo > Courses and click Add New Course.
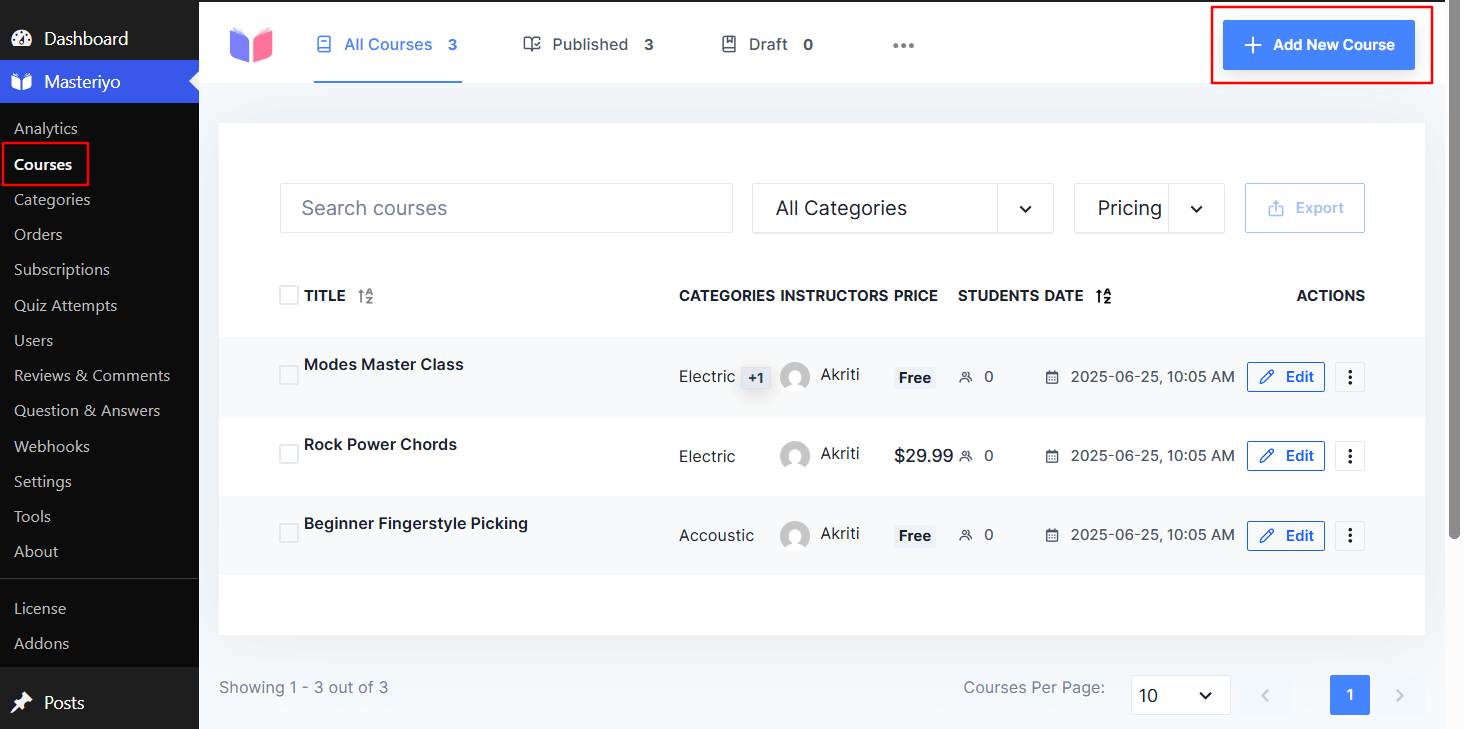
- A new course builder interface will appear.
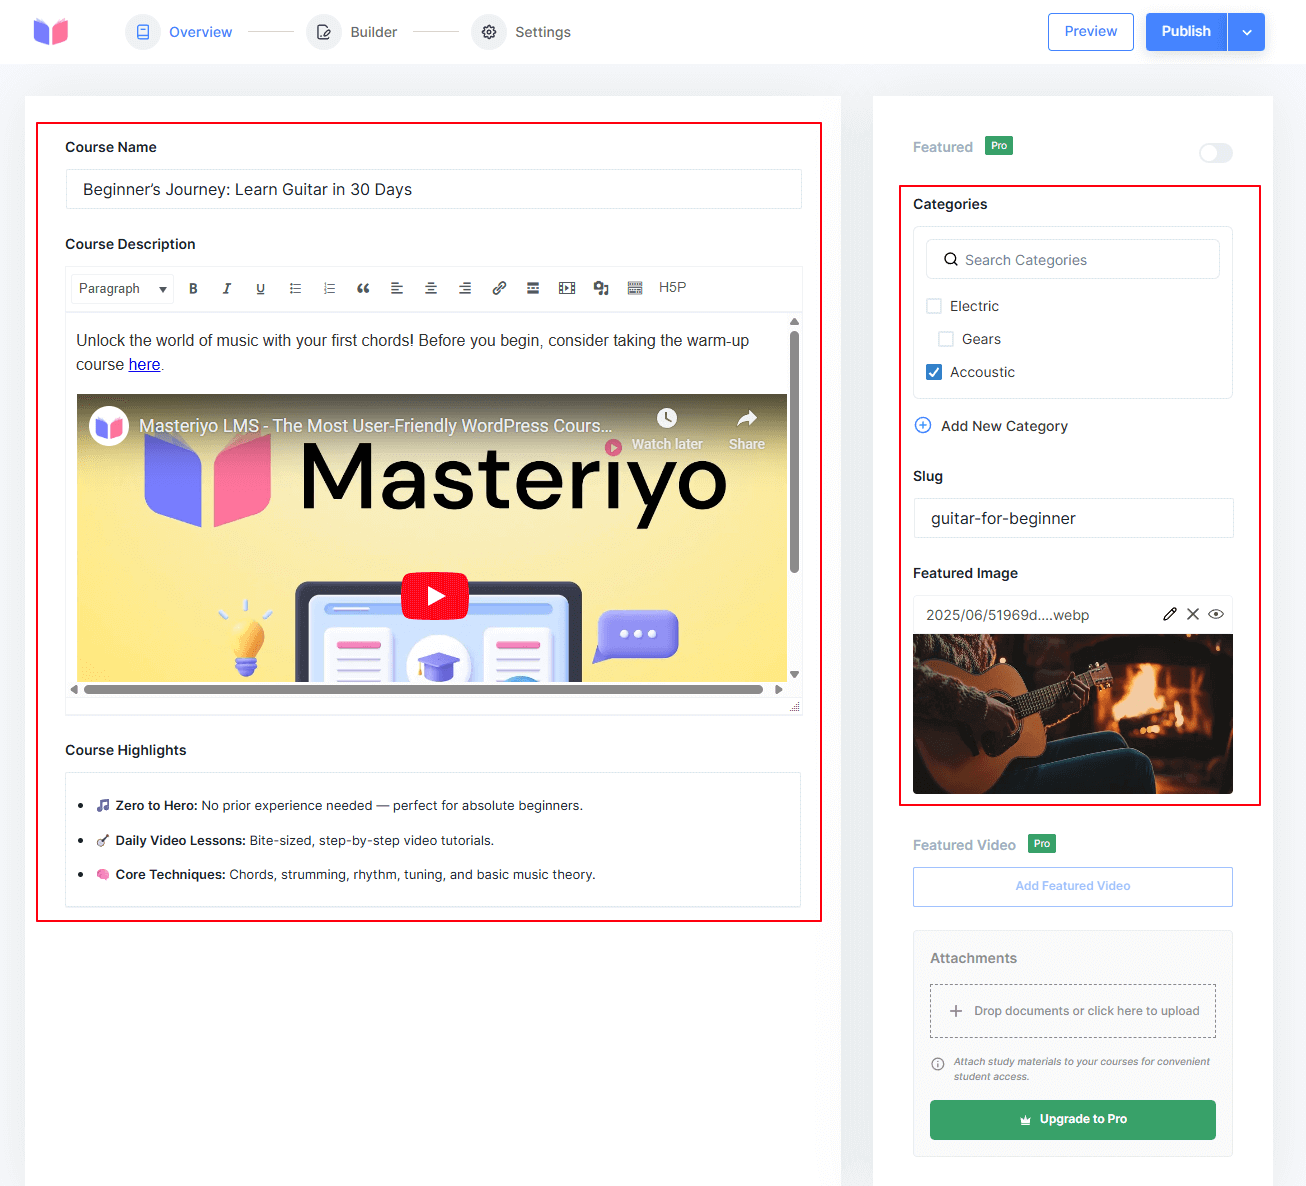
Basic Course Setup
Let's now setup course with required information:
- In the Course Name, enter a suitable name for your course.
- Add a short course description in the Course Description editor. You can also style the description and add links and media in the description editor.
- Next, enter the main features of the course in the Course Highlights box. You can enter the main highlighted features of the course in bullet points. Course highlights will be shown on the course listing page.
- On the right side of the interface, you can add Categories. You can select a category from the dropdown if you already have a category. If not, you can create a new one by clicking on Add New Category.
- Now, add the slug for your course, which is the course URL.
- Click Add Featured Image to add an image for the course.
Premium Features on Course Builder Pro
If you have Masteriyo Pro, you can set the course as a featured course and add a featured video.
- Featured: Enabling the Featured toggle button helps you to highlight the course from all your courses.
- Featured Video: Replace the feature image with the Video on your course pages.

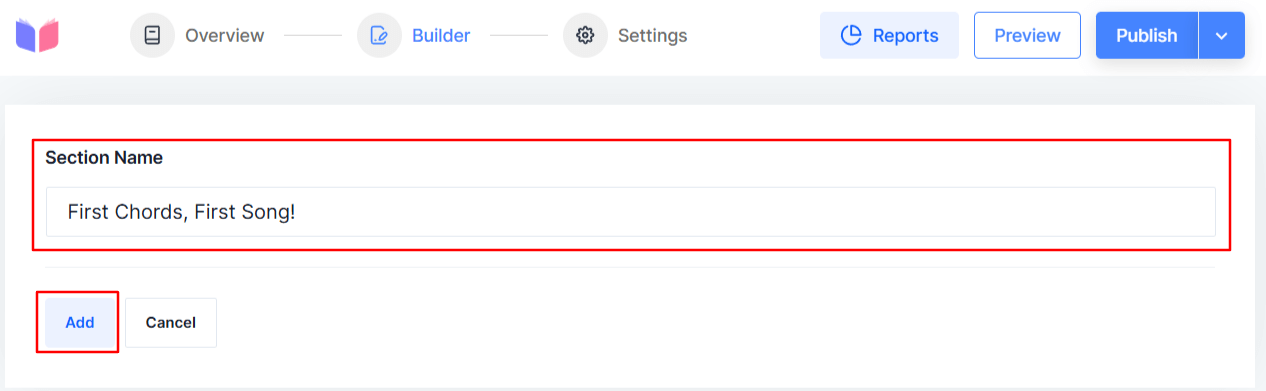
Course Content Creation
Each course can be divided into Sections. Sections are a group of Lessons, Quizzes, Assignments, and so on. Grouping them into different sections is an excellent way to make a course easier to navigate and give your student a quick overview.
- Navigate to Builder tab and click on Add New Section button.

- Give the name to the section in Section Name field and Click Add.
Adding Course Content
Once you add a new section, you'll see the Add New Content link, from where you can add Text Lessons, Video Lessons, Live Streams, Quizzes, Google Meet, Zoom Meetings, and Assignments.
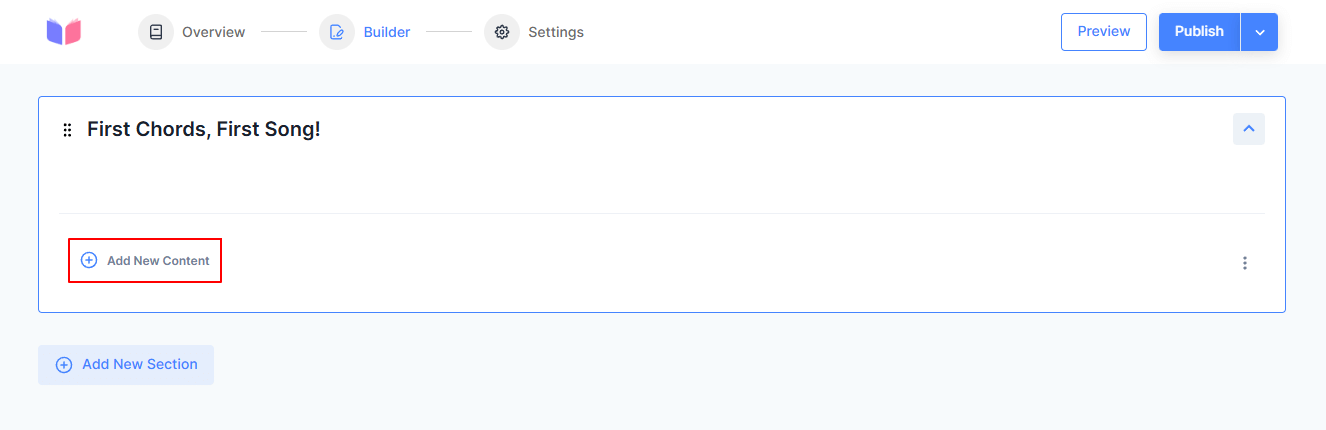
Now, select the content type based on your preference.
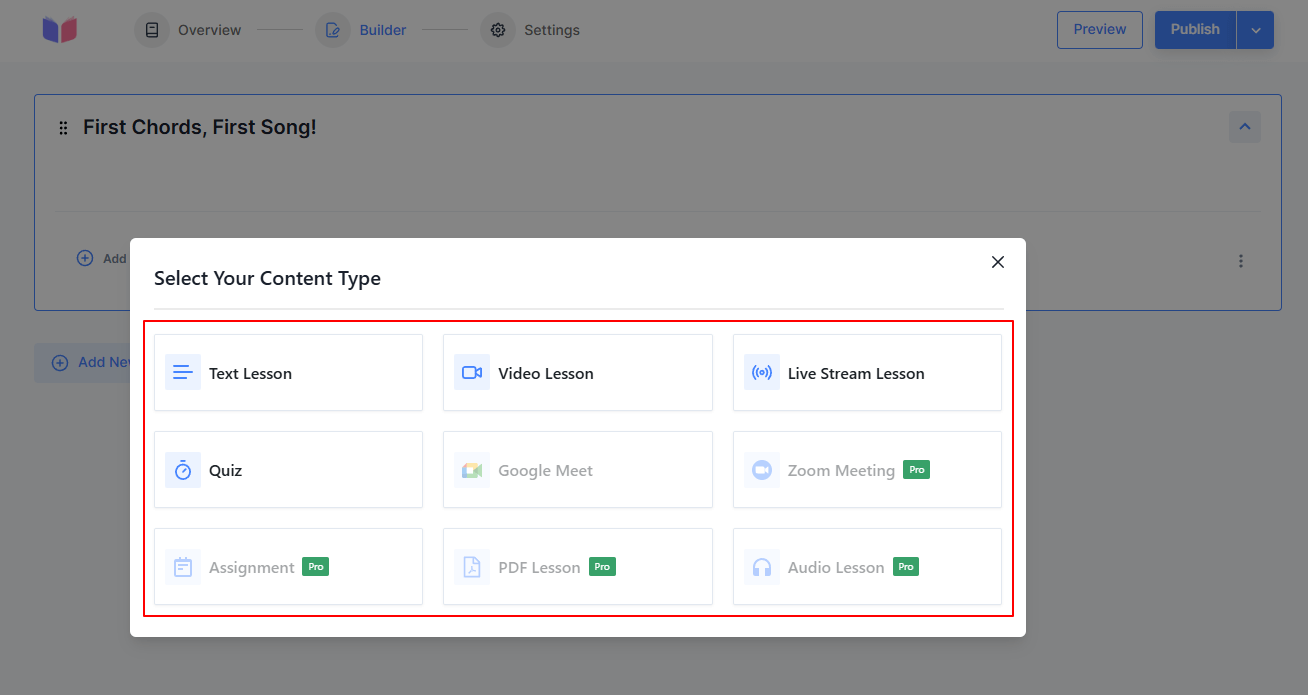
-
Text Lesson - A text-based learning module where educators can share detailed course content, including formatted text, links, and resources. Perfect for self-paced learning in your LMS platform. Learn how to create engaging text content with our text lesson creation guide.
-
Video Lesson - Deliver engaging educational content through high-quality video lessons. Ideal for visual learners and designed to enhance course interactivity on your LMS. Learn how to add Video Lessons from our detailed guide.
-
Live Stream - Host real-time classes with live streaming. Enable interaction between instructors and students for dynamic, collaborative learning experiences. Here's how to add Live Stream.
-
Quiz - Evaluate students’ understanding with customizable quizzes. Include multiple-choice, true/false, and other question types for effective learning assessments—master quiz creation with our comprehensive advanced quiz creation walkthrough.
-
Google Meet - Integrate Google Meet directly into your LMS for seamless virtual classroom sessions. You can easily schedule and host secure video meetings with your students. Set up video conferencing with our Google Meet integration guide.
-
Zoom Meeting [Pro] - Conduct live virtual classes using Zoom integration. Enhance online learning with video conferencing, screen sharing, and interactive features. Configure professional meetings using our Zoom integration tutorial.
-
Assignment [Pro] - Enable learners to submit assignments directly through the LMS. Track submissions, provide feedback, and ensure a smooth evaluation process. Streamline assignment workflows with our assignment creation guide.
-
PDF Lesson [Pro] - Share downloadable documents, worksheets, guides, and reference materials with your students. Perfect for providing supplementary reading materials, handouts, templates, or detailed study guides that learners can access offline and reference throughout the course. Learn document sharing techniques in our PDF lesson setup guide.
-
Audio Lesson [Pro] - Deliver educational content through high-quality audio recordings. Ideal for podcasts, lectures, interviews, language learning, meditation sessions, or any content where students prefer to listen while multitasking or on the go. Create engaging audio content with our audio lesson creation tutorial.
Course Settings
Navigate to Settings tab. Each course you make will have its own individual settings that have the course flow, type: free or pro, and many more features. There are basically three options to set in the individual settings. They are,
- General
- Display
- Pricing
- Content Drip
- Enrollment Expiration [Pro]
General
In this tab, you will find basic course related settings like instructor, difficulty, duration, etc. All these settings are explained briefly as below:
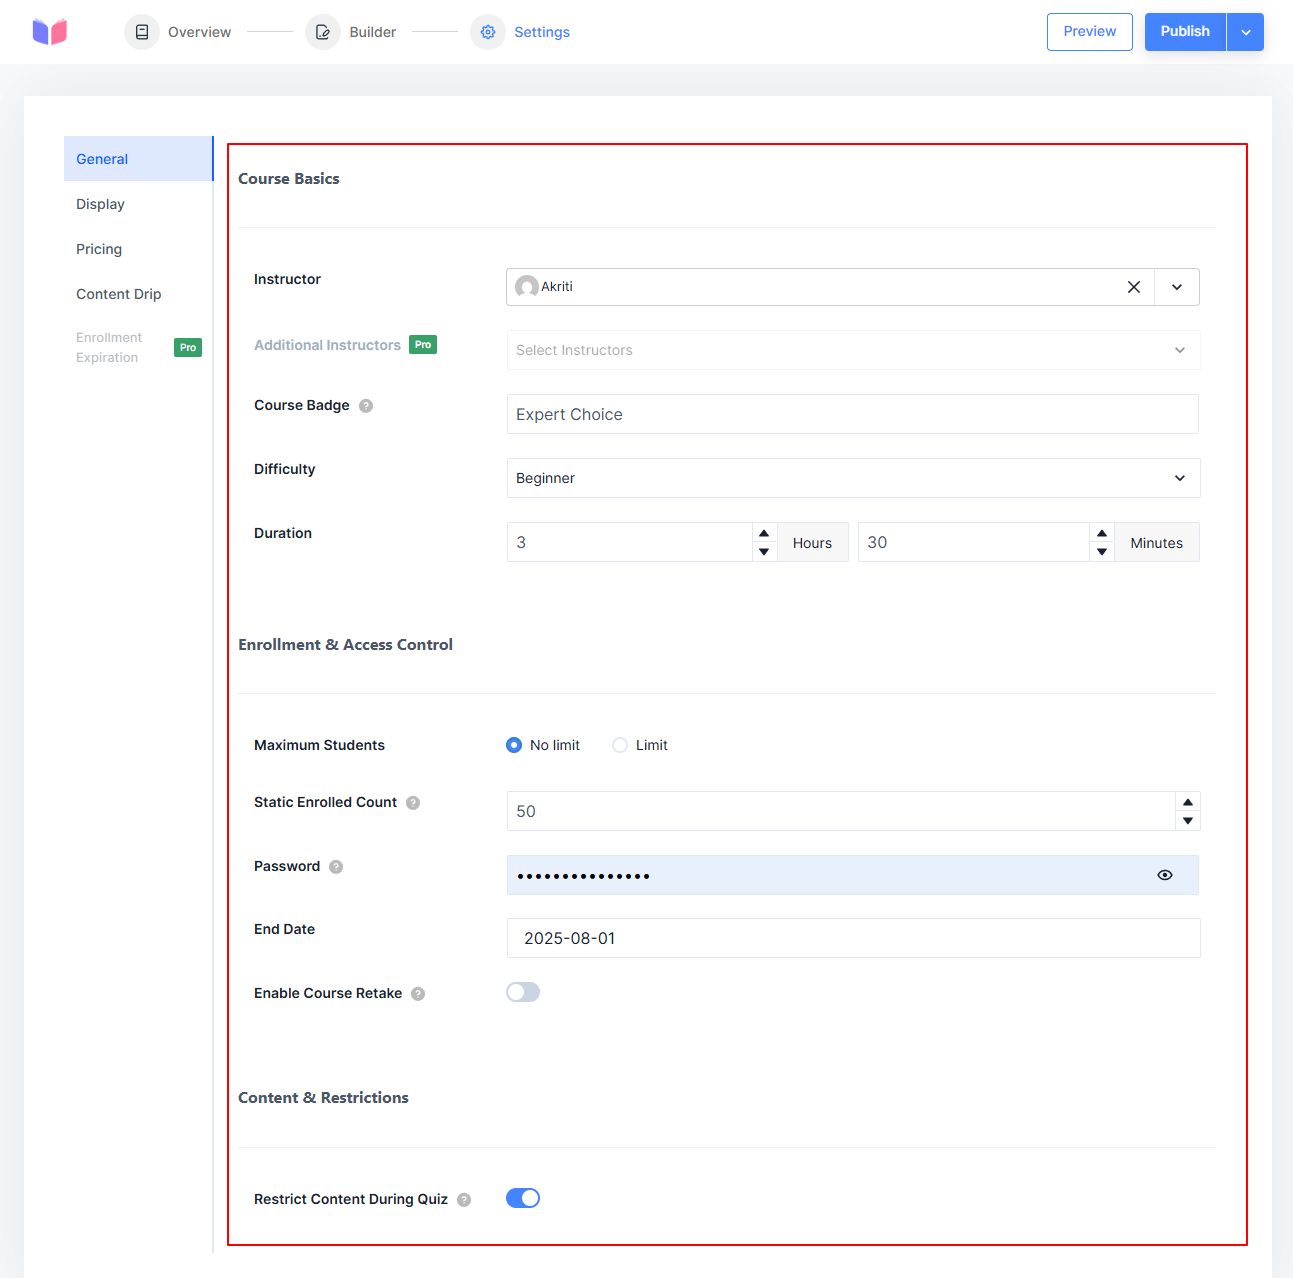
Course Basics
- Instructor - The user who has created the course will be shown here.
- Additional Instructor [Pro} - You can add more than one instructor if the course is prepared by a group of instructor.
- Course Badge - Give badge to your course. Expert choice, and so on.
- Difficulty - Set the difficulty of the course to be Expert, Intermediate, or Beginner as per the course's contents.
- Duration - Set the course duration in hours: min format.
Enrollment & Access Control
- Maximum Students - Set a limit for the students to enroll or make the course available to unlimited students.
- Static Enrolled Count - You can add number of students to your course which will be added to the actual number of students.
- Password - Set a password for the course. The students will have to enter the password to view/enroll.
- End Date - Set a date for when the course ends. Once the date has arrived and passed, the course will then change into Draft.
- Enable Course Retake - Enable this option to allow users to retake the course.
Content & Restrictions
- Restrict Content During Quiz - Enable this option to restrict the course content when a student is doing the Quiz.
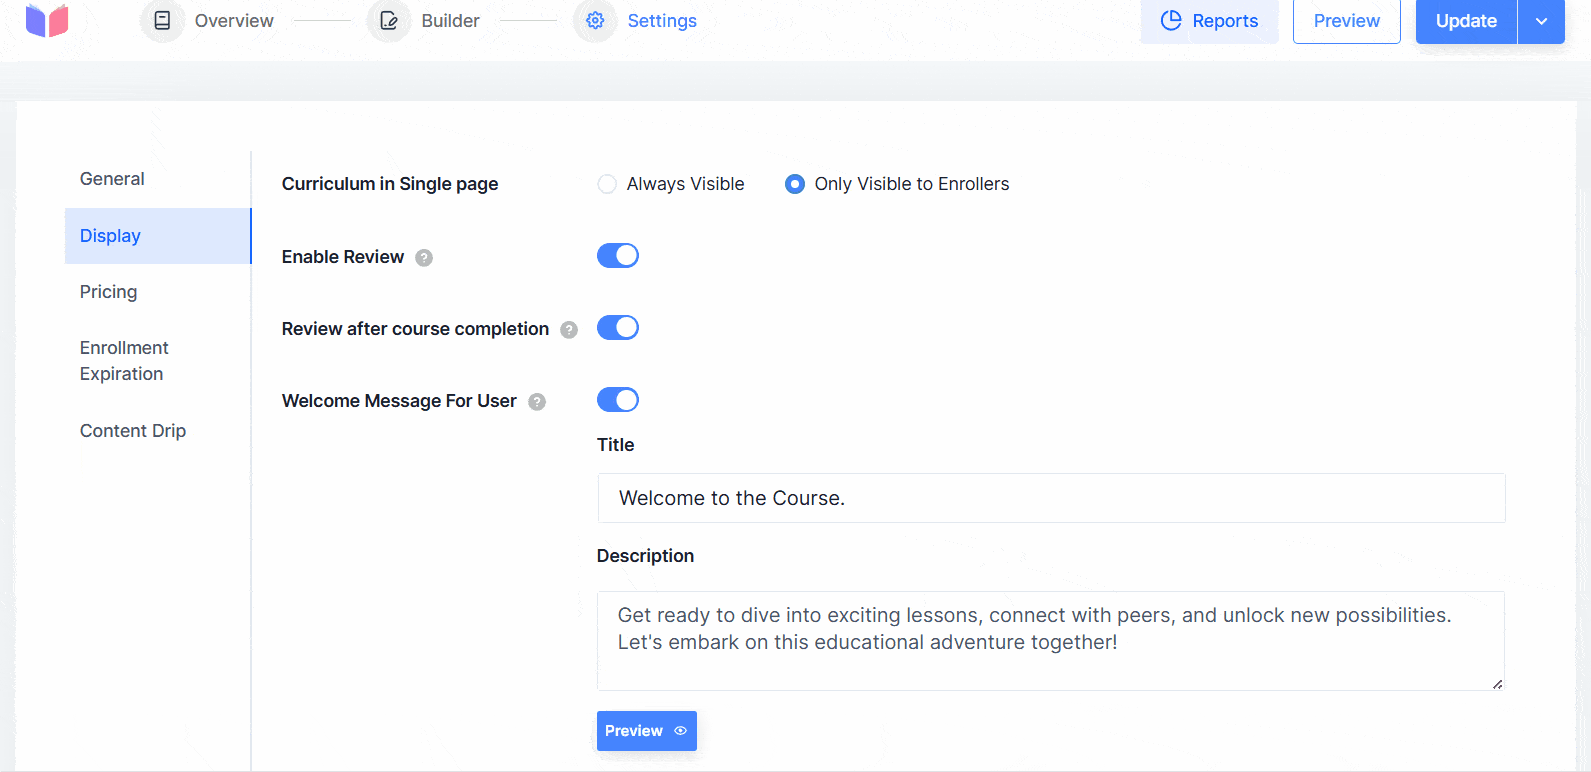
Display
This tab lets you customize how the courses appear.
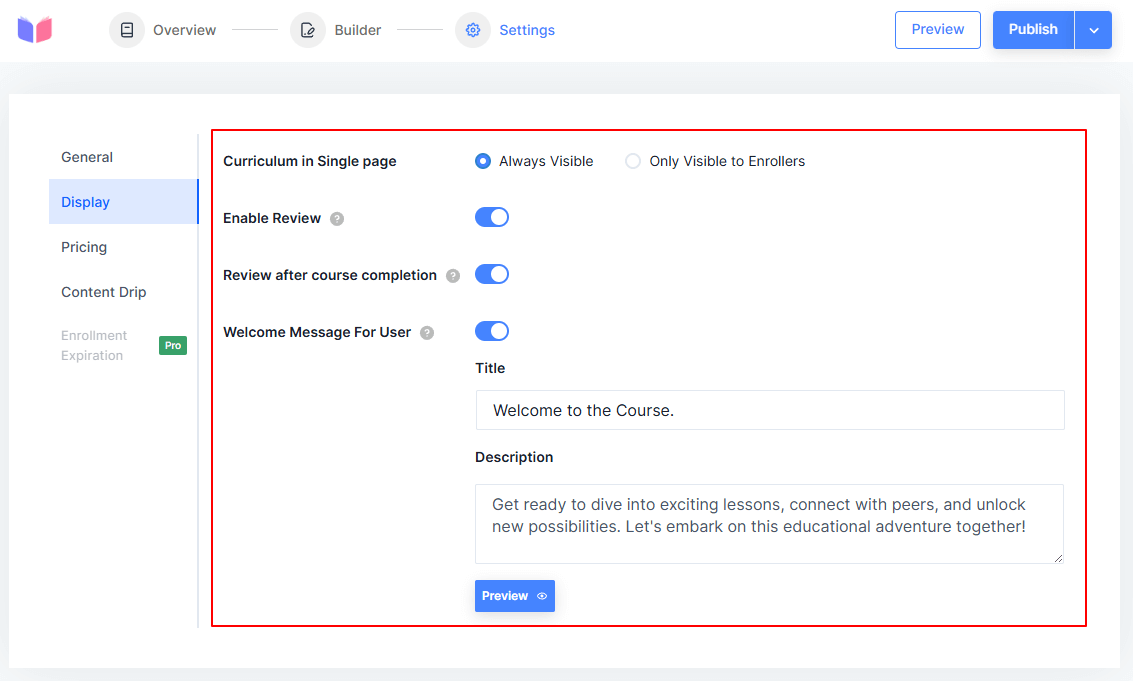
- Curriculum in Single page — Choose whether the curriculum should always be visible to the enrollers or only to them.
- Enable Review - Allows students to leave ratings and comments on your course. When enabled, a review section appears on the course page where enrolled students can share their feedback and rate the course.
- Review after course completion - Let users leave a review after they complete the course.
- Welcome Message For User - Displays a personalized greeting when students first access your course learning page. Add a custom welcome title and description to provide important course information or instructions.
You can also preview the welcome message:
Pricing
From this tab, you can set the course's price. You can either make the course Free or charge for it.
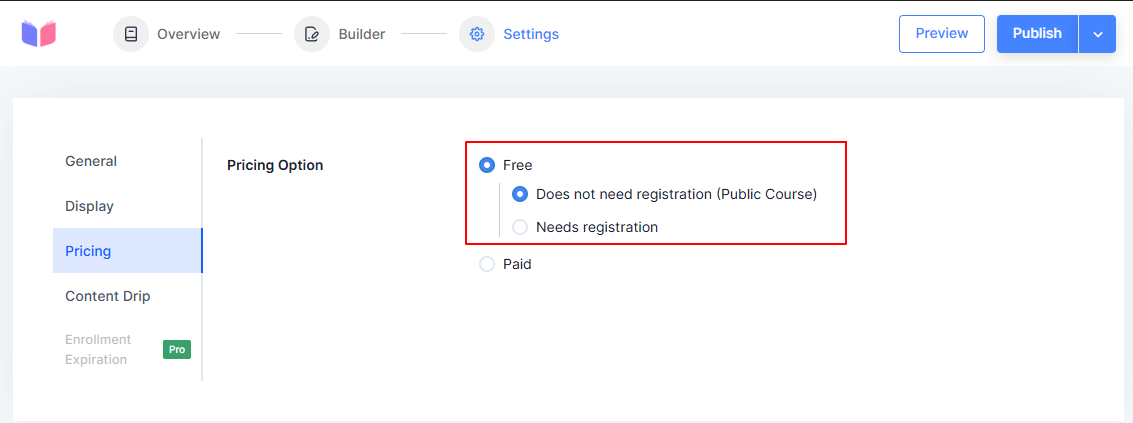
Free
If you decide to make the course free, you will then have two additional options:
- You can either allow the students to enroll in your course without registering
- Or make the registration compulsory.
Paid
For paid pricing as well, you've two options:
-
One Time
Set a one-time fee for the course you have created.
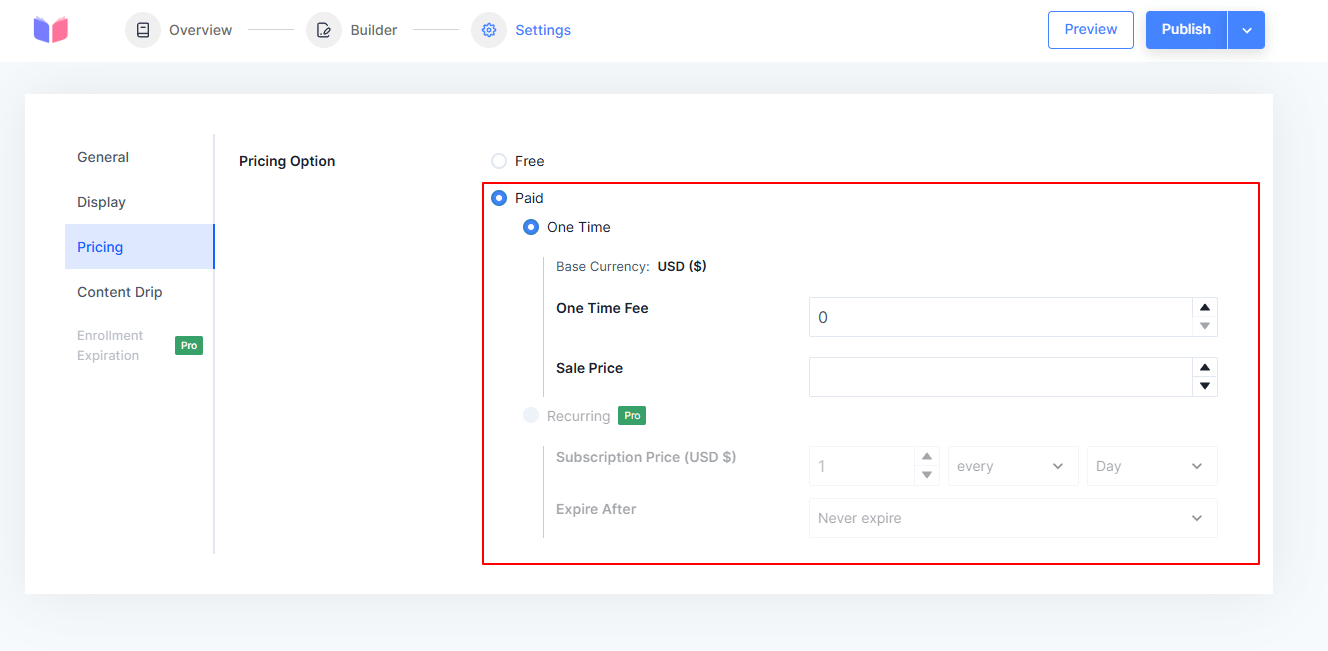
The enrollers must then pay this amount to take the course. You can also add a sale price so that the course will display both the original price and the sale price.
-
Recurring [Pro]
Recurring creates a subscription-based course where students pay repeatedly at set intervals to maintain access.
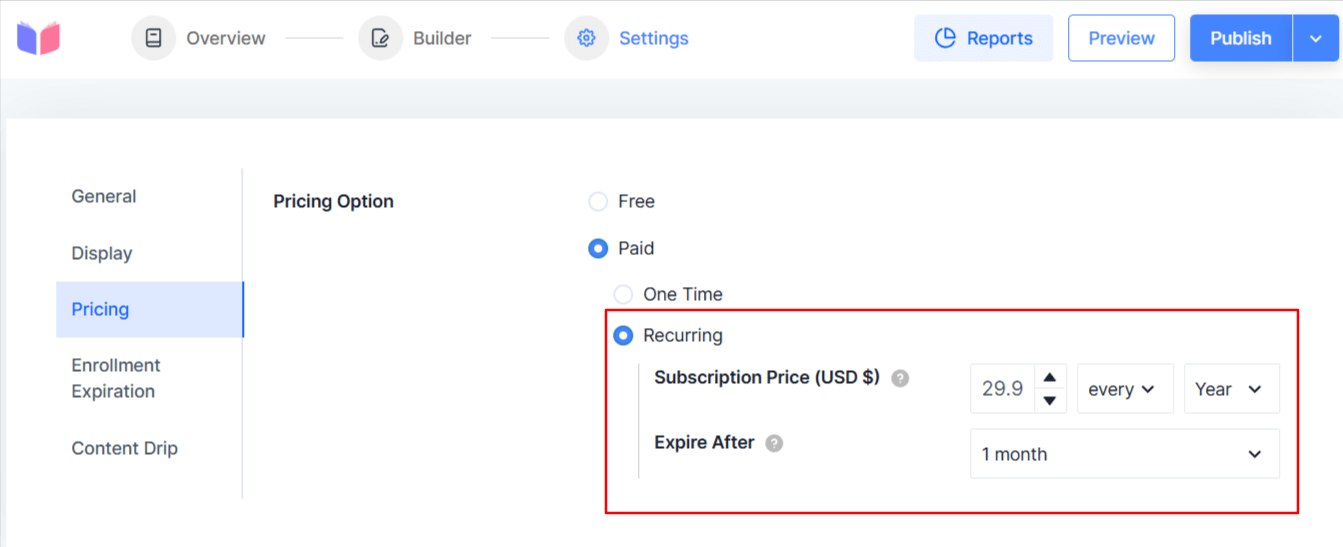
You can set a Subscription Price (how much they pay each billing cycle) and choose the billing frequency (every week, month, or year). The Expire After setting determines when their access ends if they don't renew.
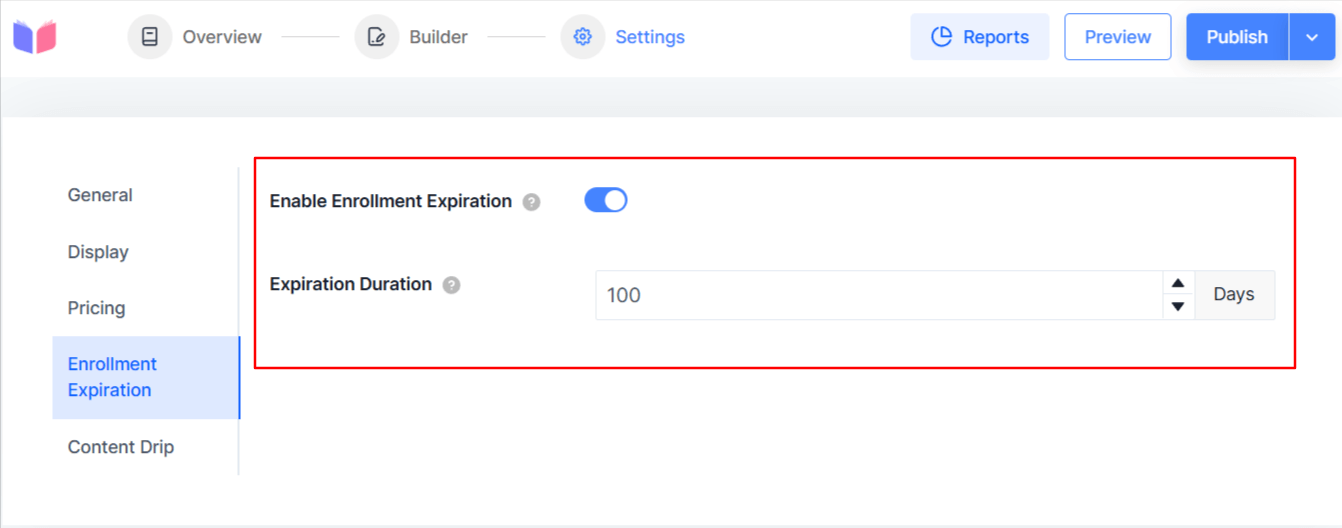
Enrollment Expiration
From here, you can set a deadline for students to complete your course after they enroll. Once enabled, you can specify a time limit in days, and students must finish the course within that timeframe or lose access.
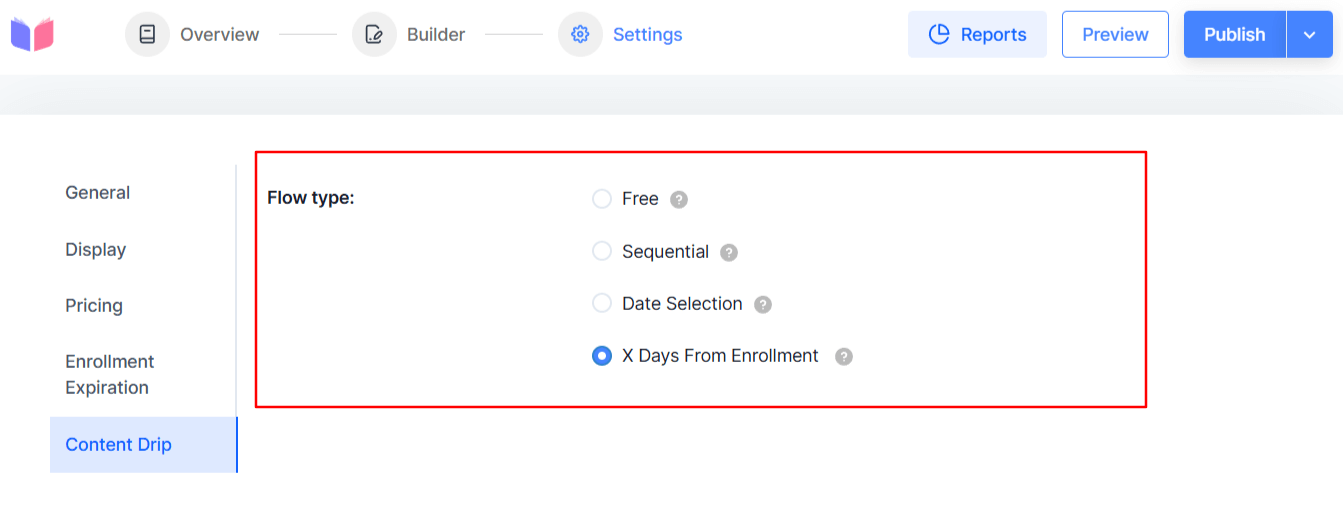
Content Drip
Content Drip controls when course lessons become available to students after enrollment. Instead of releasing all content at once, you can:
- Free: All lessons are available immediately.
- Sequential: Next lesson unlocks only after completing the previous one.
- Date Selection [Pro]: Release lessons on specific dates you choose.
- X Days From Enrollment [Pro]: Lessons unlock automatically after a set number of days from when each student enrolls.
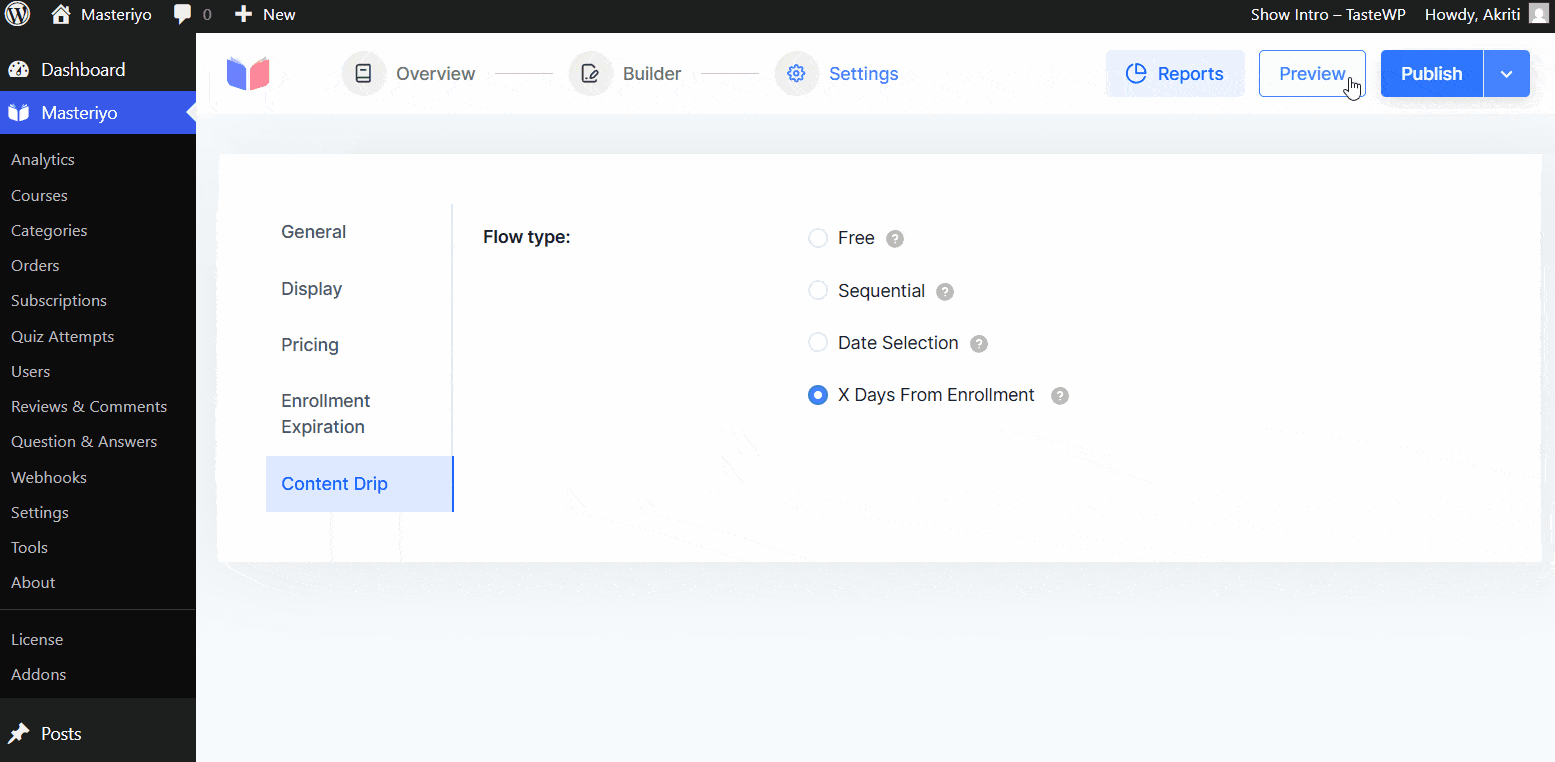
Once you have set up the course's settings per your requirement, hit the Publish button to save the changes. You can also click on the Preview button beside the Publish button to glance at the course you have made and see how it appears to the students.
Note: Here's our detail documentation on Content Drip.
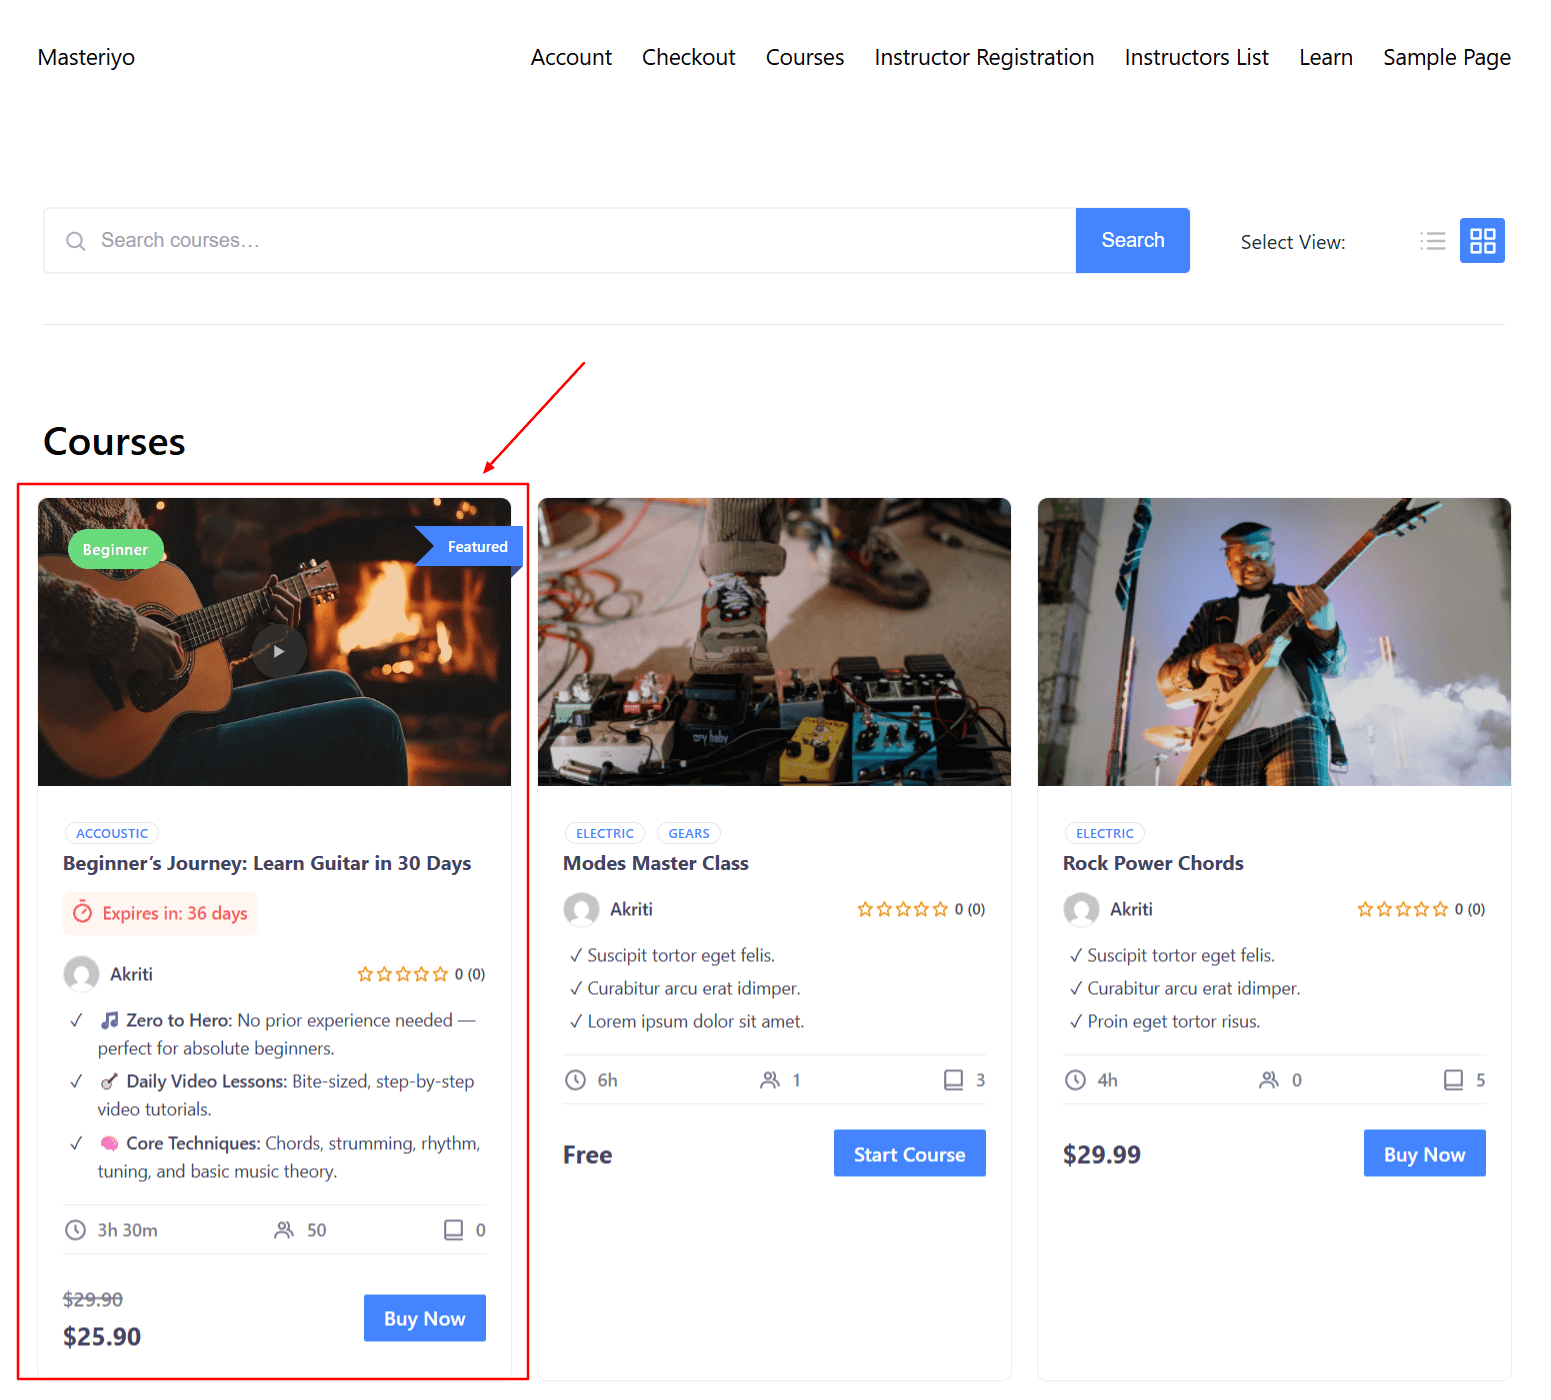
Frontend View for the Course
Here's how your course might appear at the frontend:
Additional Resources
Was this article helpful to you?
Give us Rating
Last edited on May 13, 2026.
Edit this page