Private Course Creation Pro
Learn how to create exclusive private courses in Masteriyo LMS that are only accessible to manually enrolled students.
The Private Course feature in Masteriyo LMS allows you to create exclusive courses only accessible to manually enrolled students. Unlike public classes, these remain hidden from your course catalog and require you to invite students personally.
Prerequisites:
- Masteriyo LMS Pro plan or higher(Plugin version 2.21.0 or above).
- Active installation of Masteriyo LMS.
- Manual Enrollment addon (included with Pro plan).
Create a New Private Course
You have two options for creating private courses: starting fresh or converting an existing course. So, let’s begin by setting up a new course with private access from the start.
- Navigate to Masteriyo > Courses.
- Click Add New Course.
- Fill in your course details (name, description, highlights, etc.)
For a detailed guide, check out the guide on creating a complete course.
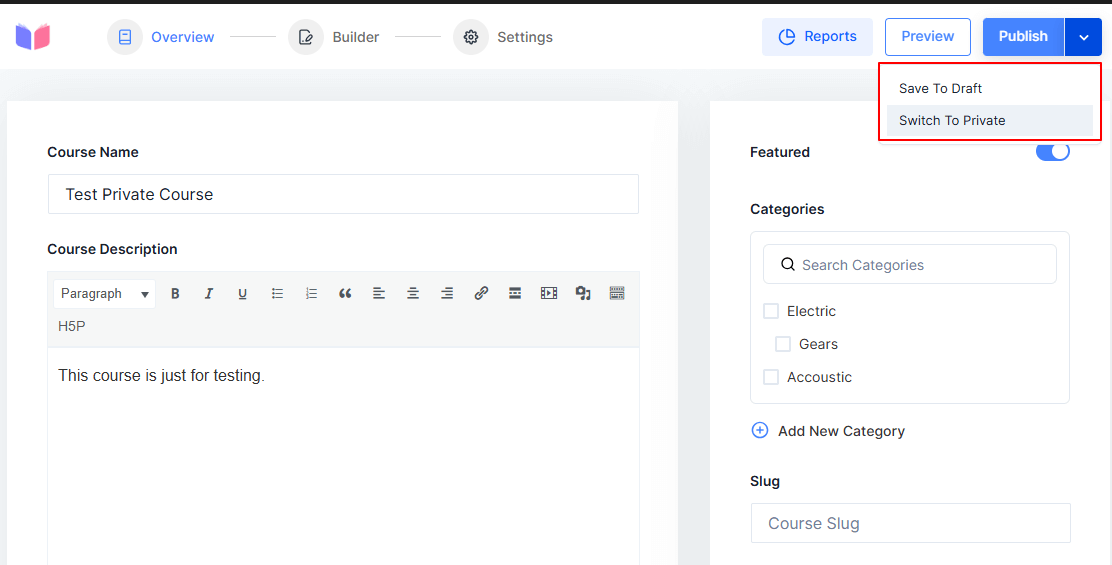
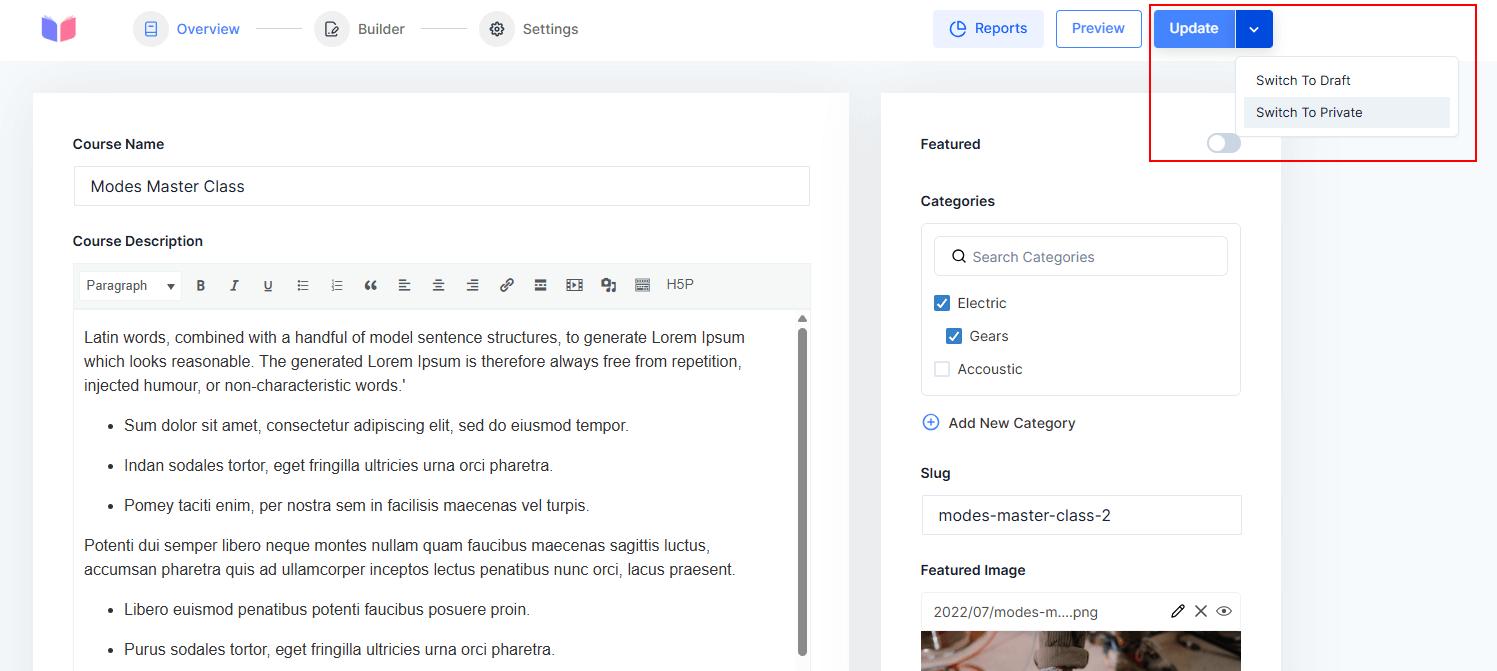
- Click the dropdown arrow next to the Publish button.
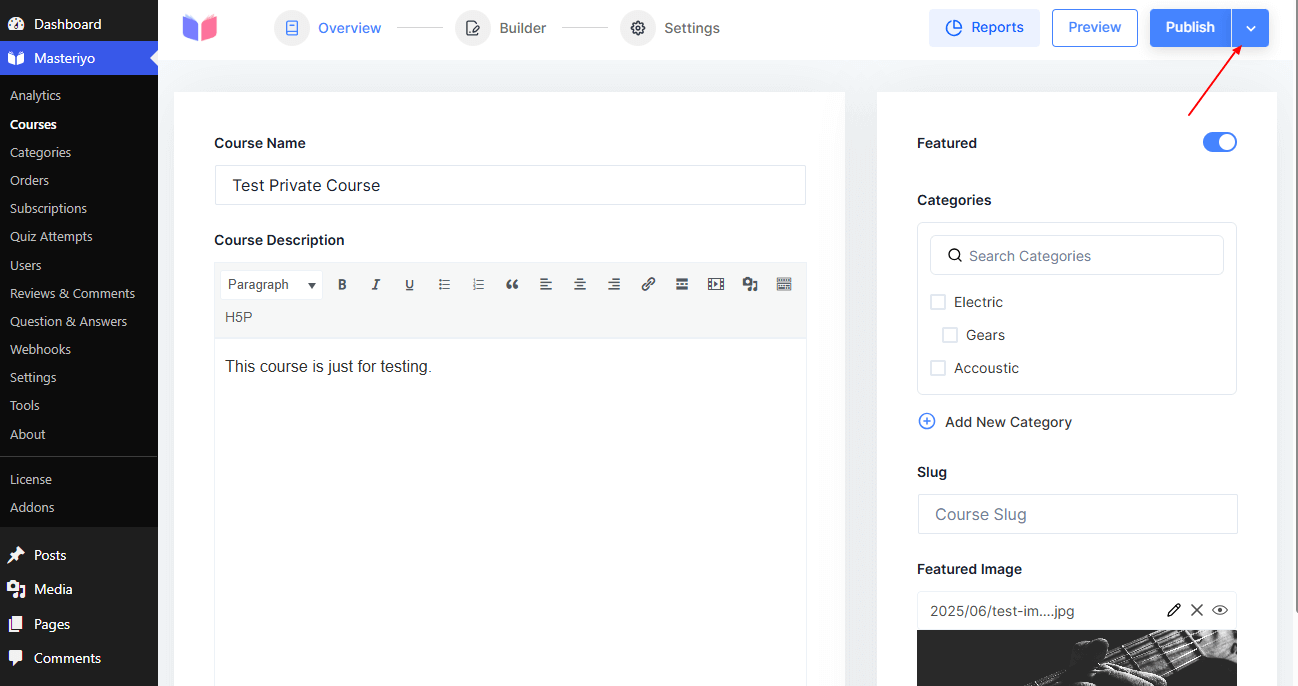
- Select Switch To Private from the options.
That’s it. Now, you can navigate to Course Builder to configure the course with lessons, quizzes, and so on.
Note: Do not click on thePublish for your private course.
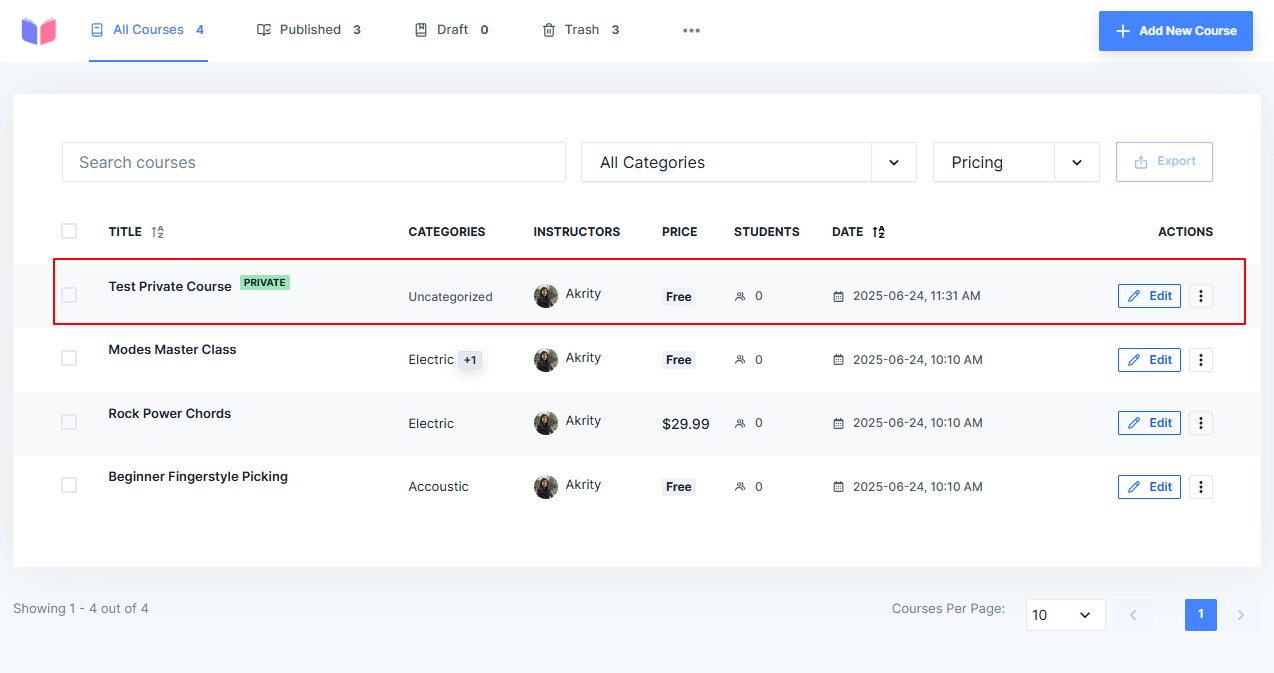
If you navigate back to the Courses list, you can view the private course.
Convert an Existing Course to Private
You can also turn any existing public course into a private one. Follow these steps:
- Go to Masteriyo > Courses.
- Find your course and click Quick Edit.
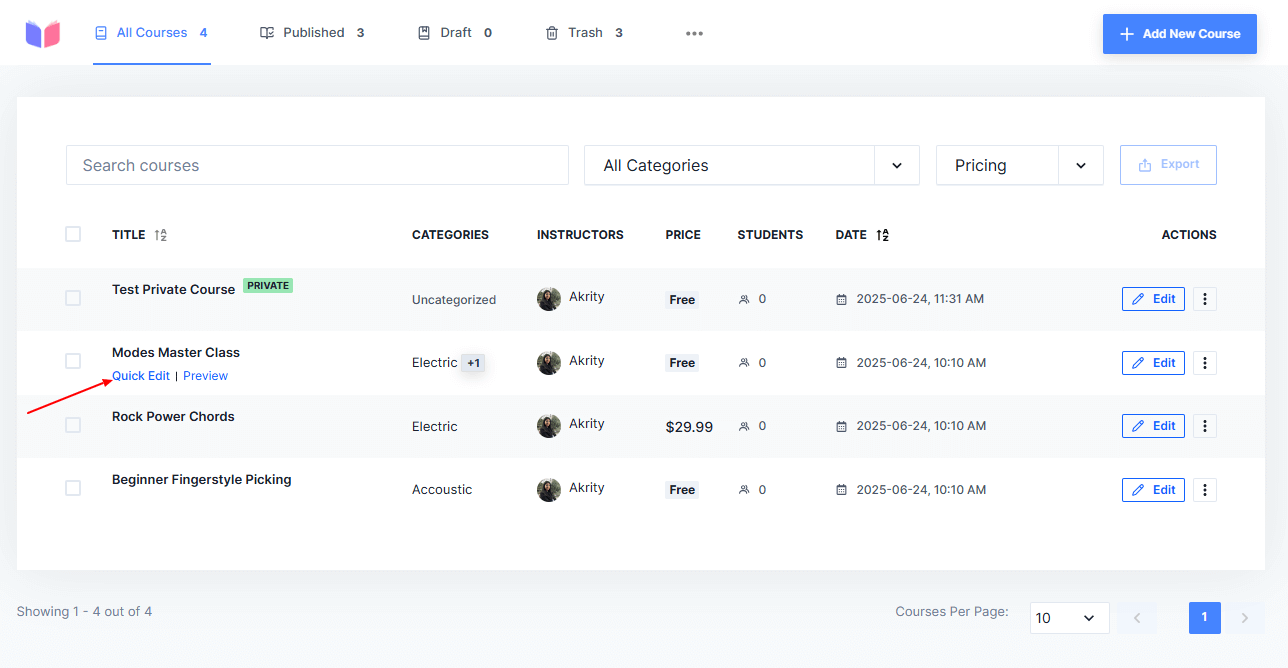
- Under Status, select Private from the dropdown.
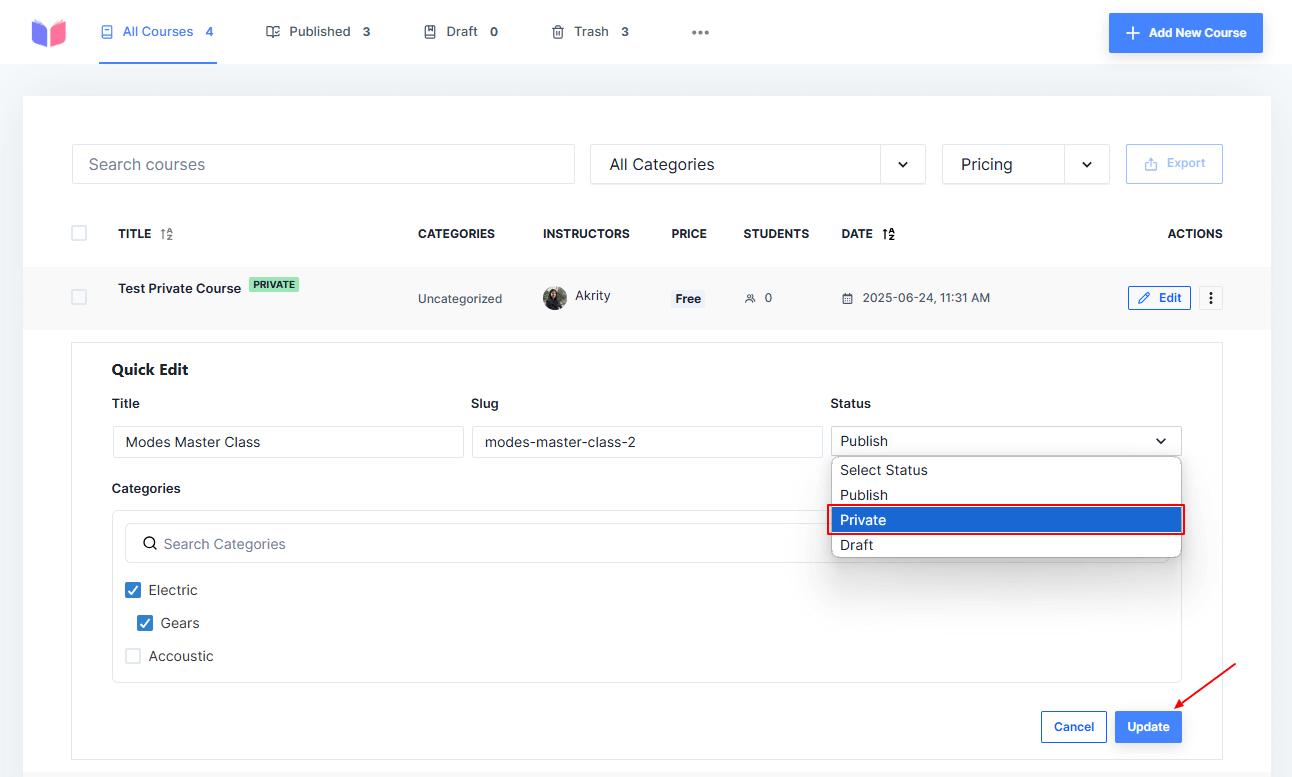
- Click Update to save changes. You can also convert an existing course into private through the Update tab of the course.
Enrolling Students in Private Courses
Since private courses require manual enrollment, you must first set up the enrollment addon.
Enable Manual Enrollment Addon
- Navigate to Masteriyo > Addons and search for Manual Enrollment.
- Toggle the switch to enable the addon.
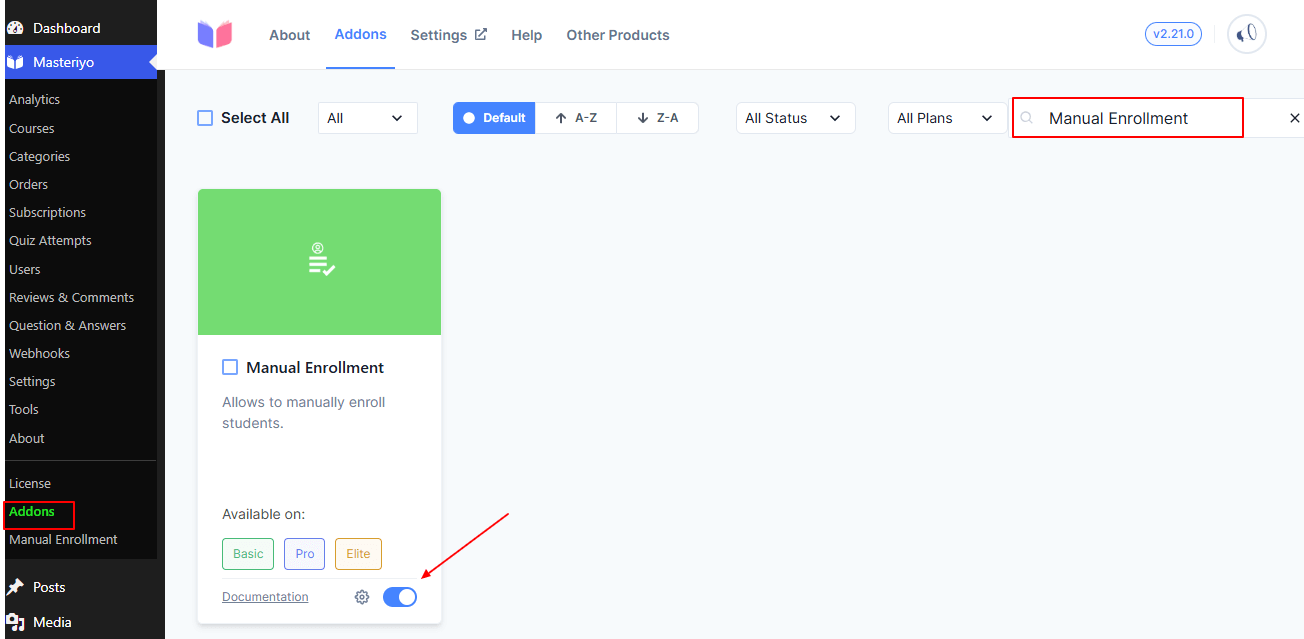
- Refresh your WordPress dashboard to see the Manual Enrollment tab.
Add Students to Private Course
- Go to Masteriyo > Manual Enrollment (appears after refresh).
- Click + New Enrollment.
- Select your private course from the dropdown.
- Choose the student you want to enroll.
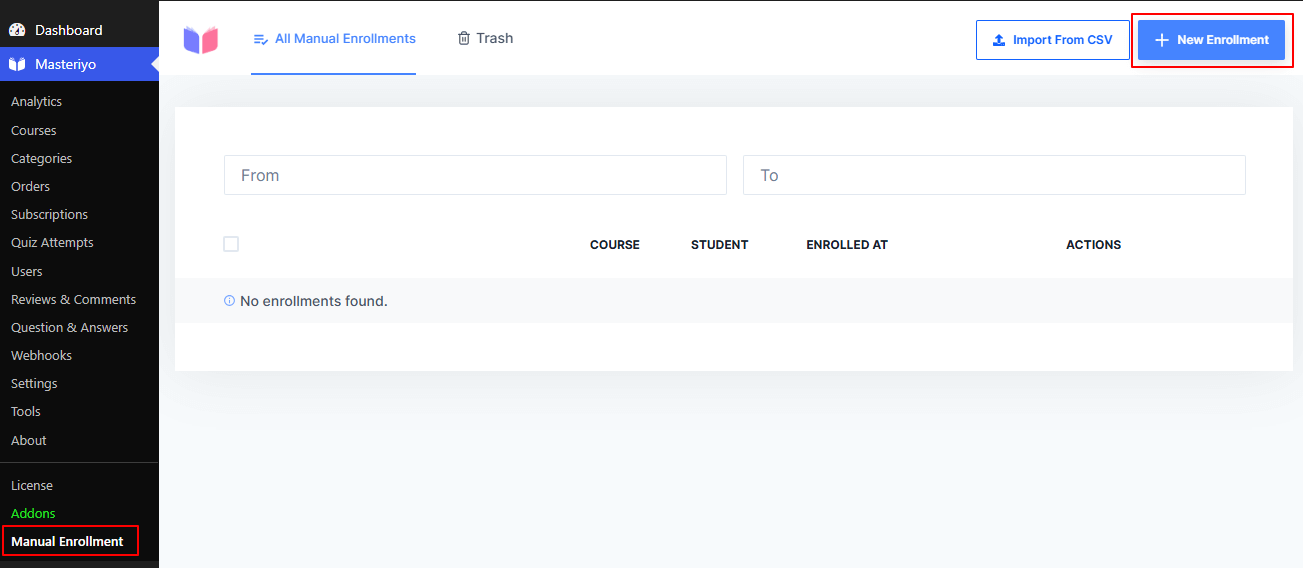
- Click Enroll to complete the process.
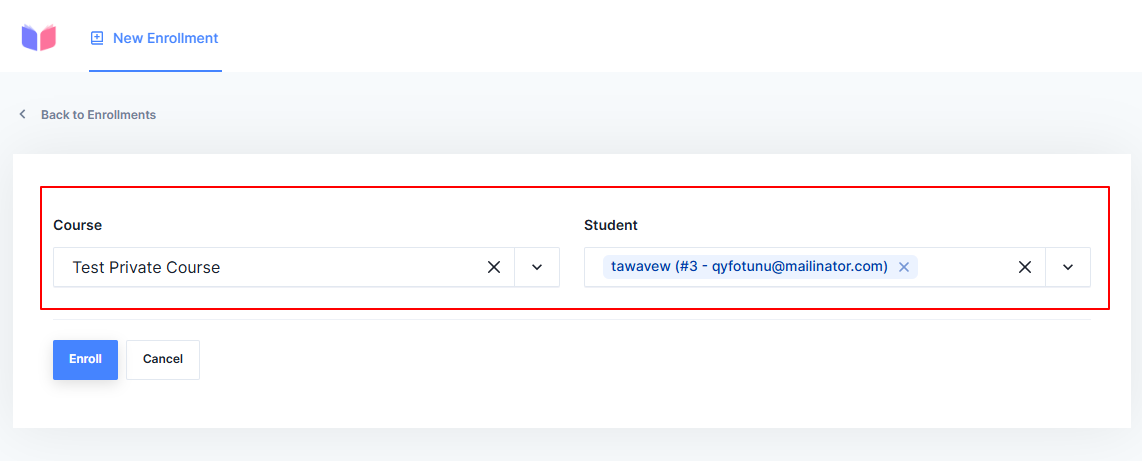
Note: Students must have existing user accounts on your WordPress site before you can enroll them.
Student Experience
- Enrolled student will be notified through email and can see the private course in their dashboard.
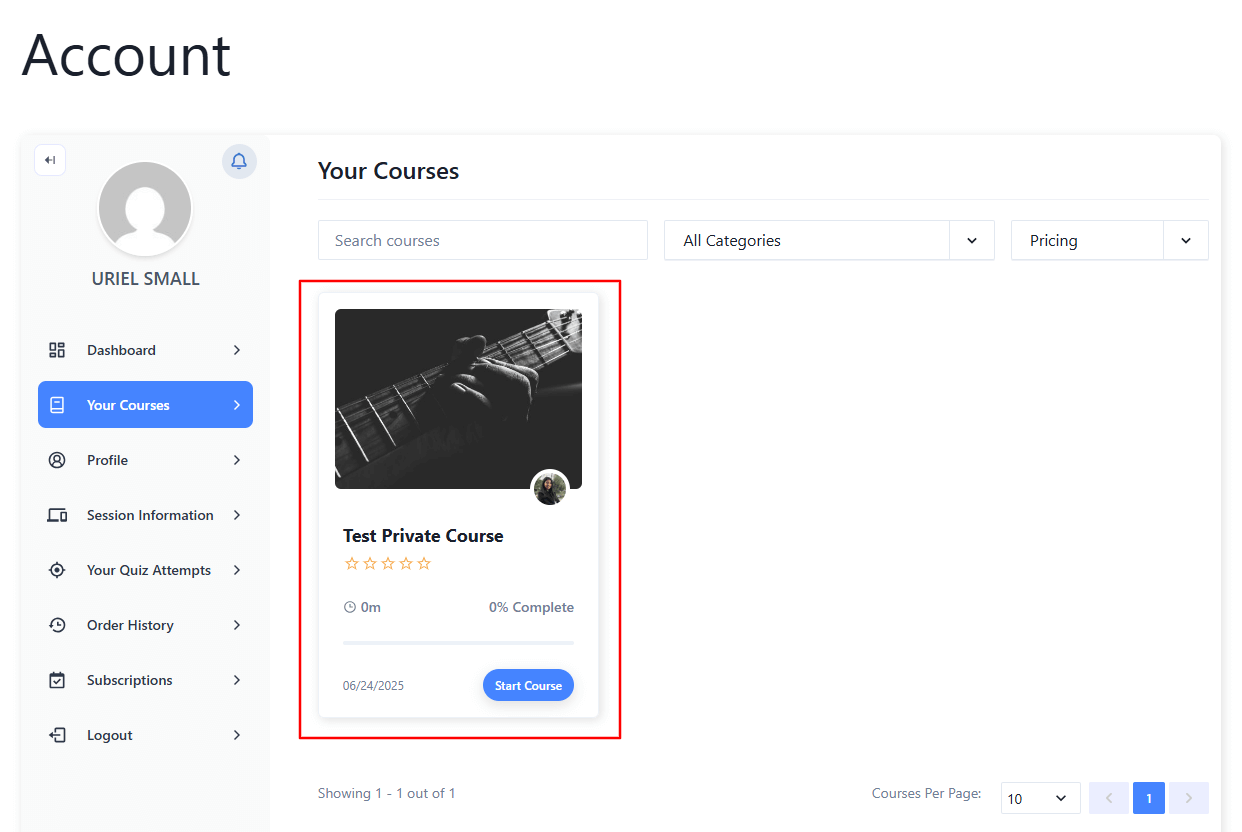
- Enrolled students can typically access all course materials.
- An enrolled student cannot see the course in the listings.
- A student not enrolled cannot access course content even with direct links.
This documentation covers Masteriyo LMS v2.21.0 and above. The interface may vary slightly in newer versions.
Was this article helpful to you?
Give us Rating
Last edited on May 13, 2026.
Edit this page