Advanced Quiz Creation
A quick guide on how to create an advanced quiz.
Note: This instruction is for creating a Quiz for your course. If you missed the documentation for creating a complete course, please review it here: https://docs.masteriyo.com/course-creation/complete-course-creation.
How to create a Quiz?
With Masteriyo, you can create advanced quizzes as per your needs. There is a component in the course section called quiz where you can add questions and allow users to answer them. You can assign points to these questions, set a pass mark and check the student's progress.
- Navigate to the course builder of the course where you want to create a quiz. Now, click on Add New Content.

- Select content type as Quiz.
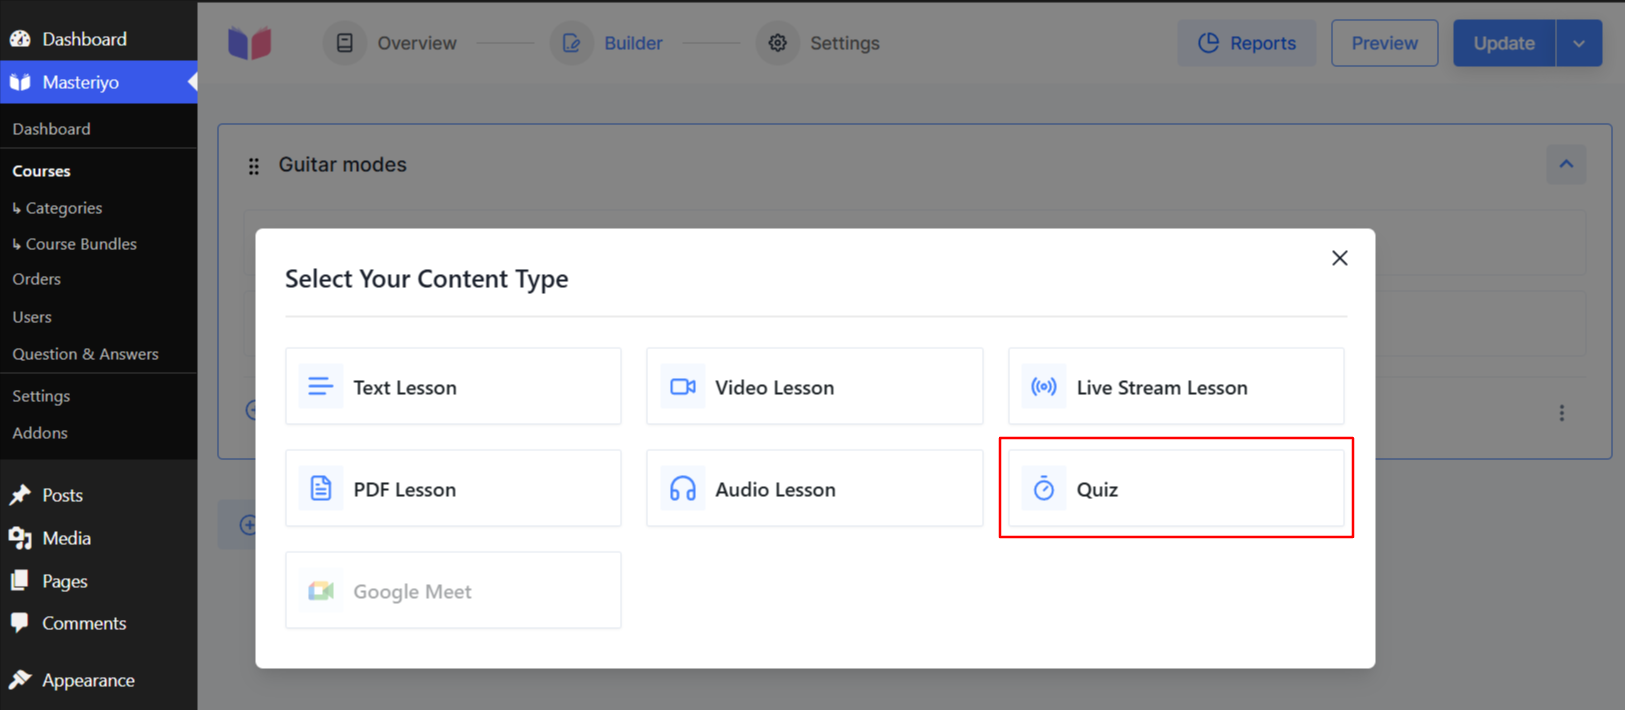
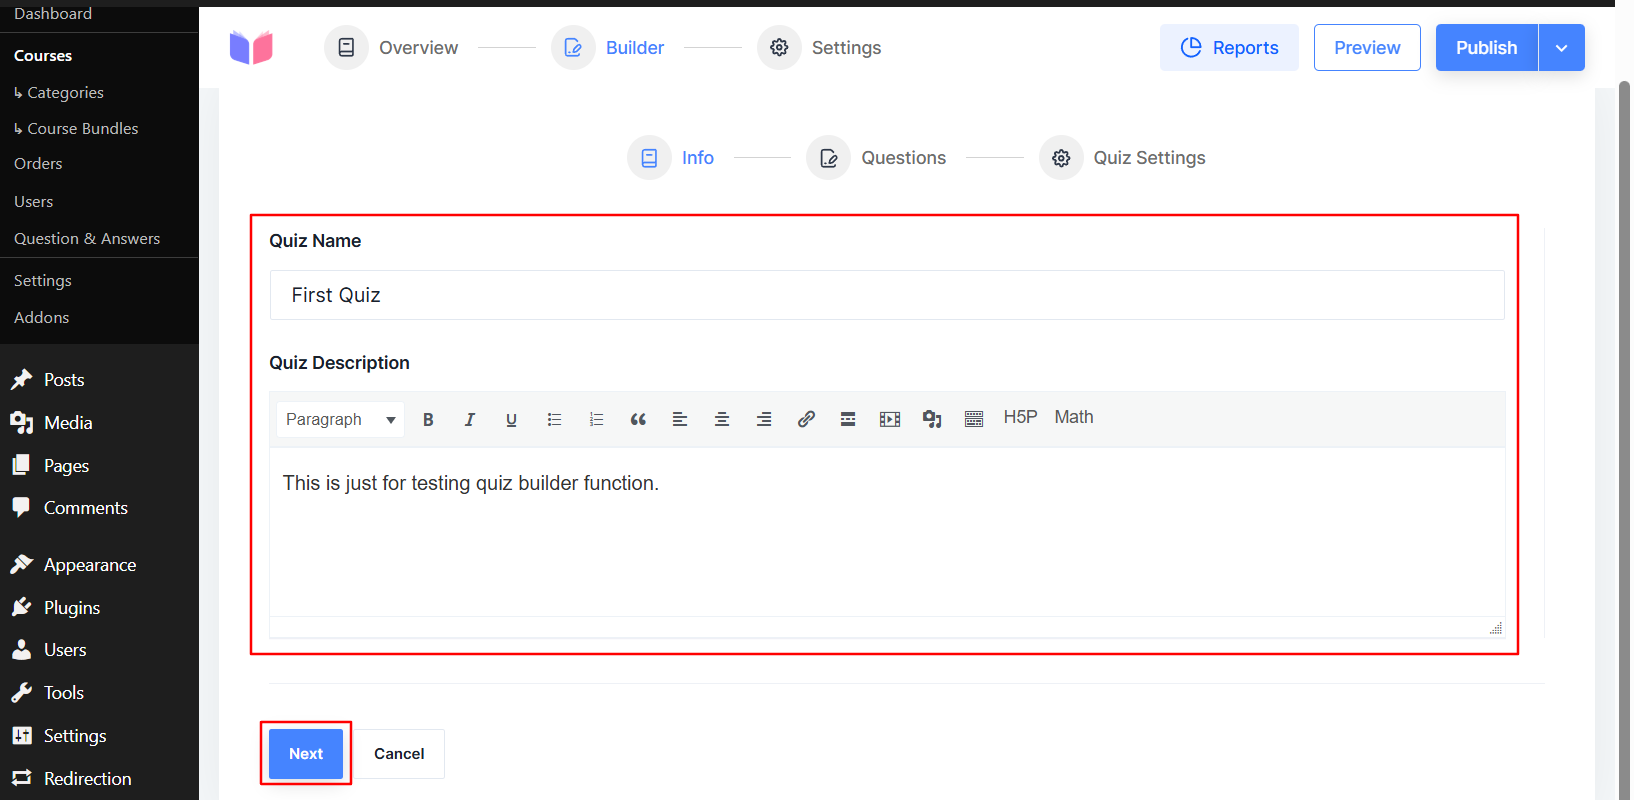
A new interface for adding a quiz will be shown.
- Give a name and description to the Quiz.
- Click on Next.
Now, you'll get two options:
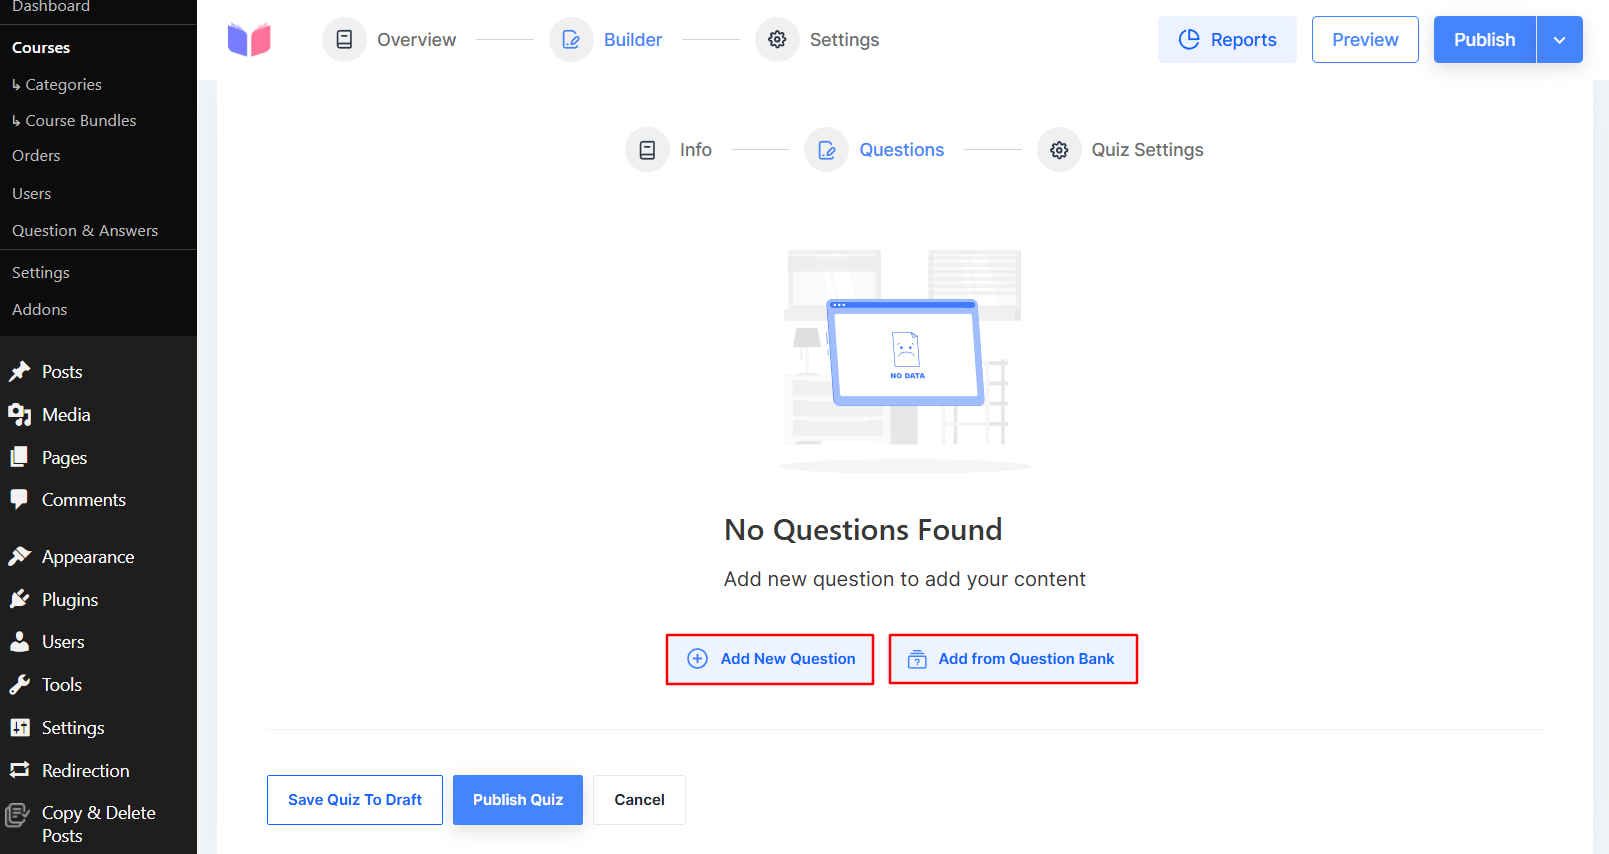
Add from Question Bank (New)
The question bank is a centralized repository for Masteriyo LMS, where you can find existing questions created with your LMS. Click on this option, and a new interface will pop up showing you all the existing questions. From here, you can choose the existing quiz's questions and add them to your course without recreating.
You can choose your preferred action:
Add to Quiz: Adds the question directly (removes it from the bank).
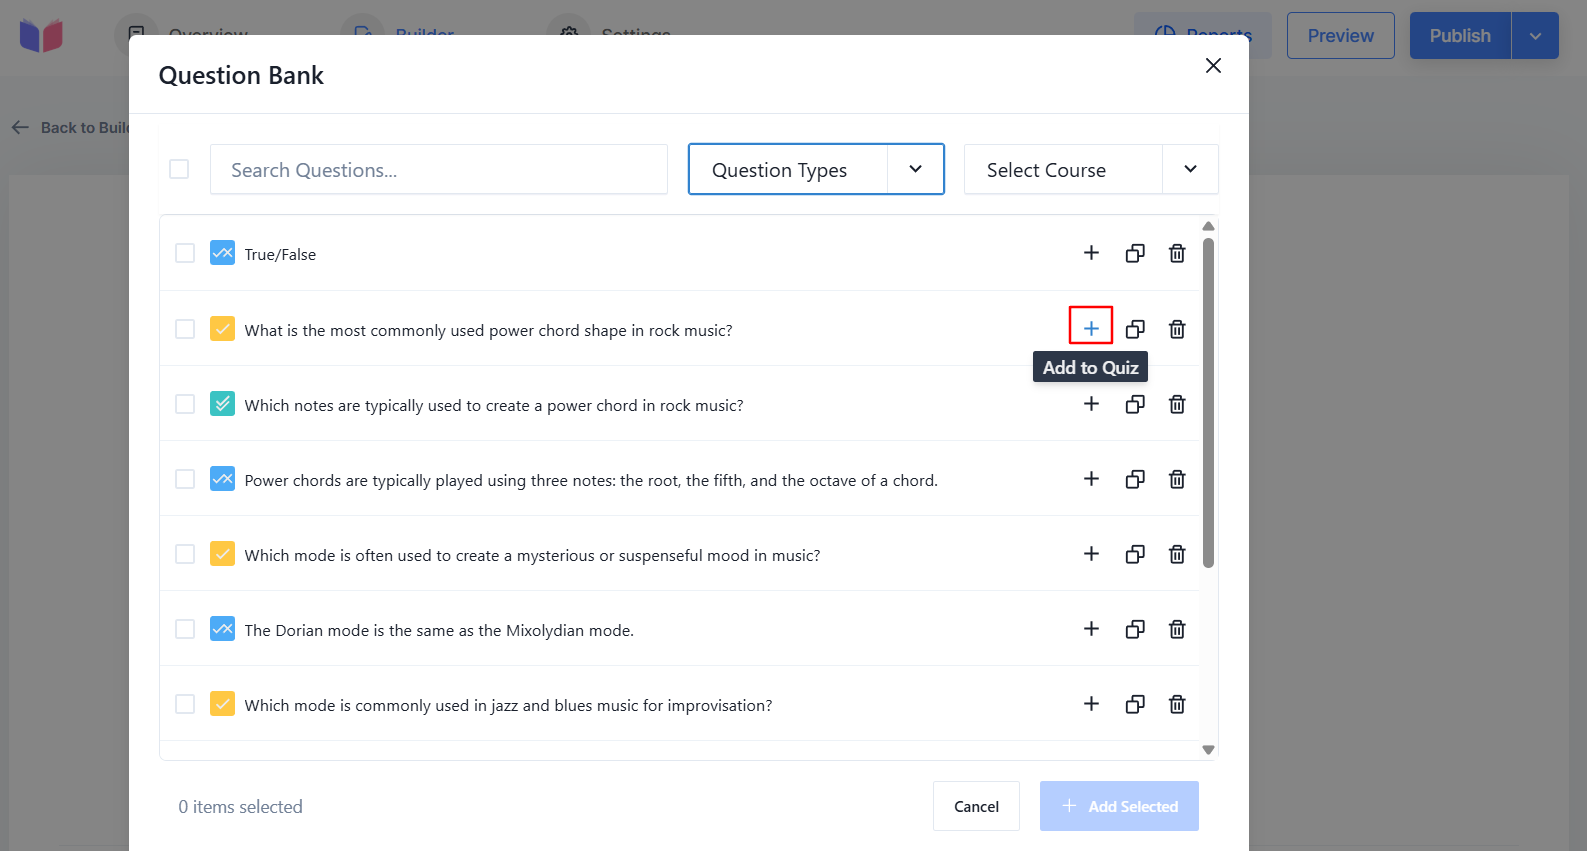
Duplicate and Add to Quiz: Creates a copy and adds it to your quiz while keeping the original in the bank.
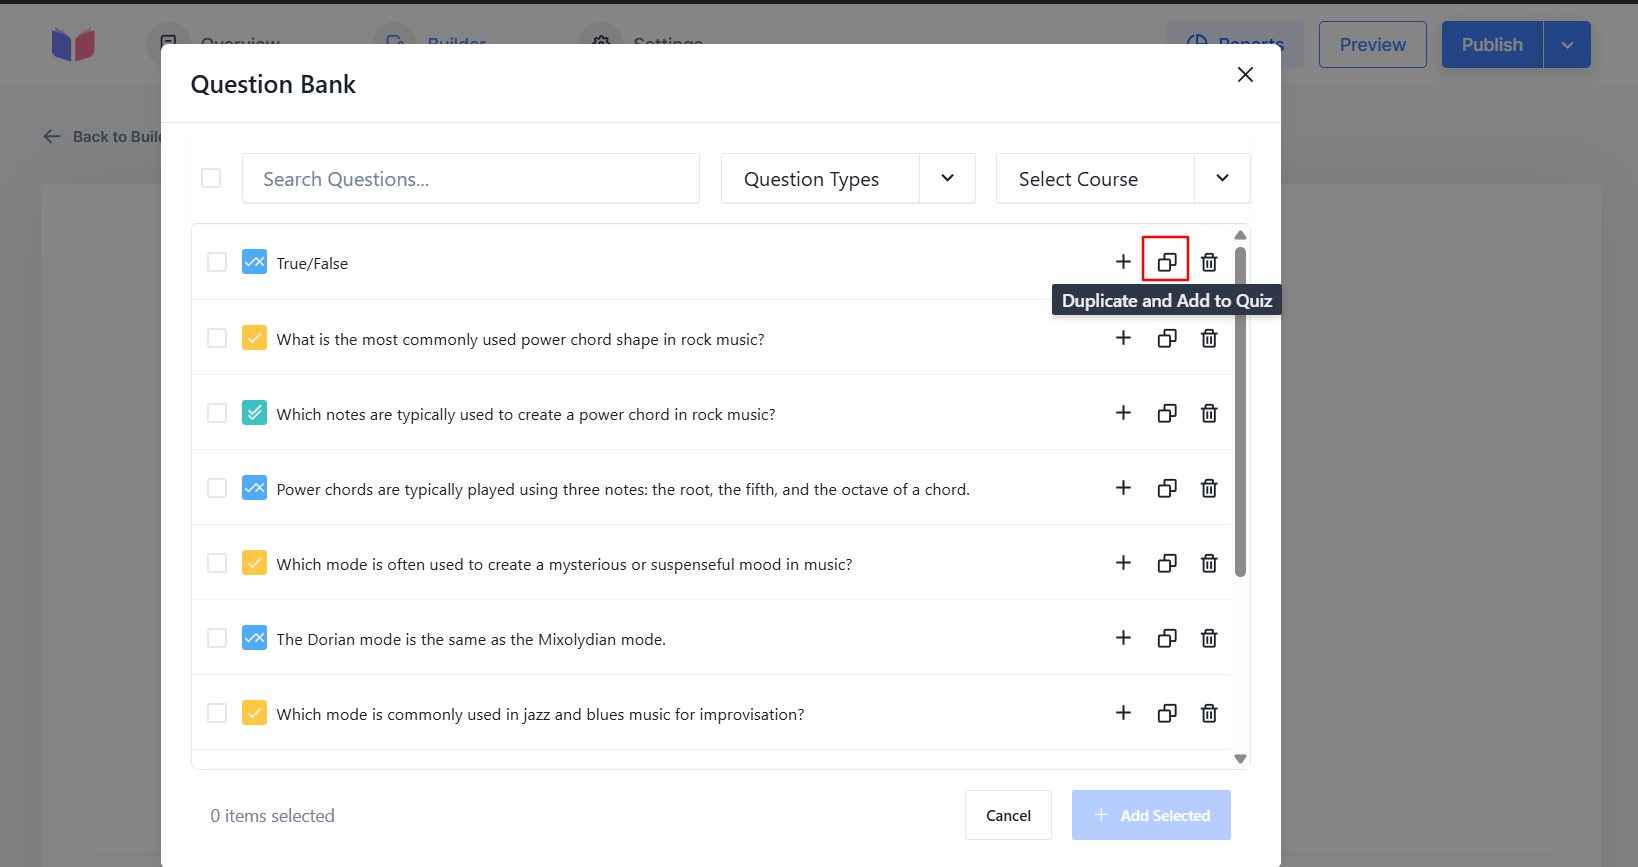
Now, if you want to reuse any of those, you can select and click on Add Selected and then hit the Update button. It will now automatically add those questions to your quiz.
Add New Question
If you want to add a new question, please follow the steps below.
- Click on the Add New Question and you'll see Select Question Type. So, select your question type to proceed.
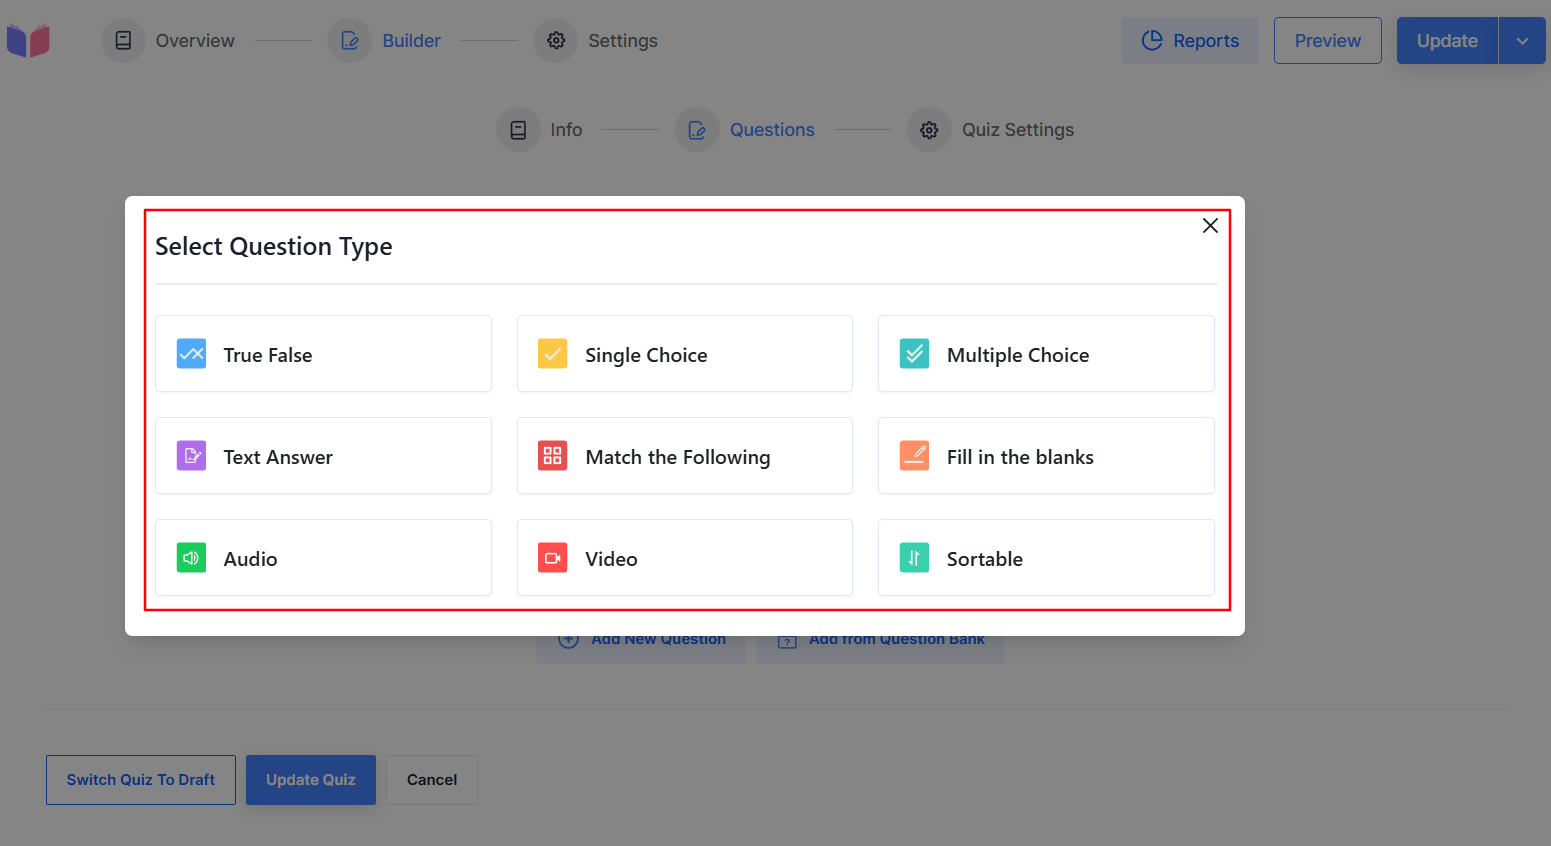
Question Types
True False
Write the questions that have a true or false answer. Similarly, you can add question description, answer, and answer explanation. Also, dont forgot to update the question and quiz.
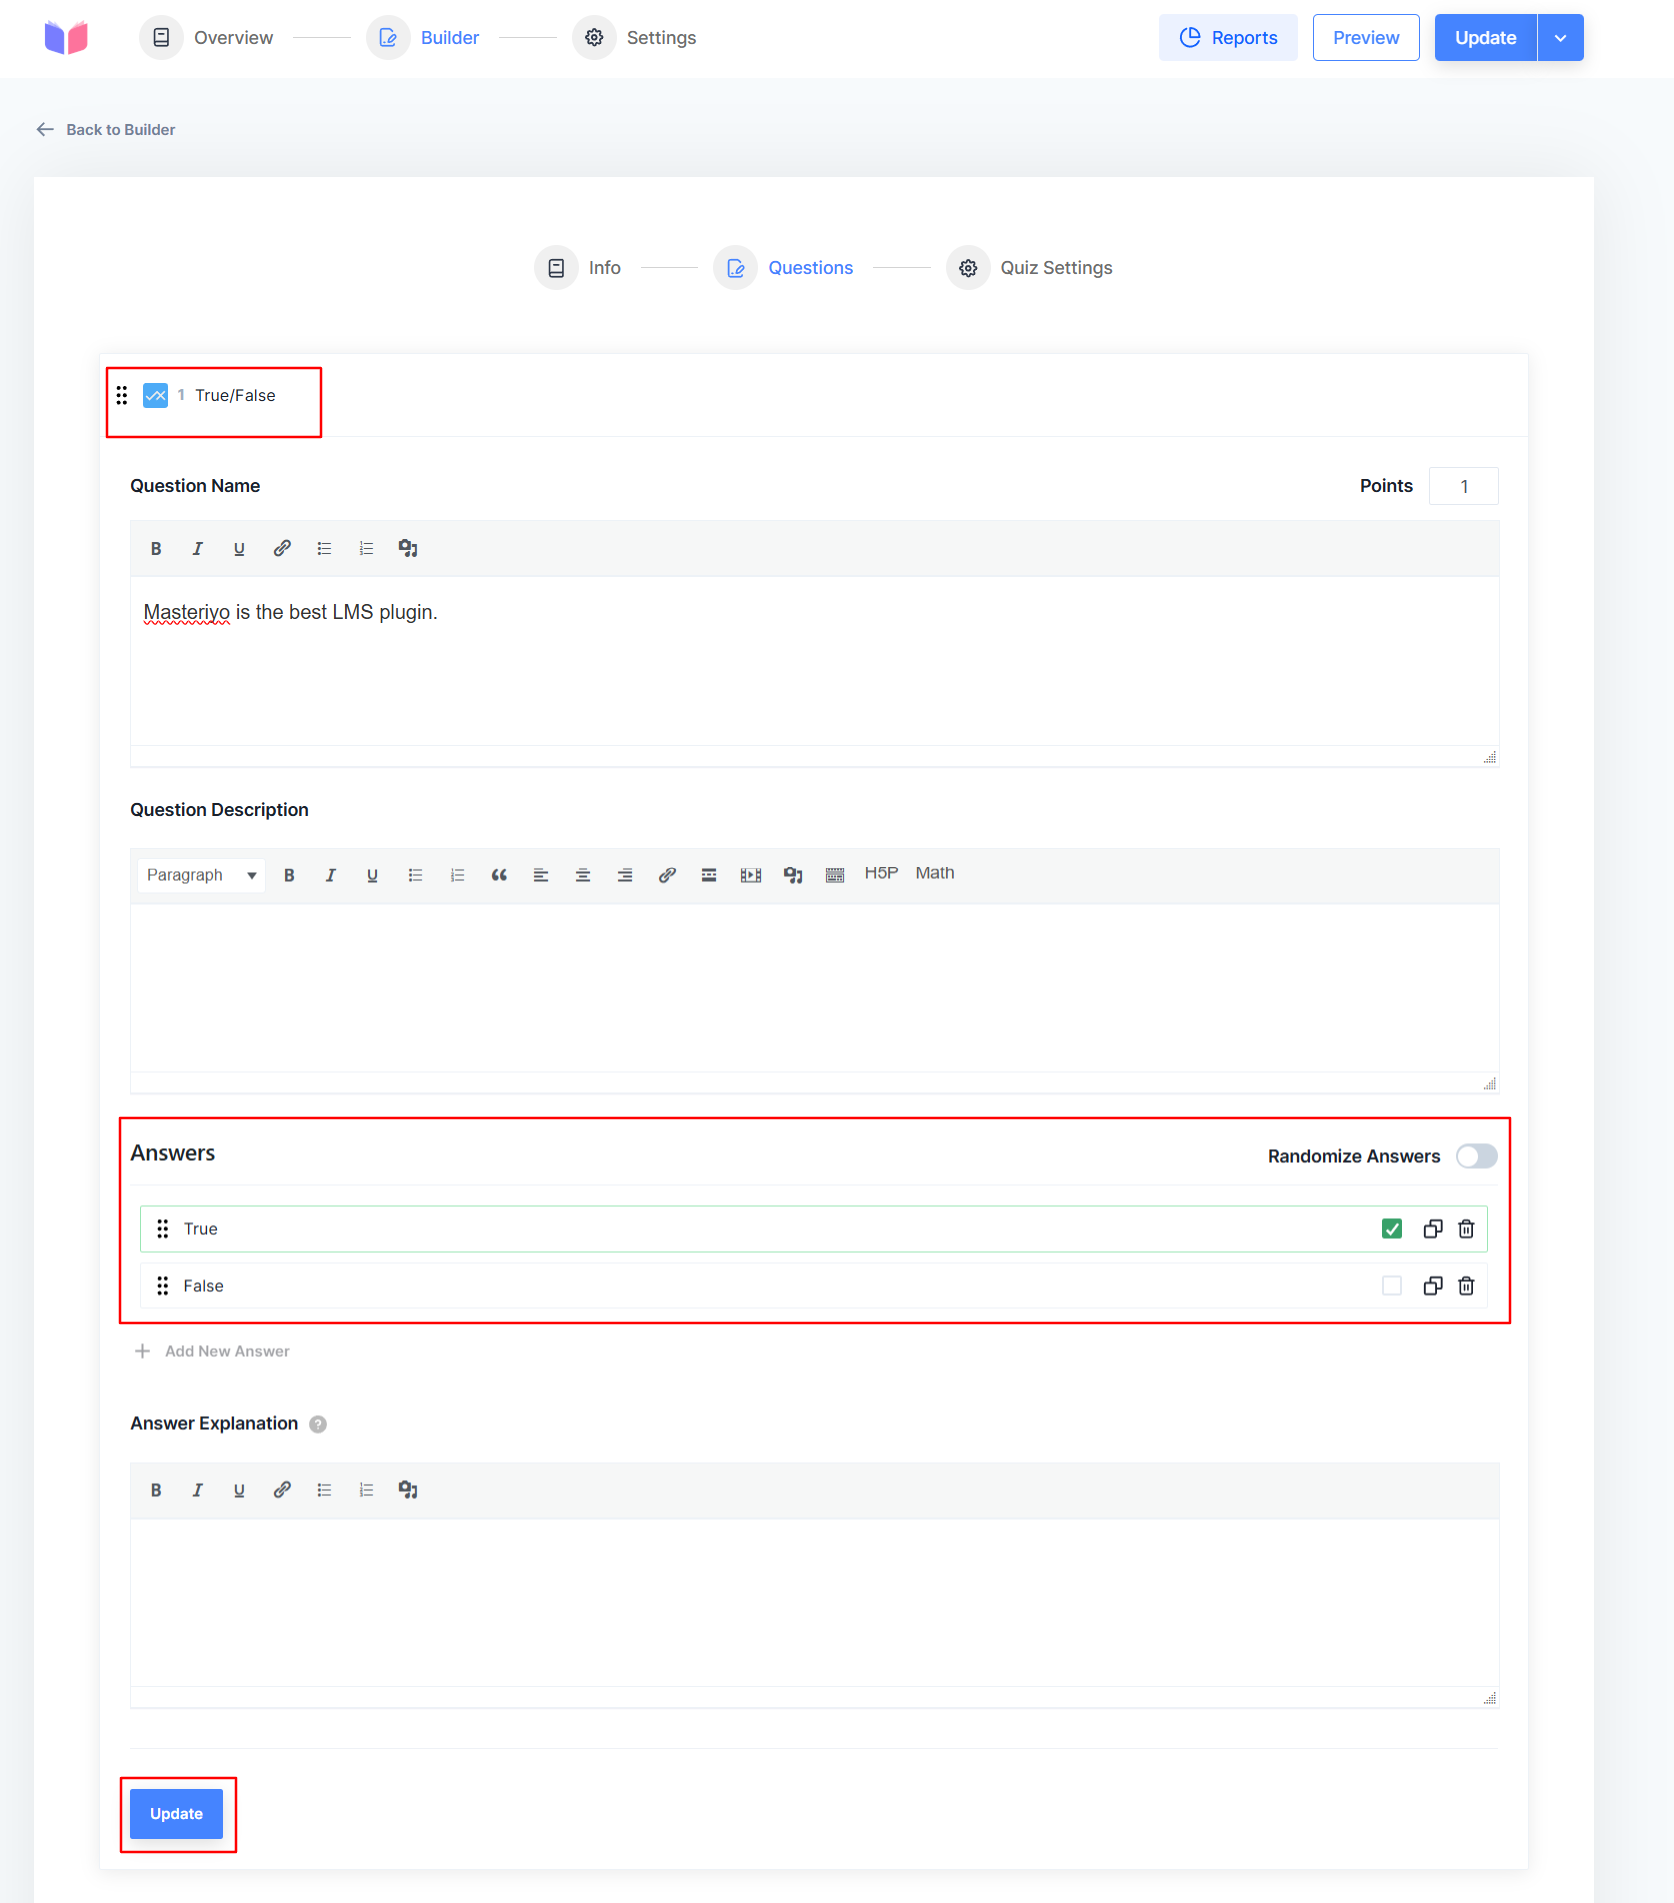
Answer Explanation
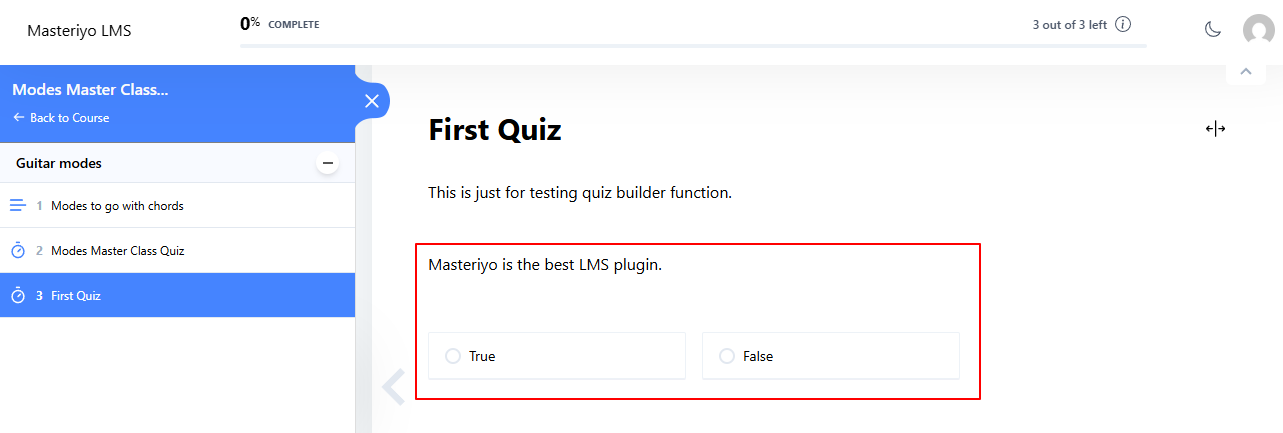
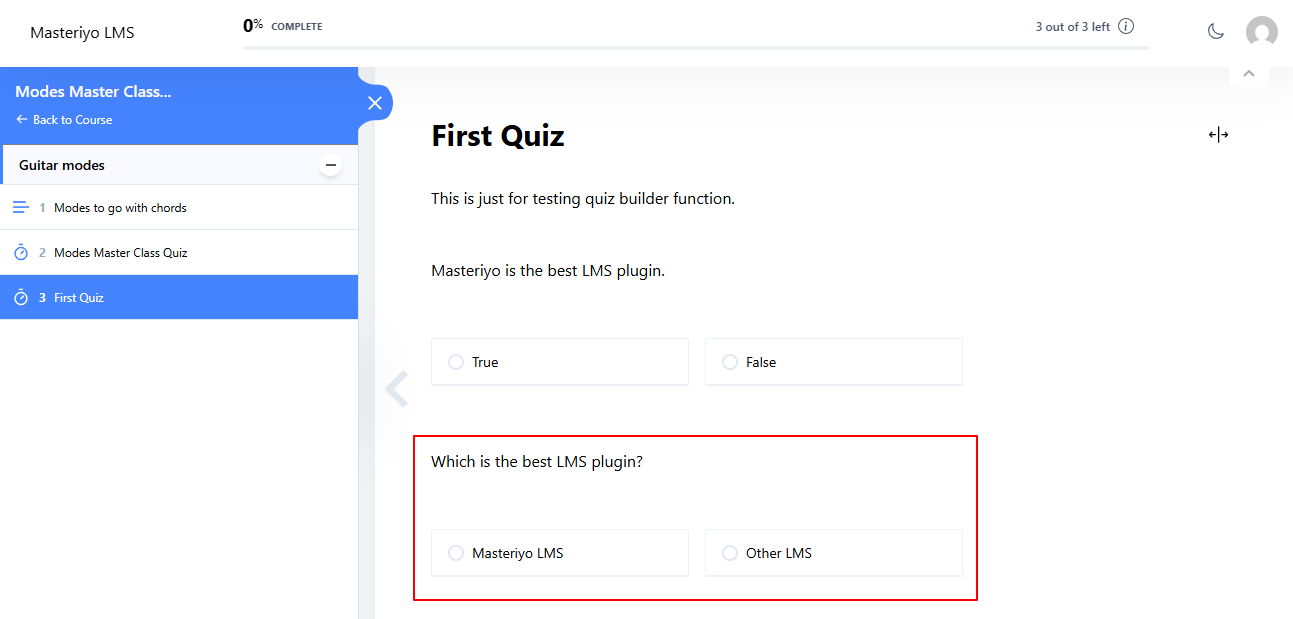
This option lets the instructor add an explanation to the correct answer. The students will be able to see this once they submit the answers. Here's how the True False looks at the frontend:
Single Choice
If you have questions where the learners have to select only one question out of the available options, you need to add this question type. Click on 'Add new answer' to add a new option.

At the user's end, the quiz might look similar to the image below:
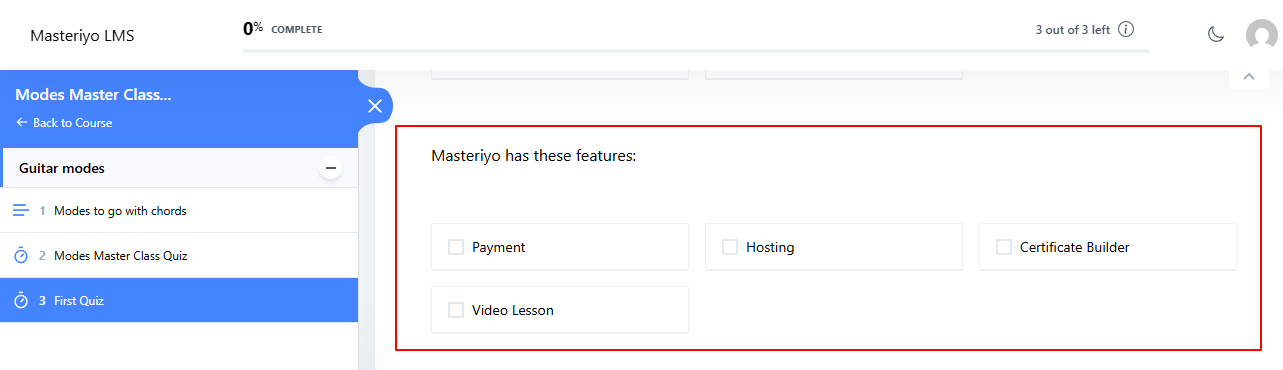
MultiChoice
This is similar to the single-choice questions, but here the learners can select more than one answer. Click on 'Add new answer' to add a new option.
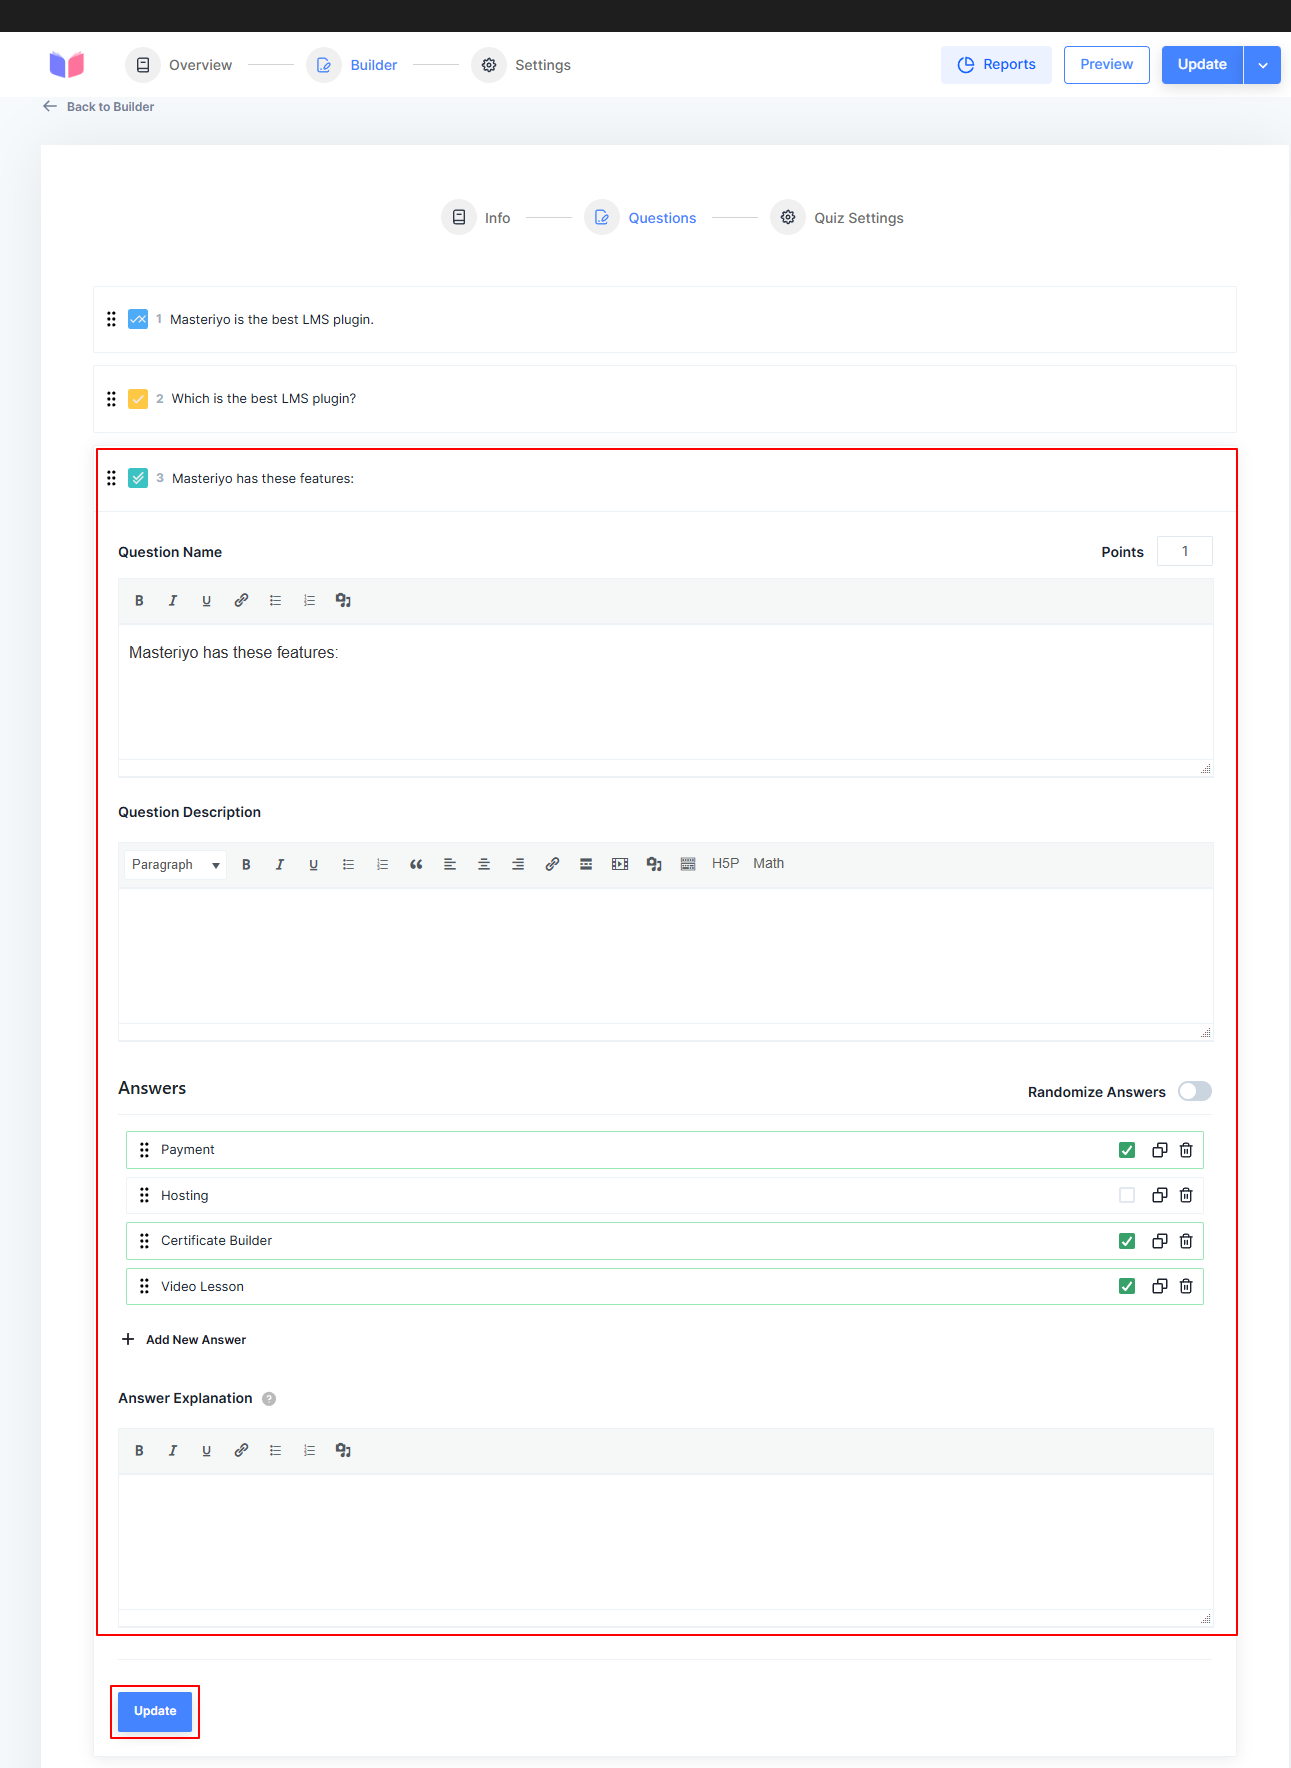
Here's the frontend view of MultiChoice quiz:
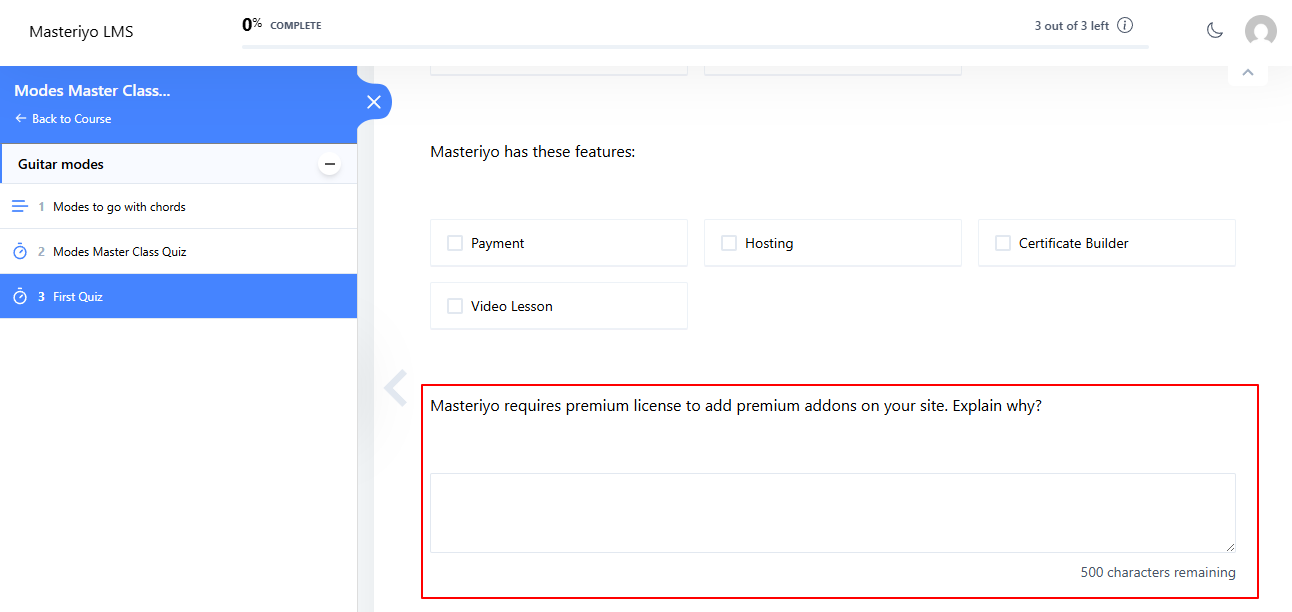
Text Answer Pro
This question type lets you create a question that requires explanatory text answers. It lets the learners describe the answer in their own words. You can also set the maximum length for the text.
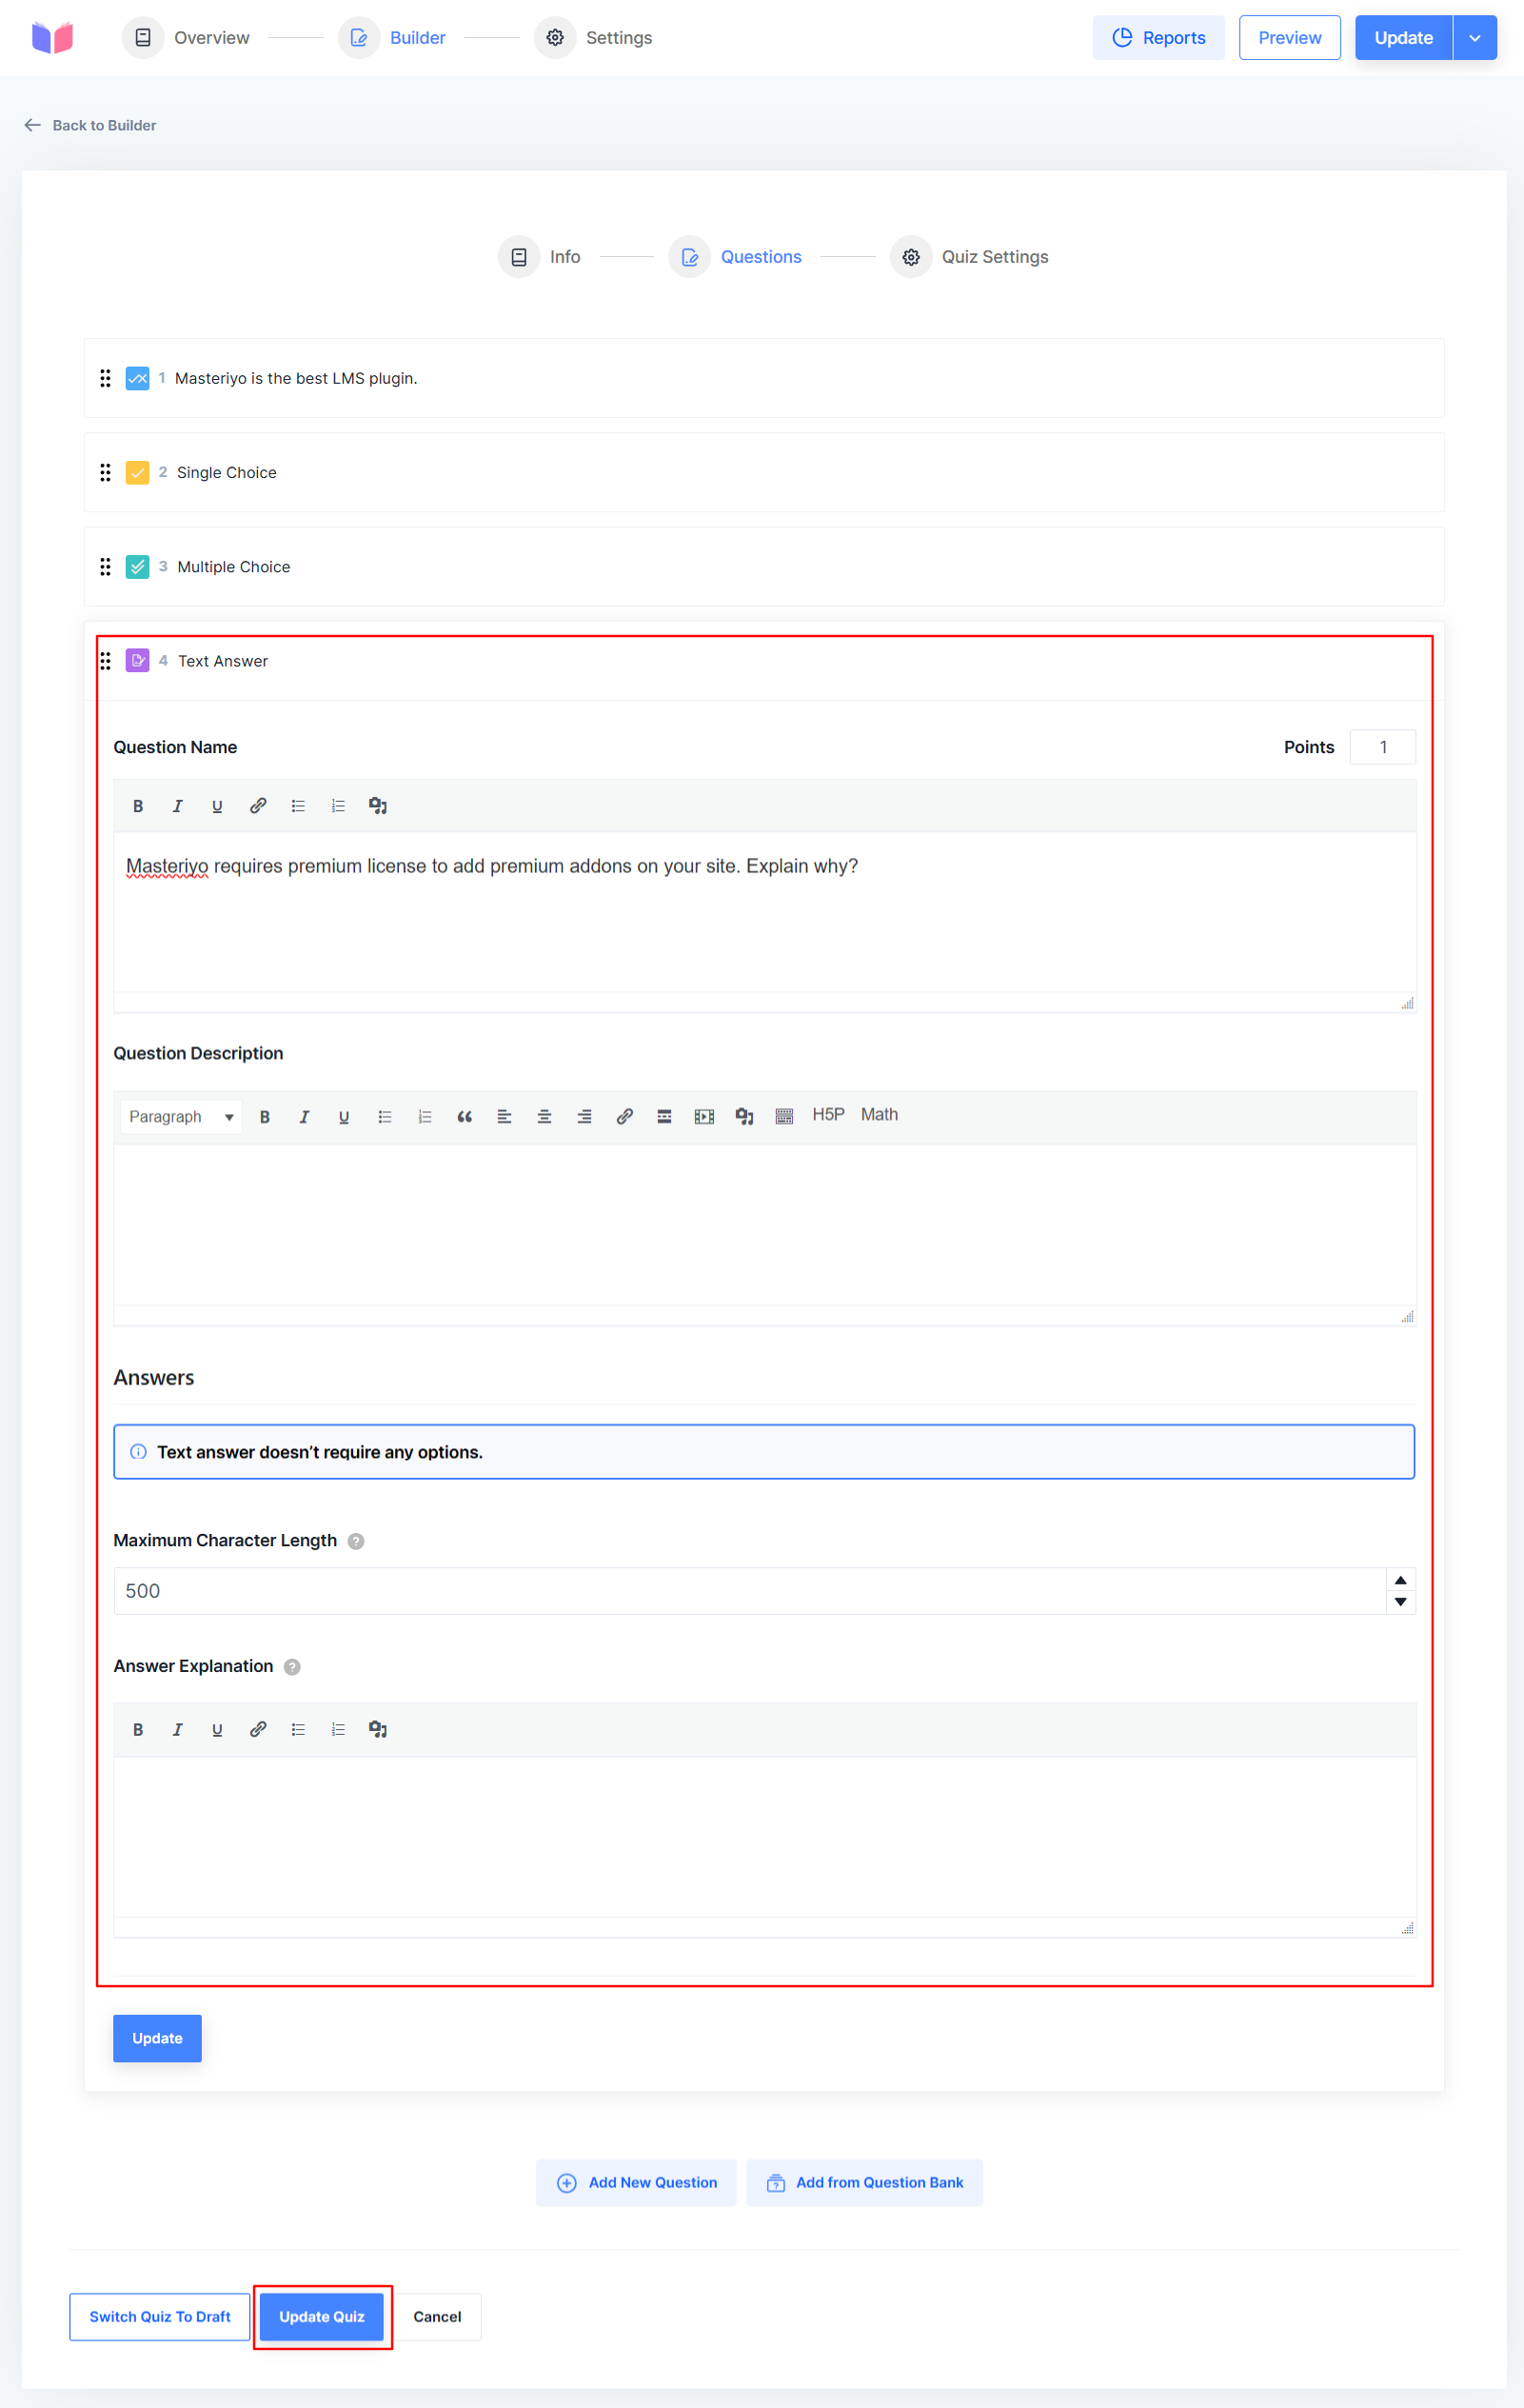
This quiz will look similar to the image below at the frontend:
Match the following Pro
This is a question type where the answers are to be matched with the prompts. You can select whether you are matching text to text, image to text or image to image.
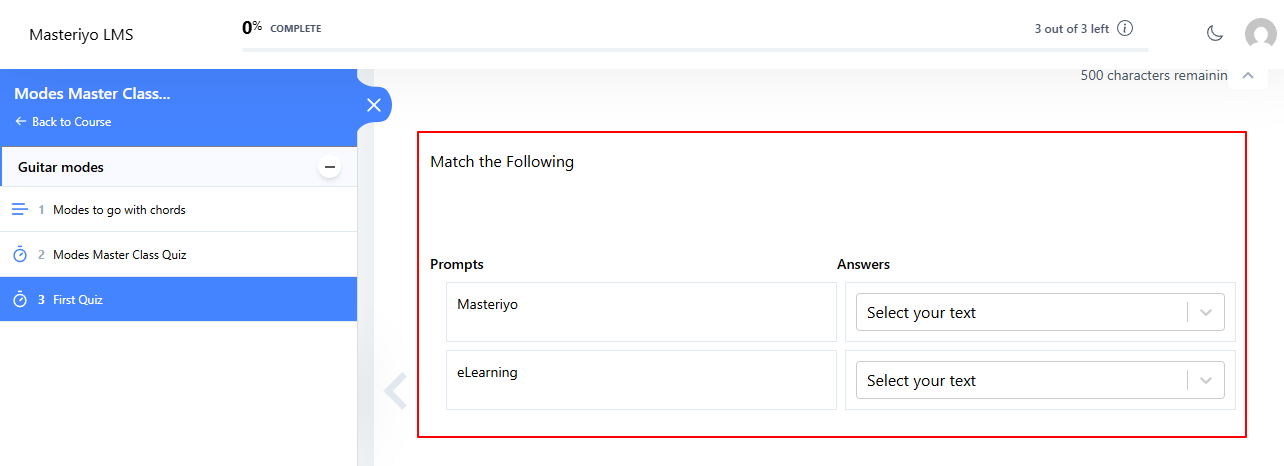
When you select any options related to image, you can upload your image from the uploader button.
While submitting the quiz, the learners should select the matching answers for the respective prompts from the drop-down menu. You can see it in the image below.

Fill in the blanks Pro
You can use this if you want to add a question where the learners will have to fill in the blanks with a correct answer.
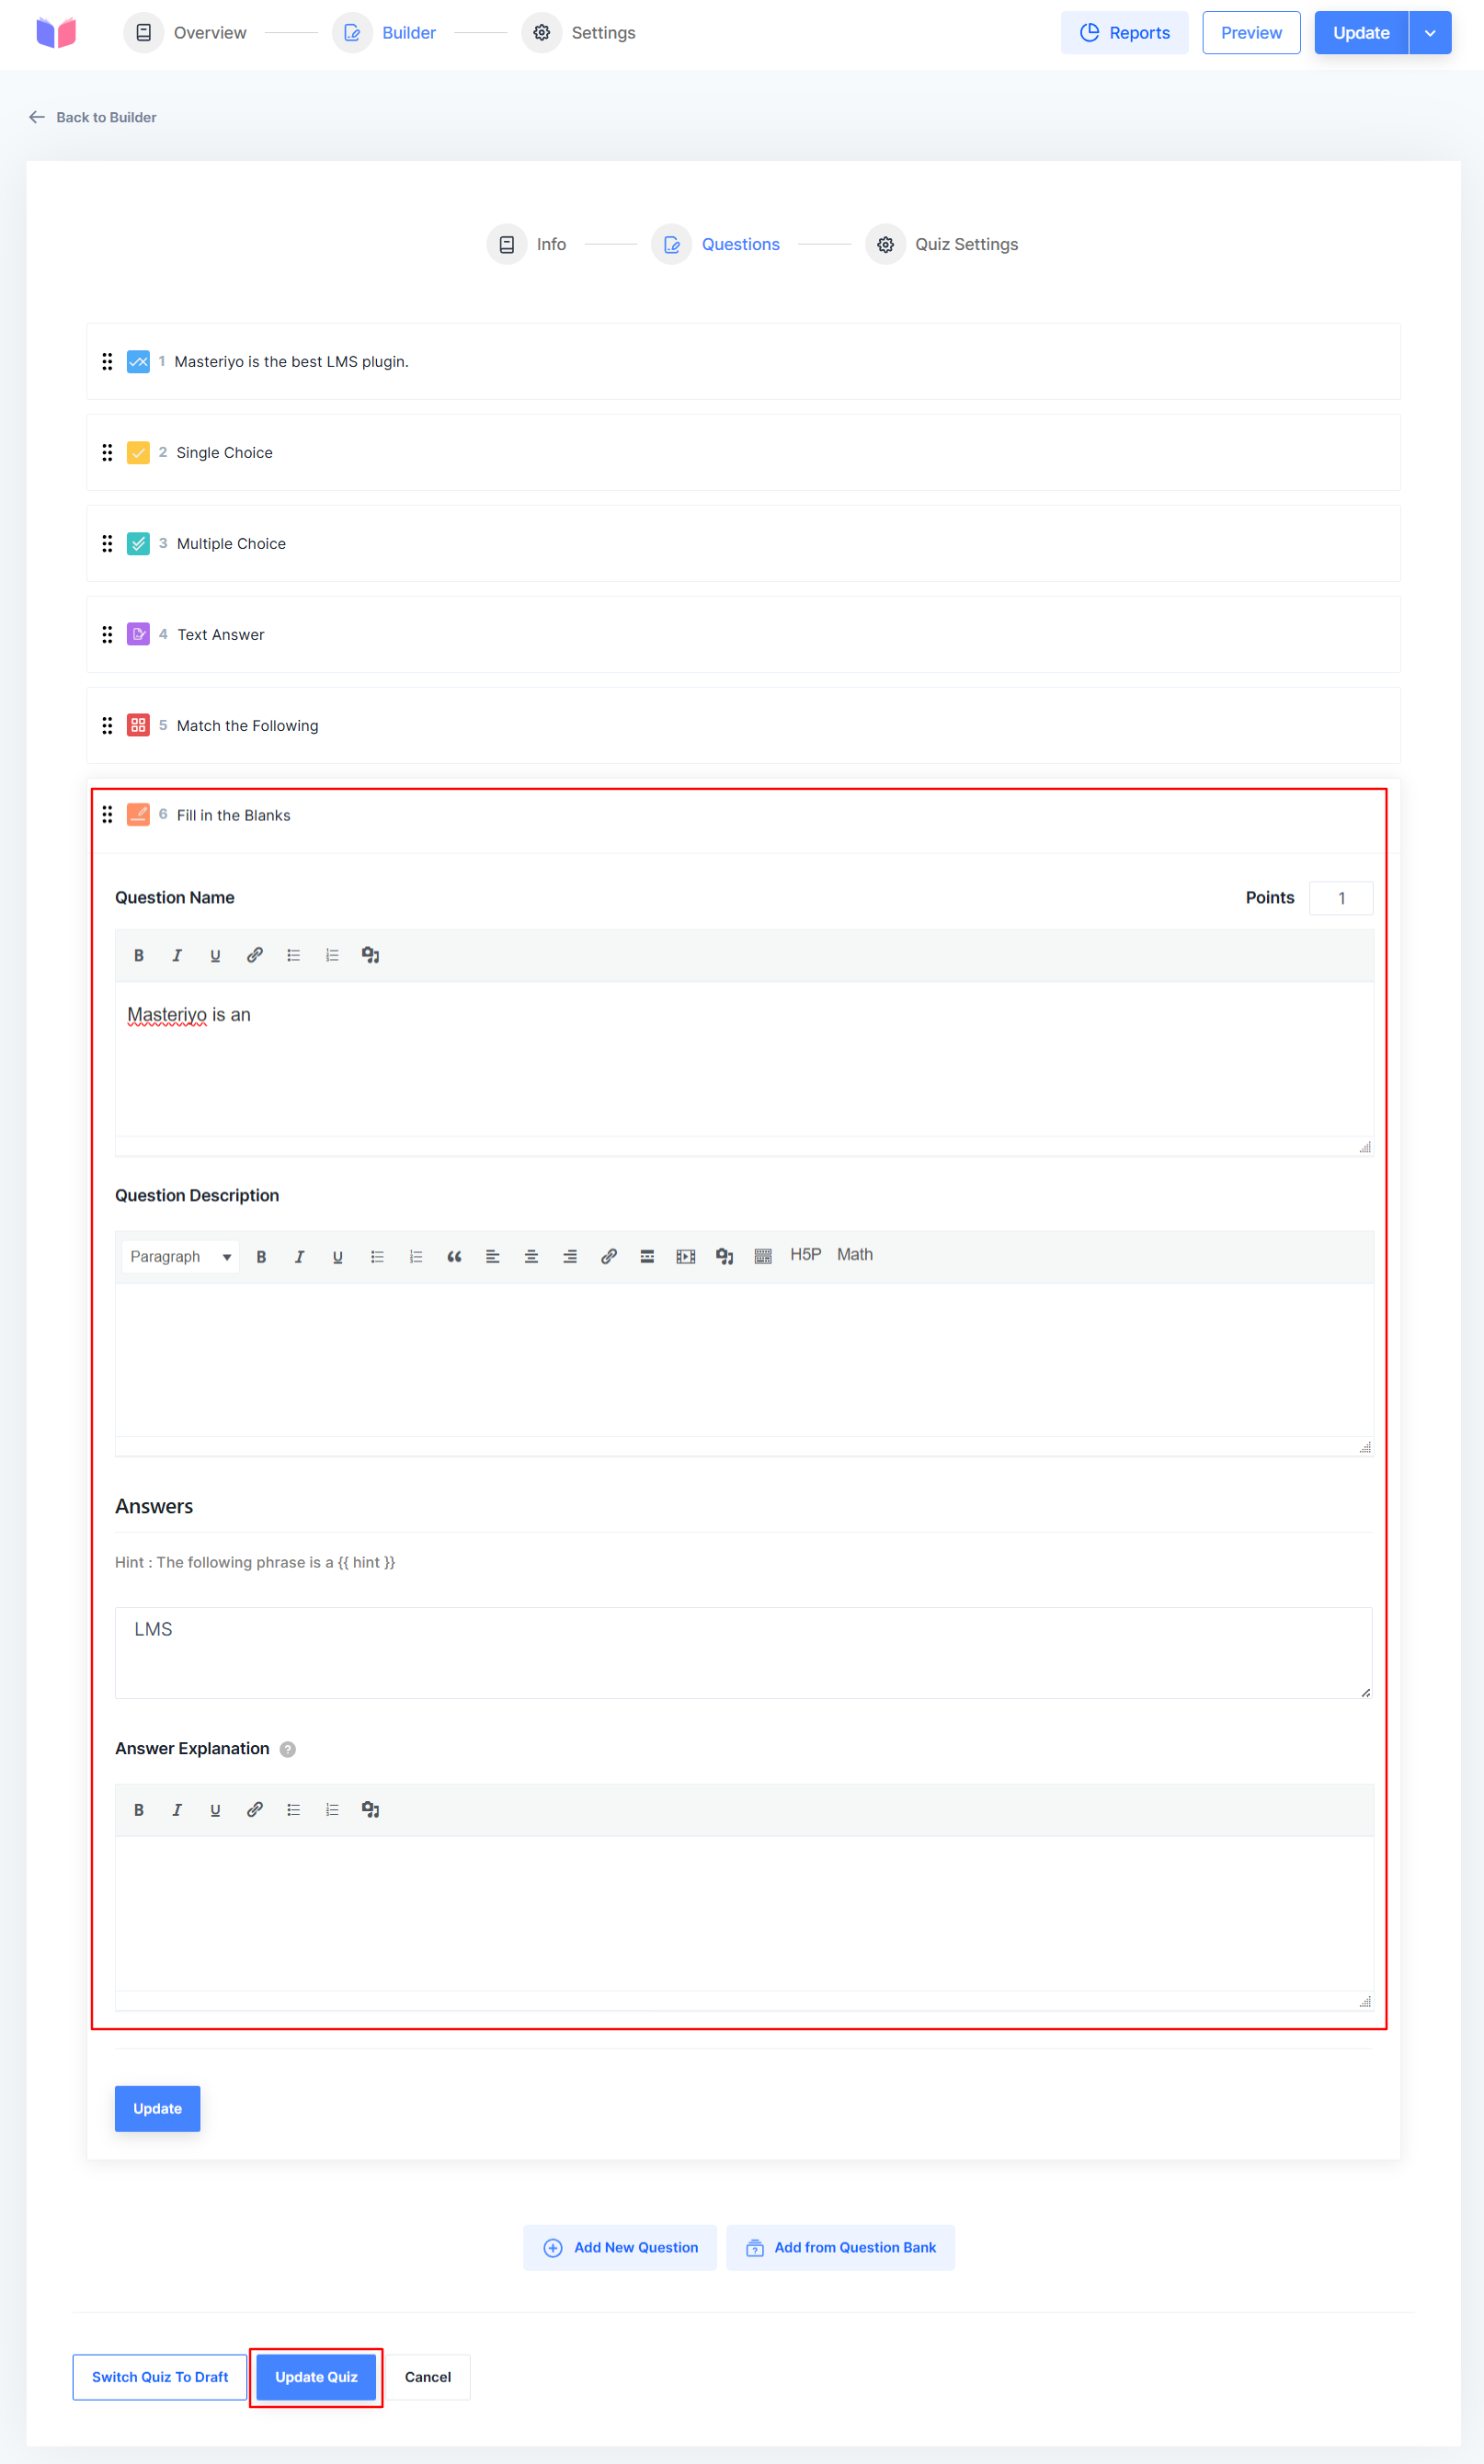
{" "} Format: This is a hint for the {{ fill in the blanks }} question. Here, the text between the double curly braces is the answer that the learners will have to write. {" "}
Audio Pro
Just like the video questions, you can also add an audio question to your quiz. For this, choose the question type 'Audio'. Now, you will need to upload audio by clicking 'Drop documents or click here to upload'. Now, write the question and click on update.
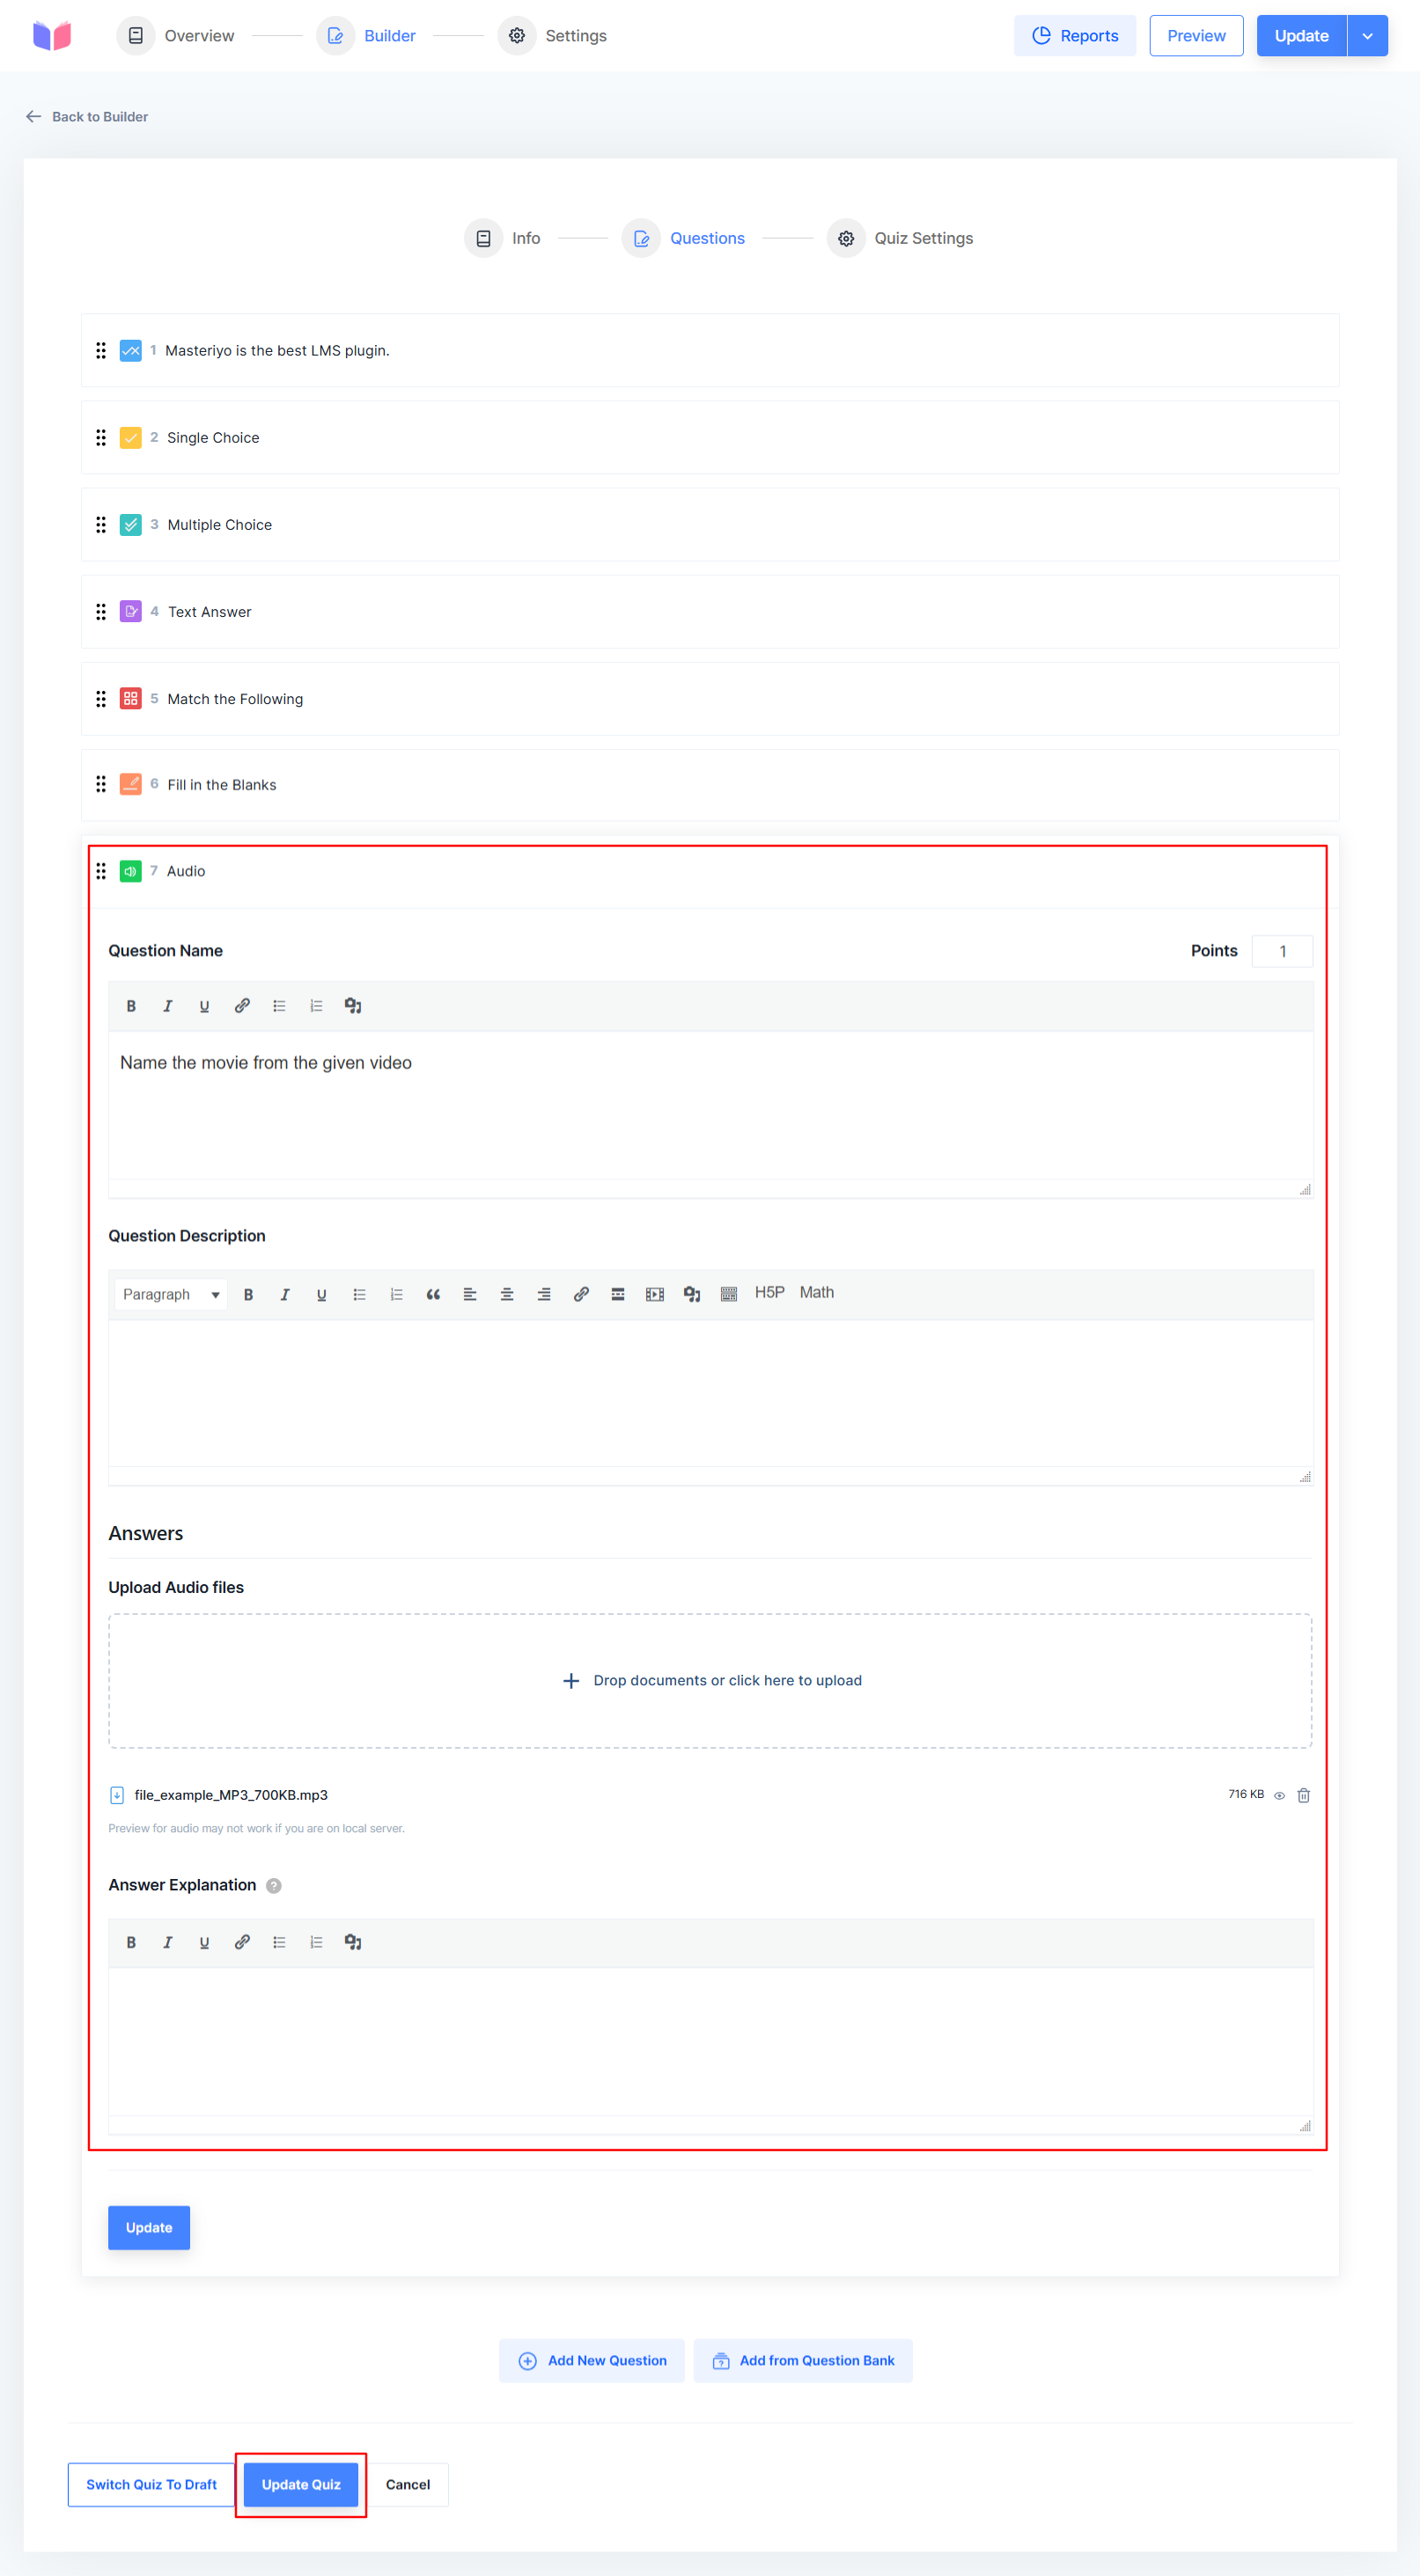
Now, while submitting the form, the learners can listen to the audio and write the required answers.

Video Pro
Here, you can upload videos while creating courses and give questions related to that videos. There are four video sources you can choose from. They are:
- Self-Hosted
- Youtube
- Vimeo
- External URL
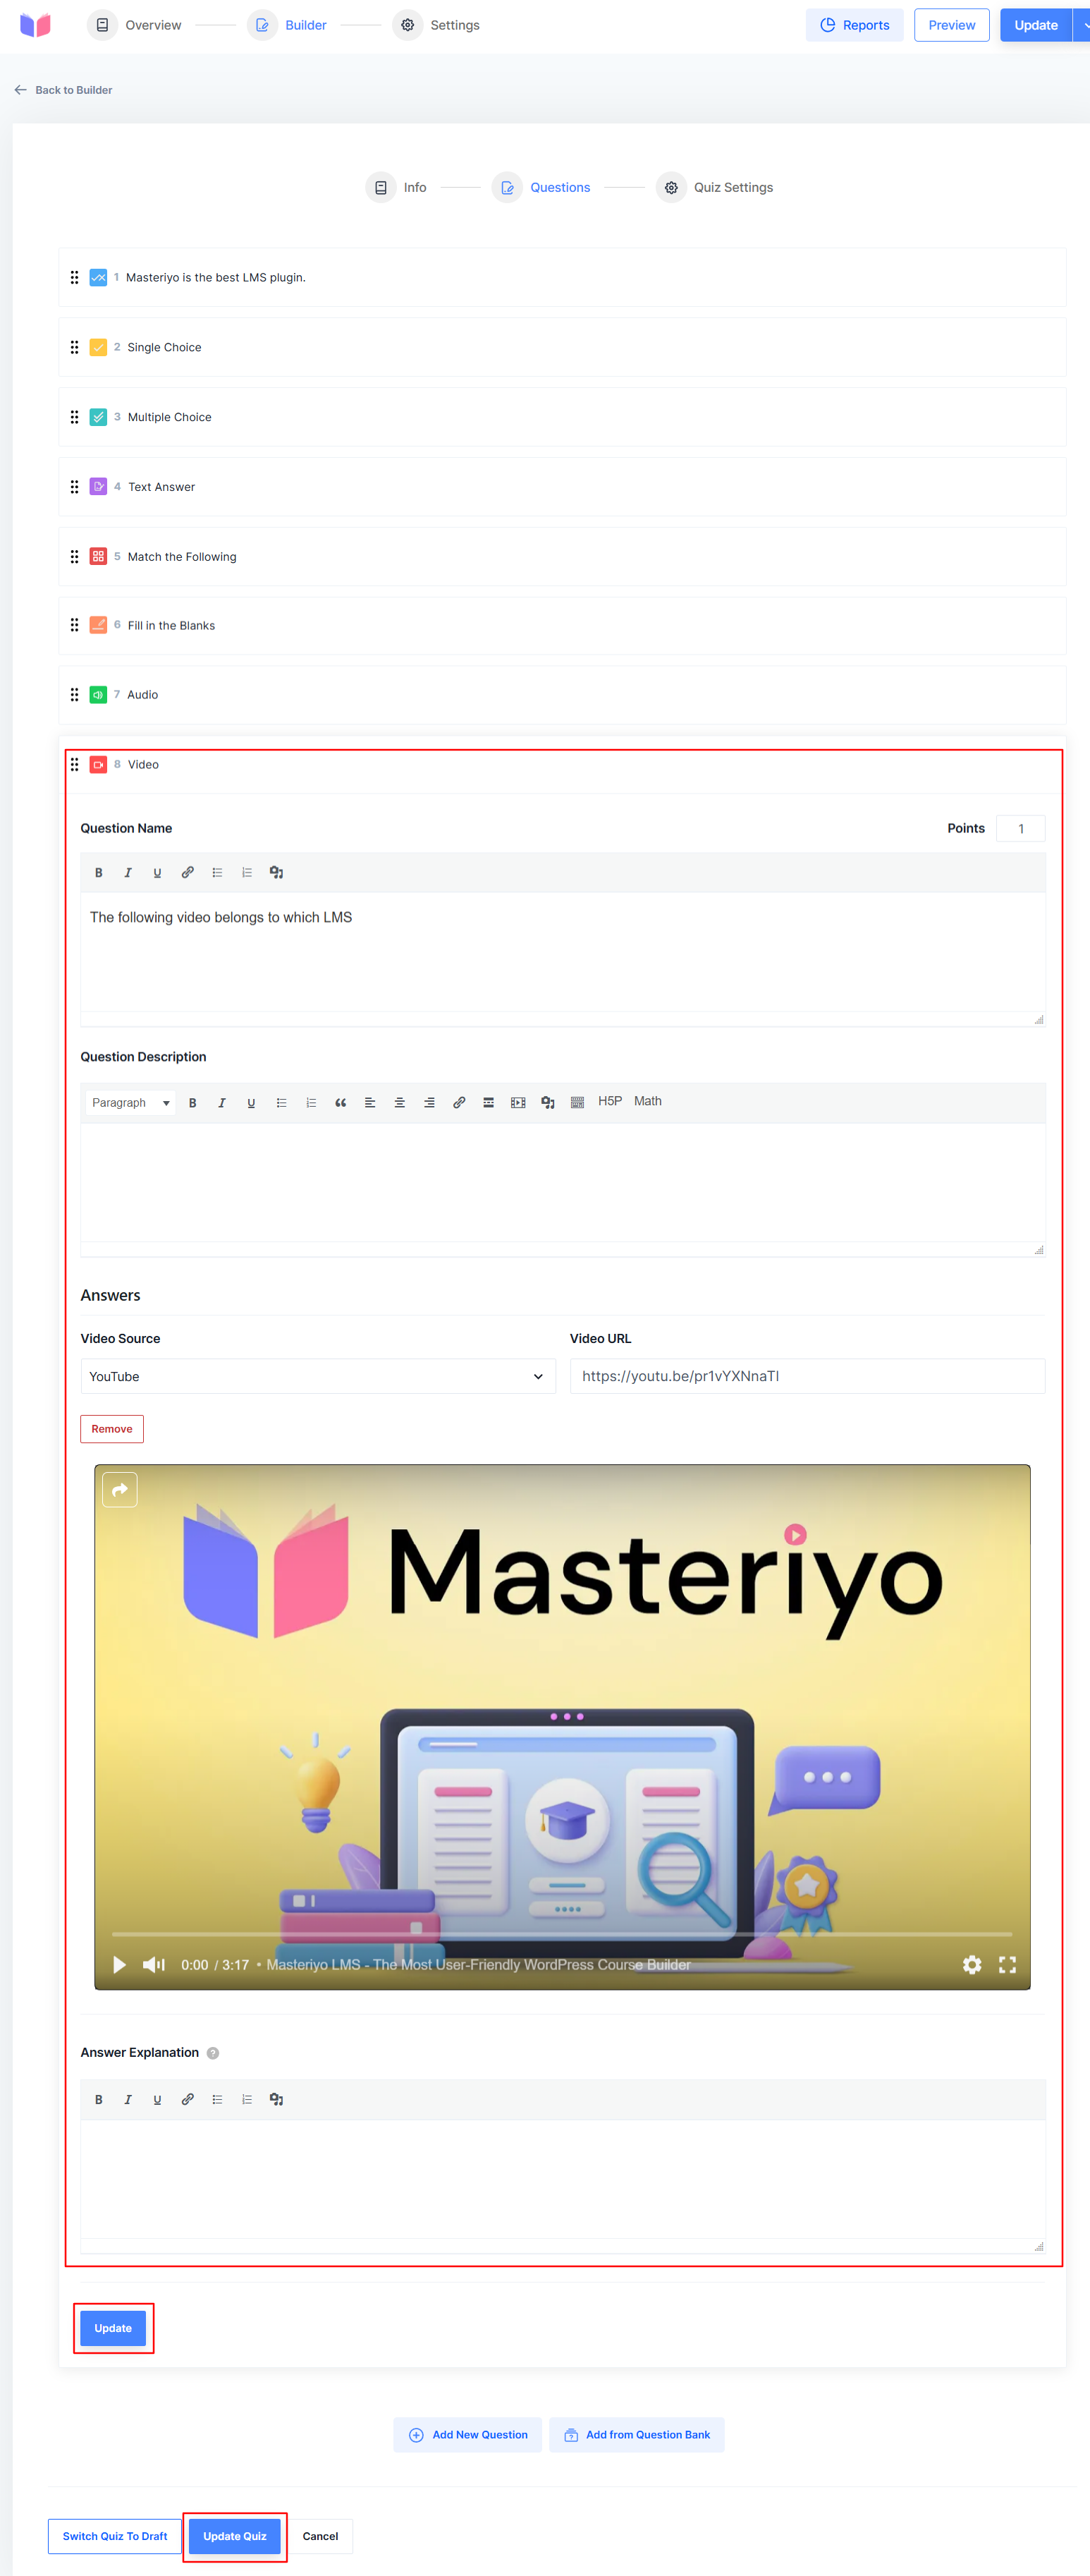
In the Self-Hosted option, you will need to upload a video from the local source. Similarly, if you choose YouTube or Vimeo, you can add YouTube or Vimeo video links. The last one is the external URL. You can add the URL of the place where you have hosted your own video.
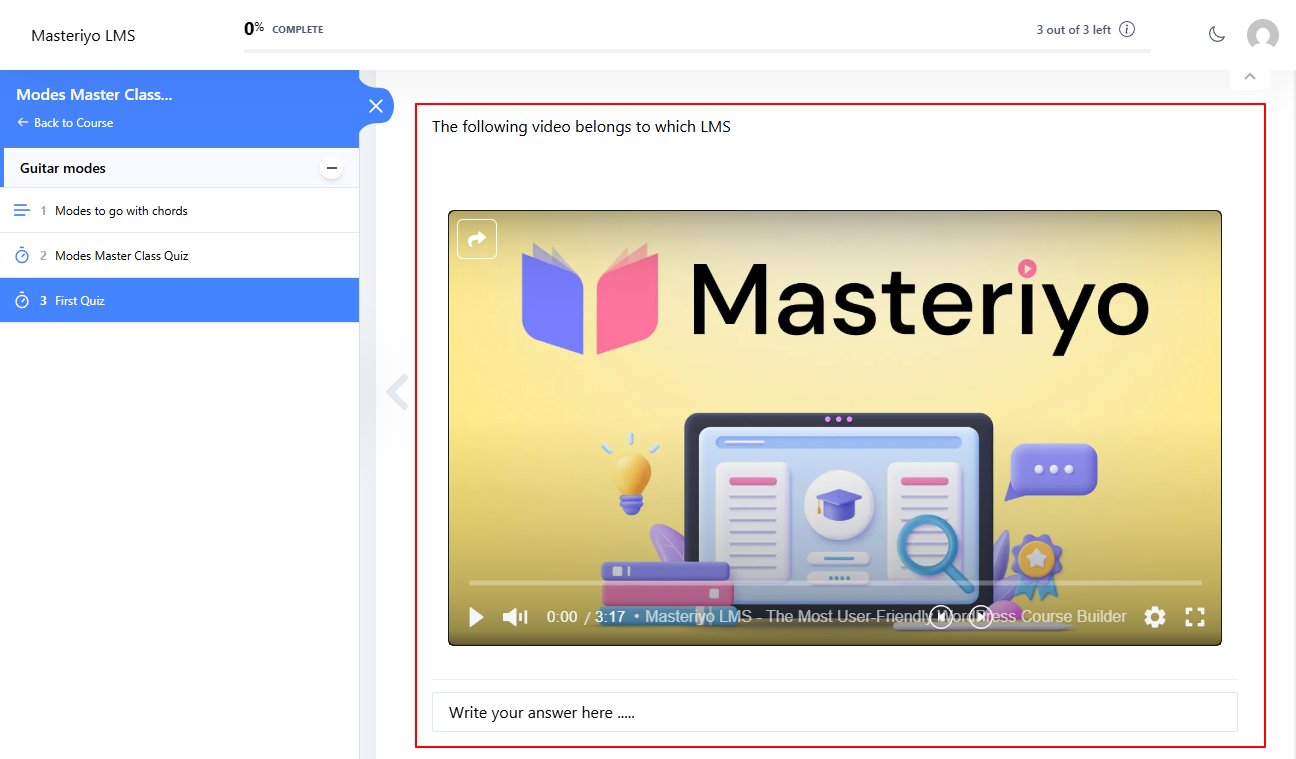
Now, while submitting the quiz, the learners can watch the video and write the answer to the question asked.
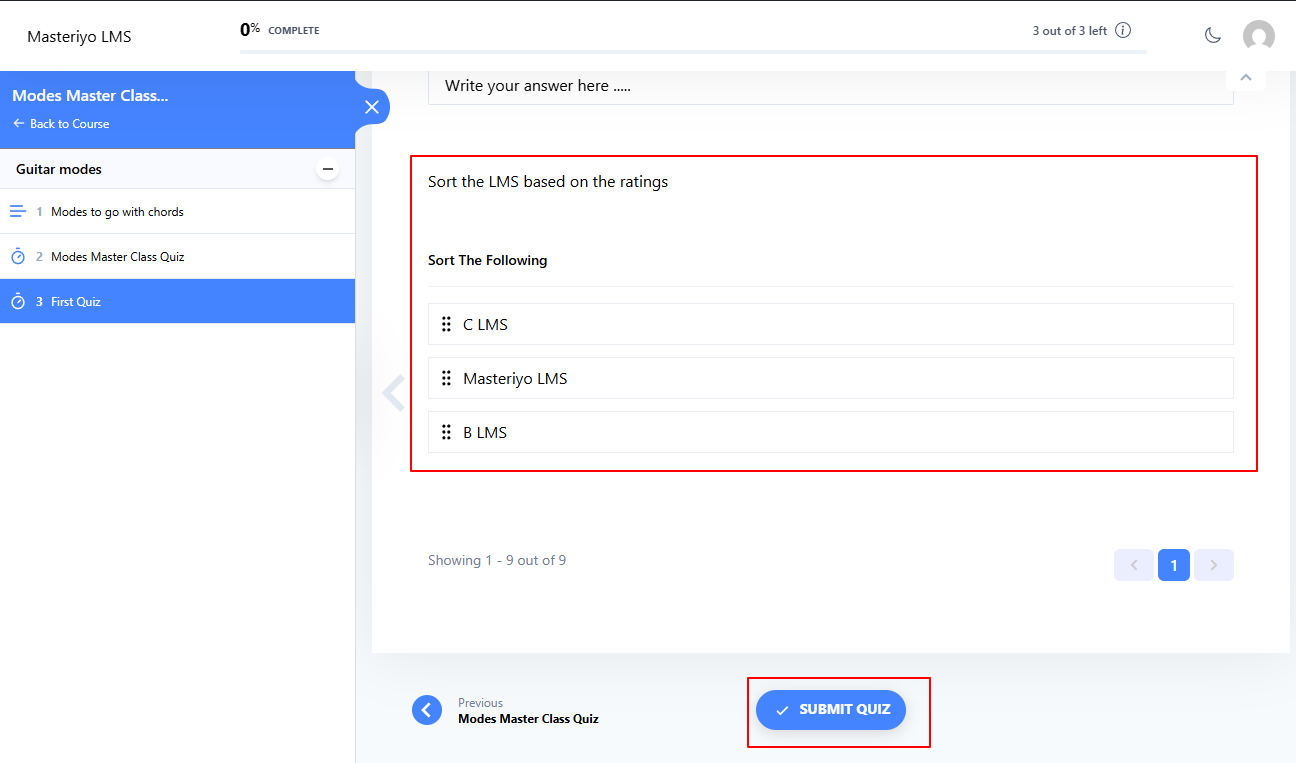
Sortable Pro
In this type of question, the learners will have to sort the given answers according to the question. As a quiz maker, you can add options by clicking the 'Add new answer' button.

Here's how the quiz will look:
Quiz Settings
On the last tab of the Quiz Editor screen, you will see the Settings specifically for the quiz you have just created. This Setting consists of the following.
General
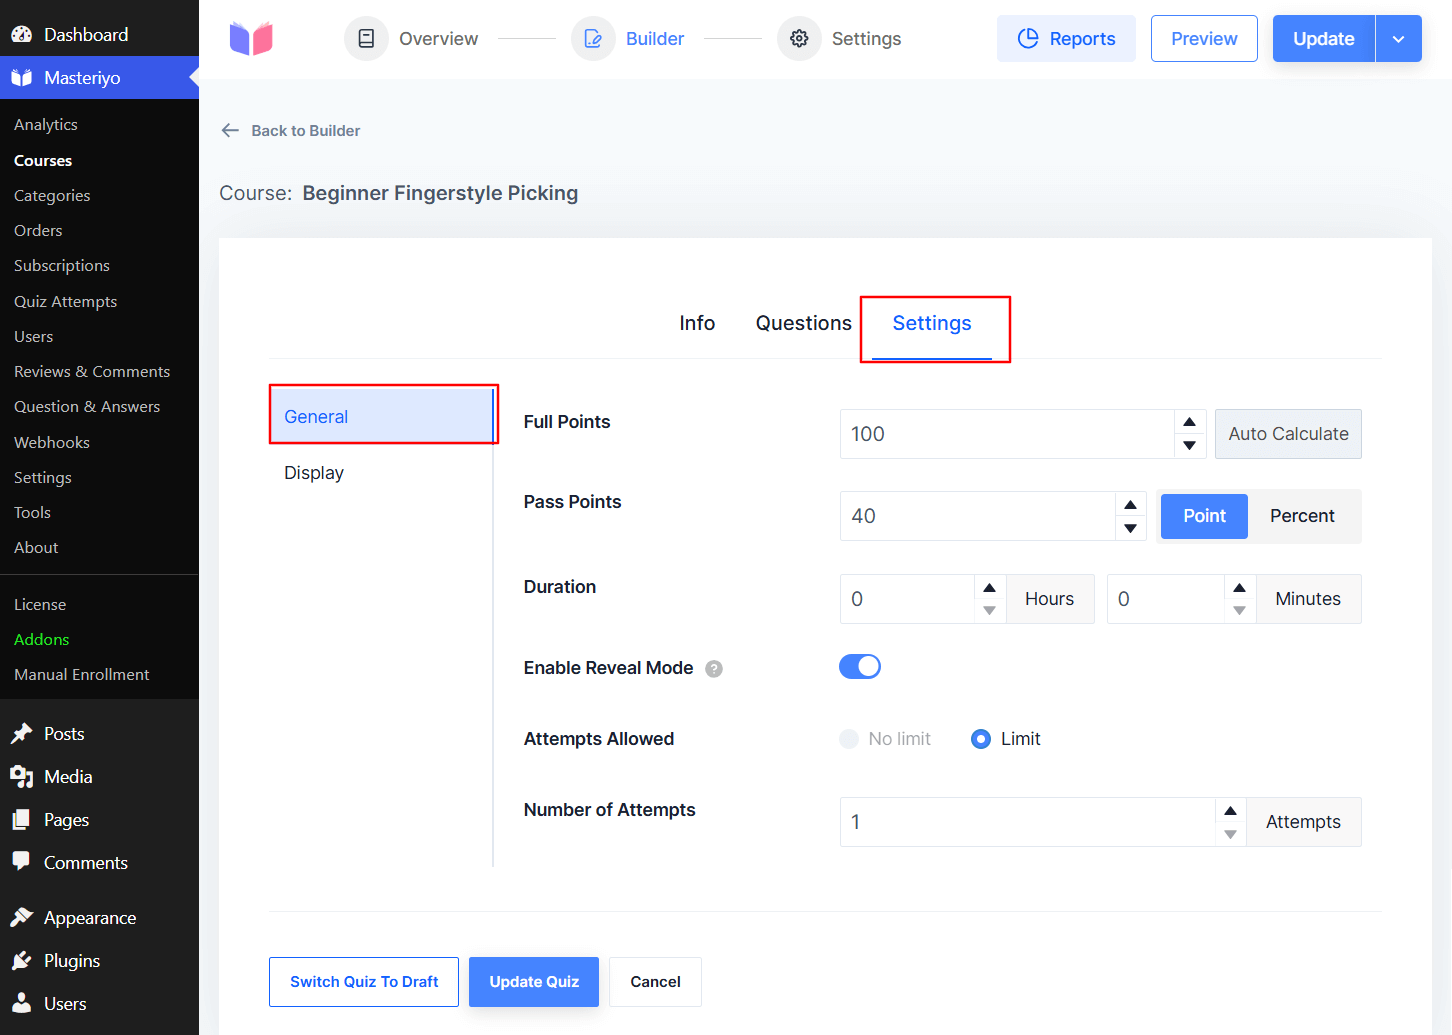
- Full Points: You can set the full points for the quiz you have created based on the marks for each question.
- Auto Calculate: This button automatically calculates point values based on the number of questions.
- Pass Points: Set the minimum points required for the students to pass this quiz. You can choose to display scores as either points or percentages using the toggle buttons.
- Duration: Set the time duration for which the quiz is active. Students will have to complete the quiz within this time frame.
- Enable Reveal Mode: Toggle to enable reveal mode for the quiz so that it automatically sets the number of attempts to one. This mode limits students to one quiz attempt and shows them all correct answers after submission.
- Attempts Allowed: You can set whether to put a limit on the attempts allowed for the quiz to be solved or not.
- Number of Attempts: When "Limit" is selected, this field specifies the maximum number of attempts allowed.
Display
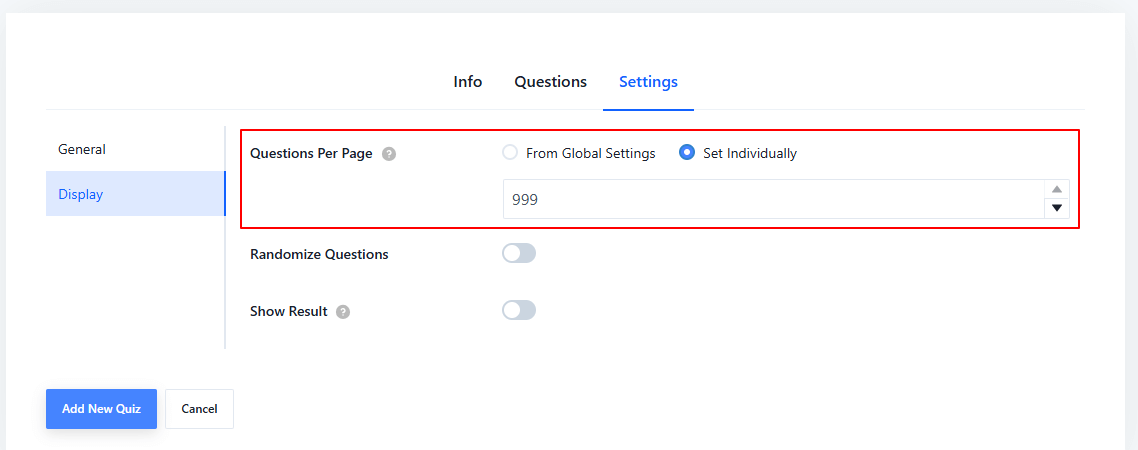
- Questions Per Page: You can choose two options for this. Either choose to inherit the global settings for the number of questions to be displayed in each page or choose a custom number for separate quizzes.
- The maximum limit for the questions per page is 999.
- Randomize Questions: When enabled, presents questions in random order to each student. (Toggle to enable/disable).
- Show Result: When enabled, displays quiz results to students immediately after completion. (Toggle to enable/disable).
You can then update the quiz.
Additional Resources
Was this article helpful to you?
Give us Rating
Last edited on May 13, 2026.
Edit this page