Payments Settings
Set up payments to sell courses in Masteriyo — store, currency, taxes, checkout fields, PayPal, Stripe, offline payment, and bank wire transfer details.
Location: Masteriyo > Settings > Payments
Payments
Setting up payment configurations in Masteriyo LMS is essential for selling your courses online. This comprehensive guide will walk you through every payment option, from basic store setup to advanced payment gateway configurations.
Store
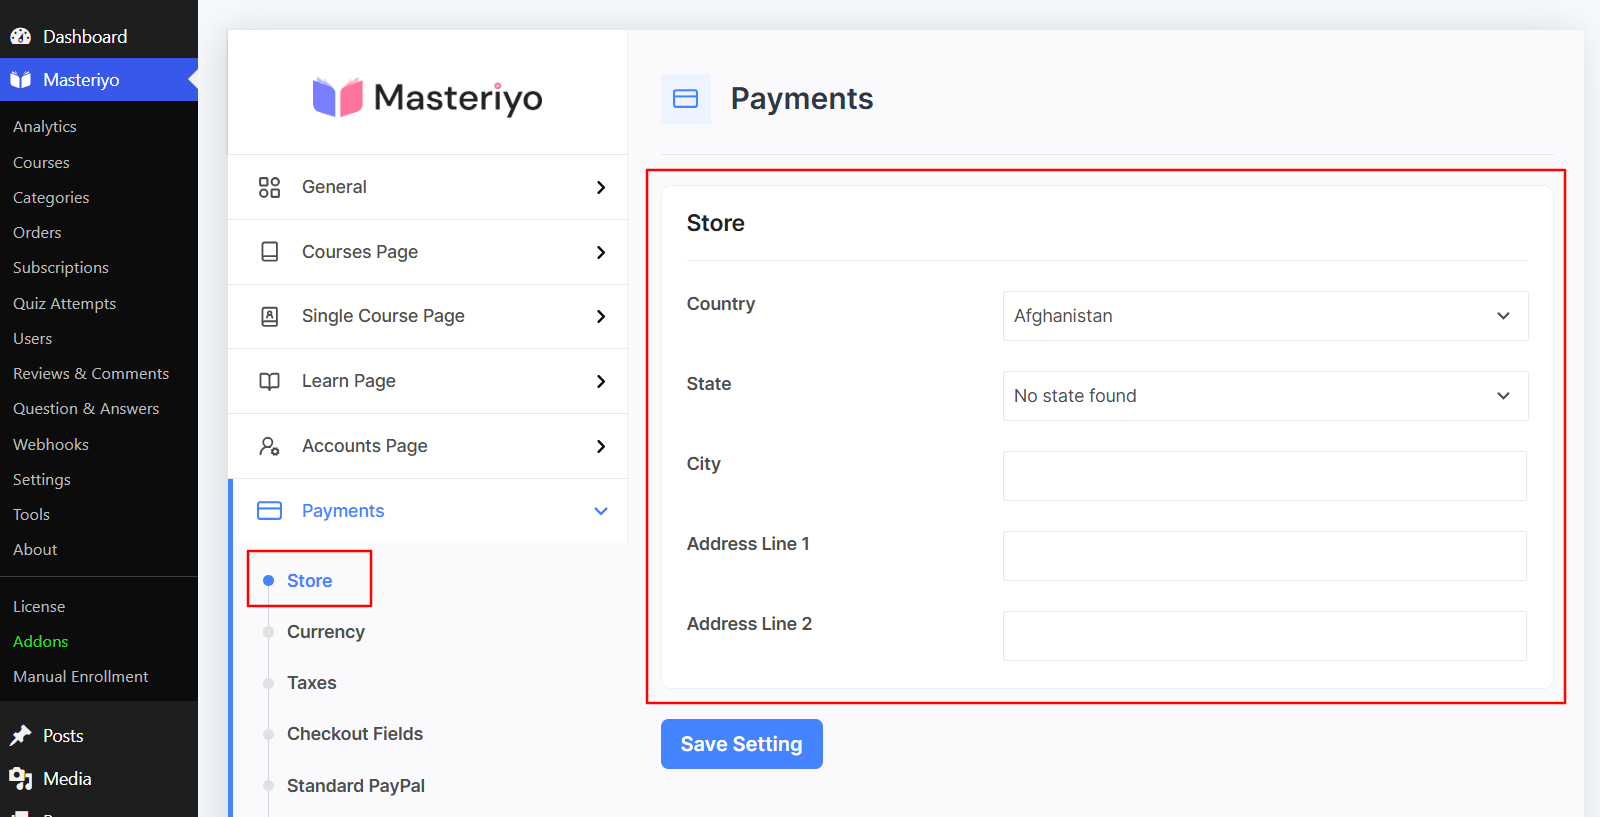
- Country - Select the country where your store is based. Other Address Fields For the Store
- State - Select your state or province.
- City - Enter your business city.
- Address Line 1 - Your primary business address.
- Address Line 2 - Suite, unit, or additional address details.
Currency
Proper currency setup ensures your course prices display correctly and payments process smoothly.

- Currency - Select the currency you want to use for the courses.
- Currency Position - Select the position(left/right) to display the currency symbol.
- Thousand Separator - Set a character for the number places.
- Decimal Separator - Set a character for decimal numbers.
- Number of Decimals - Set the decimal number place.
Taxes Pro
Setting up taxes in Masteriyo LMS allows you to automatically calculate and collect taxes on course purchases based on your students' locations. Tax settings help you comply with local tax regulations and automatically calculate taxes on your course sales.
Configuration
Click on Taxes in the Payments submenu to open tax configuration.
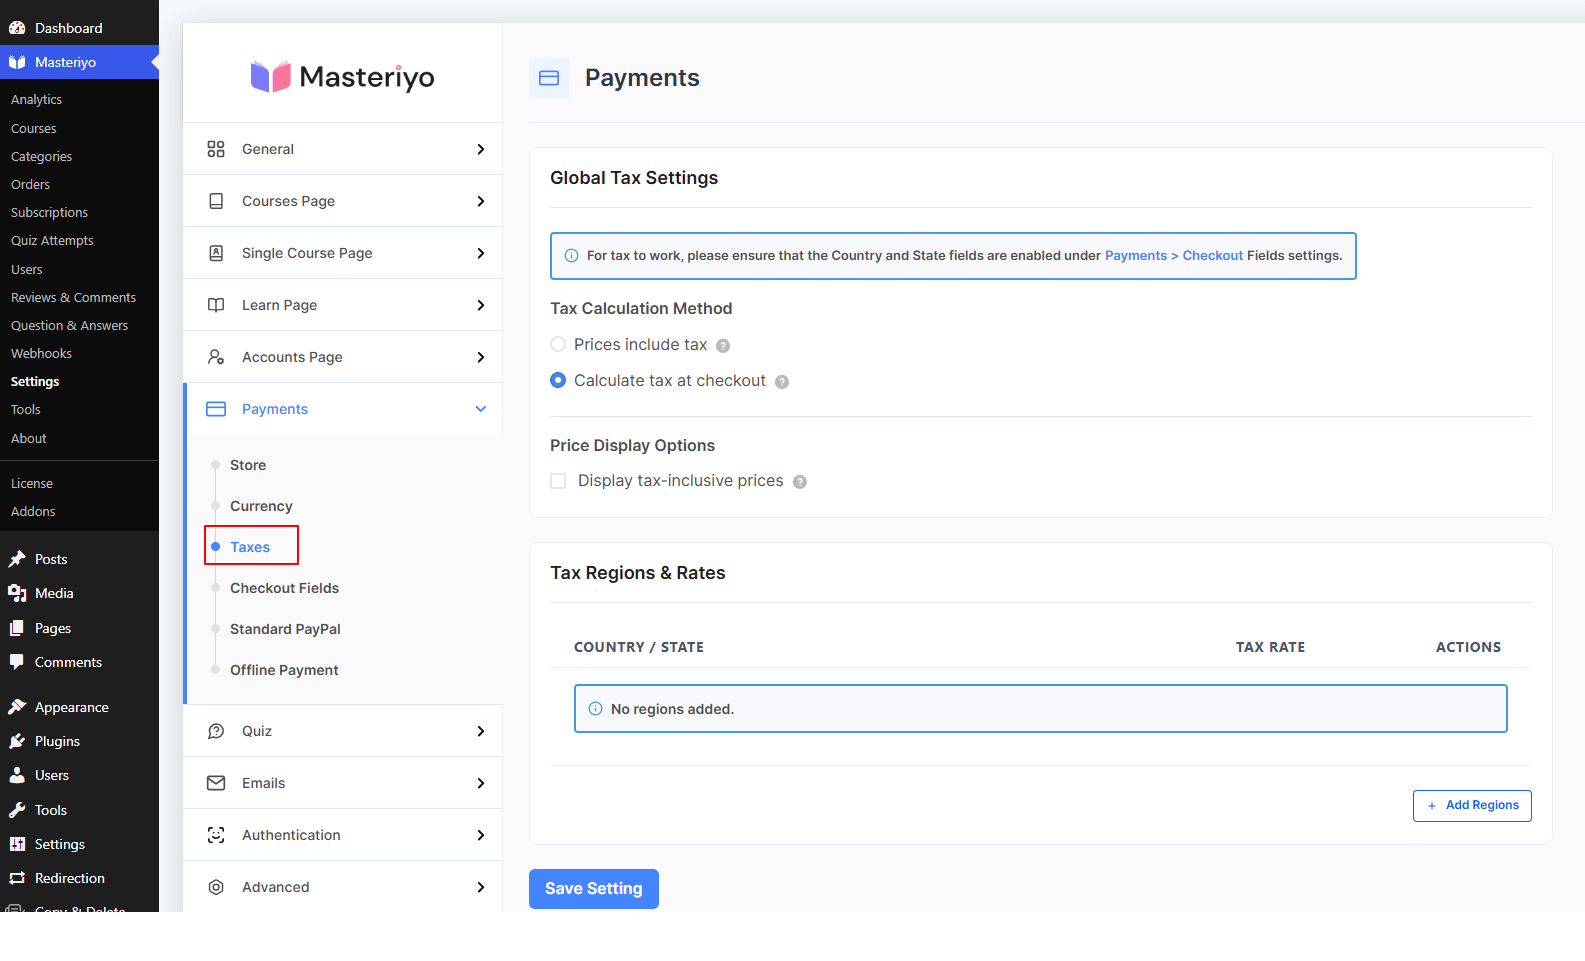
Global Tax Configuration
Note: Please enable Country and State field from Payments > Checkout Field for the taxes to work.
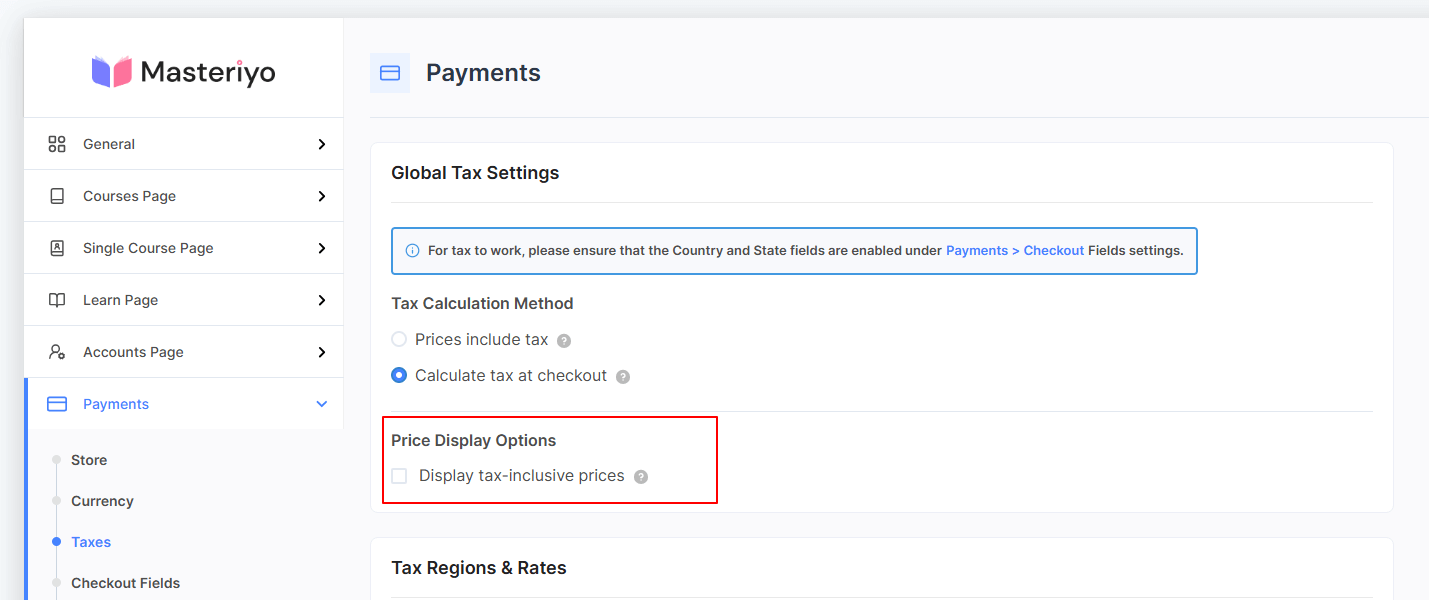
Choose Tax Calculation Method
From here, you can determine how taxes should be calculated for your courses:
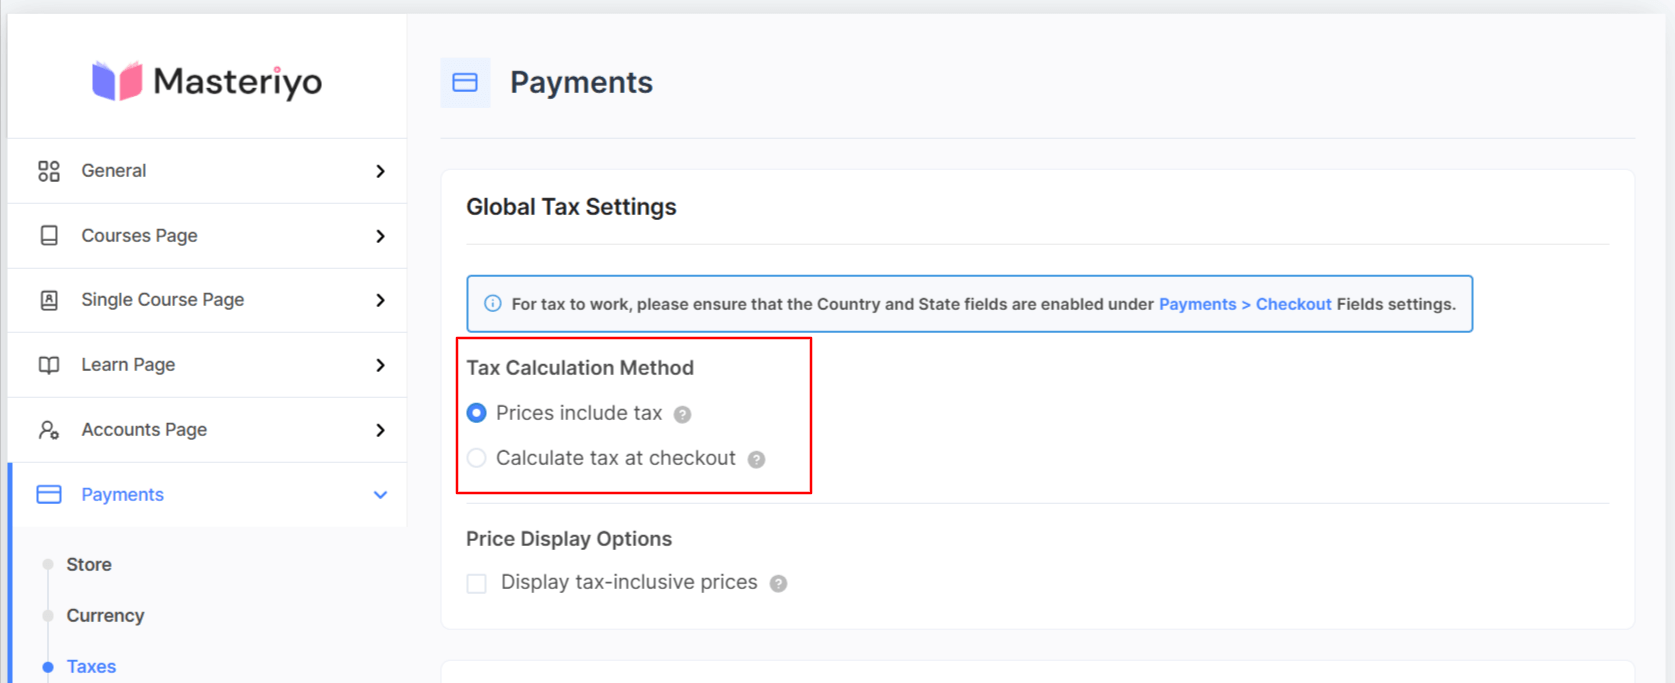
Option 1: Prices Include Tax
Course prices already include tax, as the tax amount is extracted from the total cost. It’s useful when selling to a single tax jurisdiction because it’s simpler for fixed-rate scenarios.
Option 2: Calculate Tax at Checkout
Tax is calculated during checkout, based on the customer's billing address. It’s more accurate for international sales.
Price Display Options
Configure Tax-Inclusive Display: Check "Display tax-inclusive prices" if you want to show prices with tax included.
Pro Tip: For a better user experience, consider showing tax-inclusive prices to avoid checkout surprises.
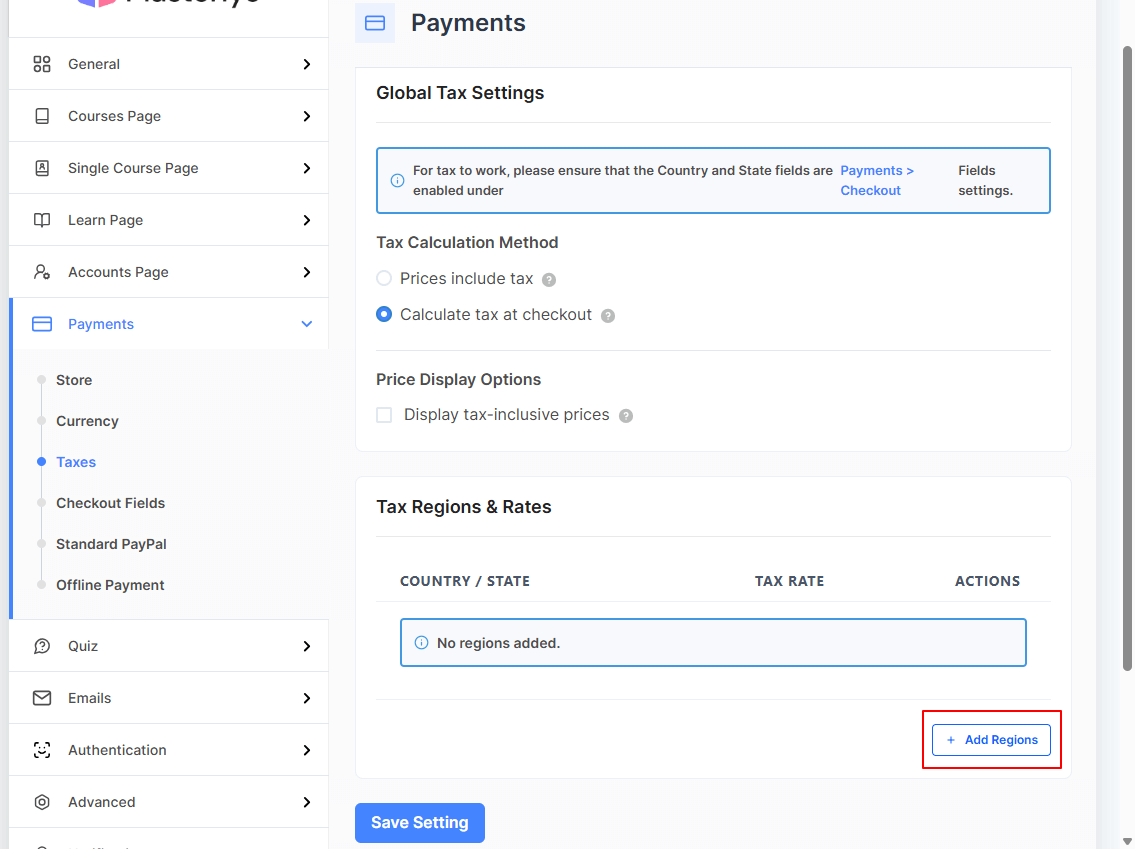
Setting Up Tax Regions & Rates
Step 1: Click on the + Add Regions button to create your first tax region.
Step 2: Configure Regional Tax
A pop-up will appear for tax configuration. Now, choose the country from the dropdown. Enter your tax percentage in the box. (e.g., 13 for 13%)
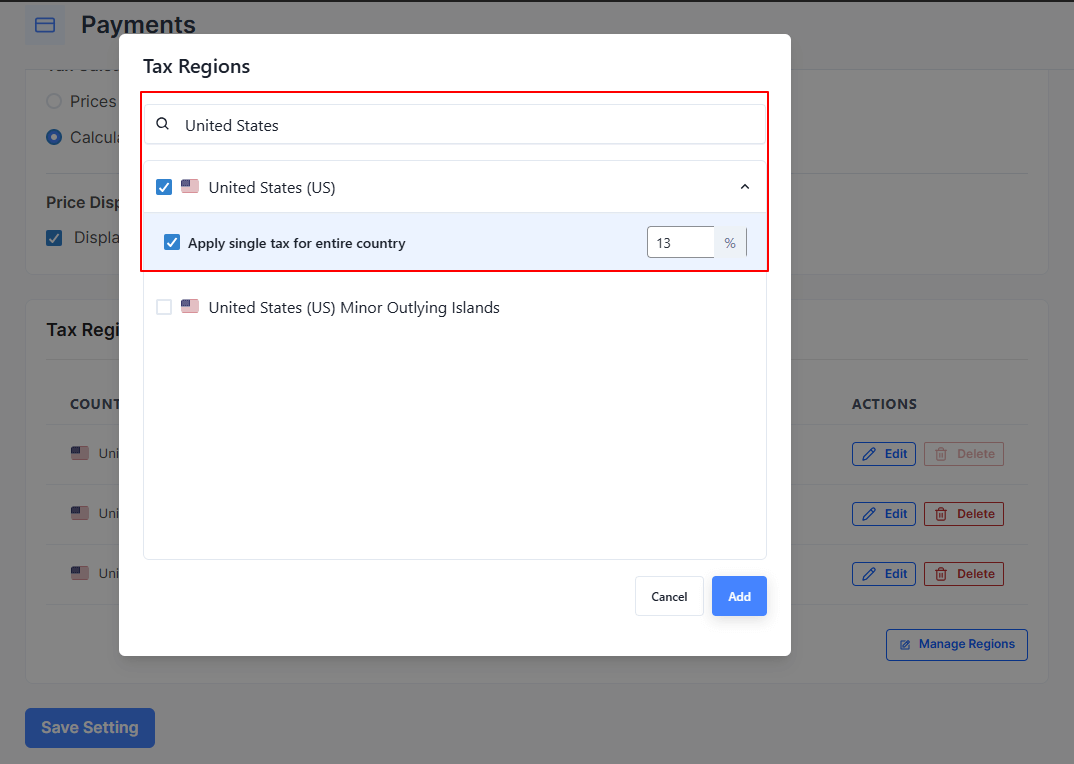
Uncheck Apply single tax for entire country if you want to apply individual tax rates for each region of the country. After that, you can pick the specific state or region:
Enter Tax Rate: Input the tax percentage for the regions you select.
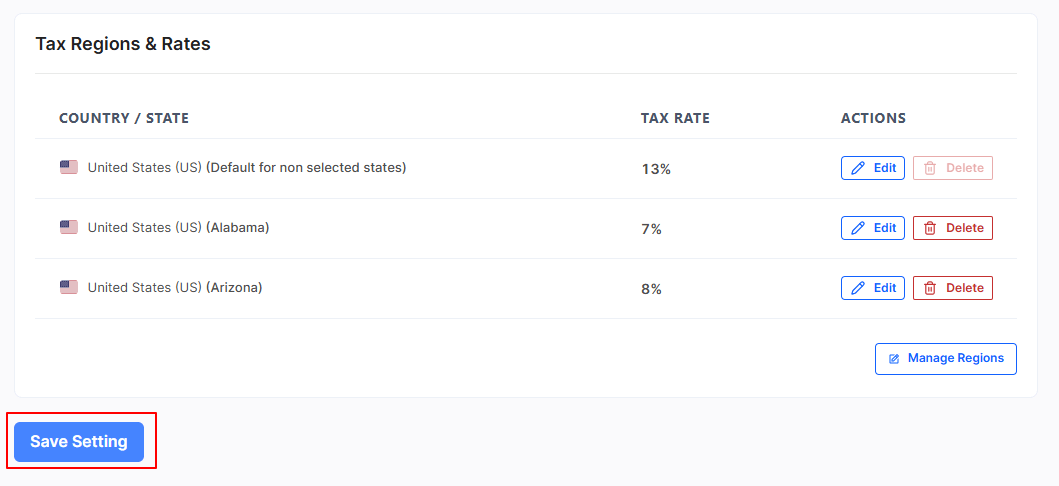
For non-selected states, you can set a default tax rate. Click "Add" to save the regional tax settings.

The region will appear in your tax regions list. Click on Save Setting to save the changes.
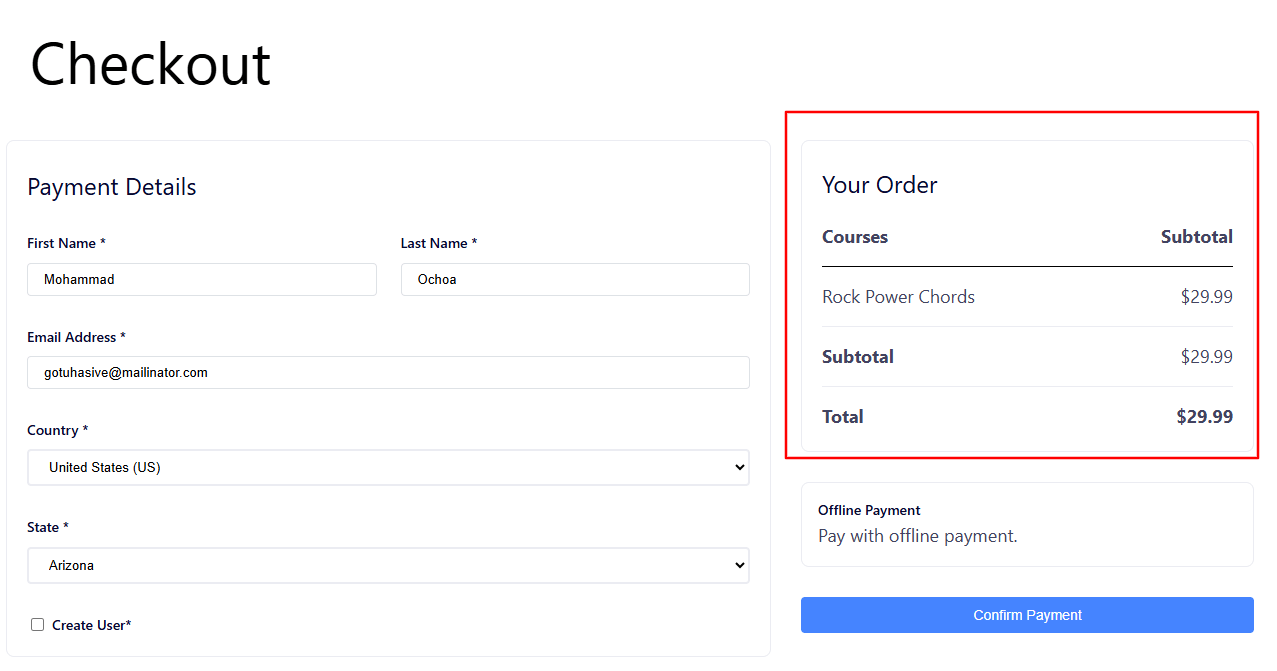
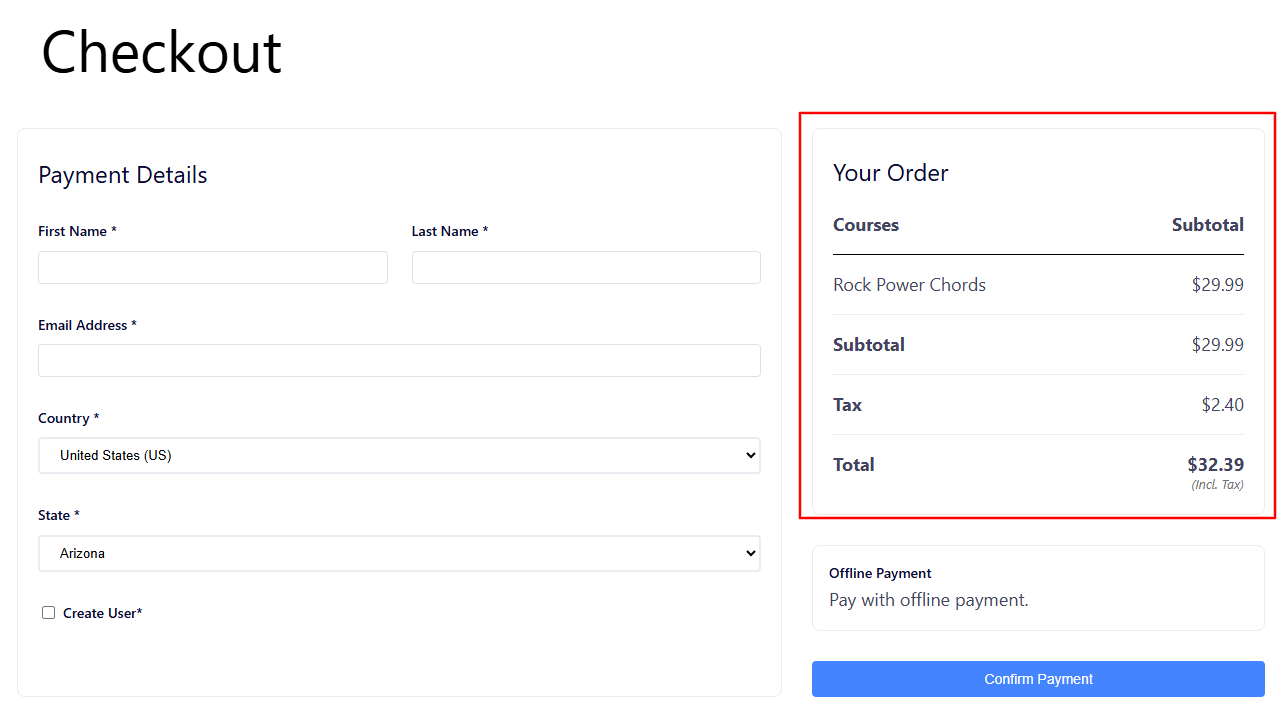
Frontend View of the Taxes at Checkout:
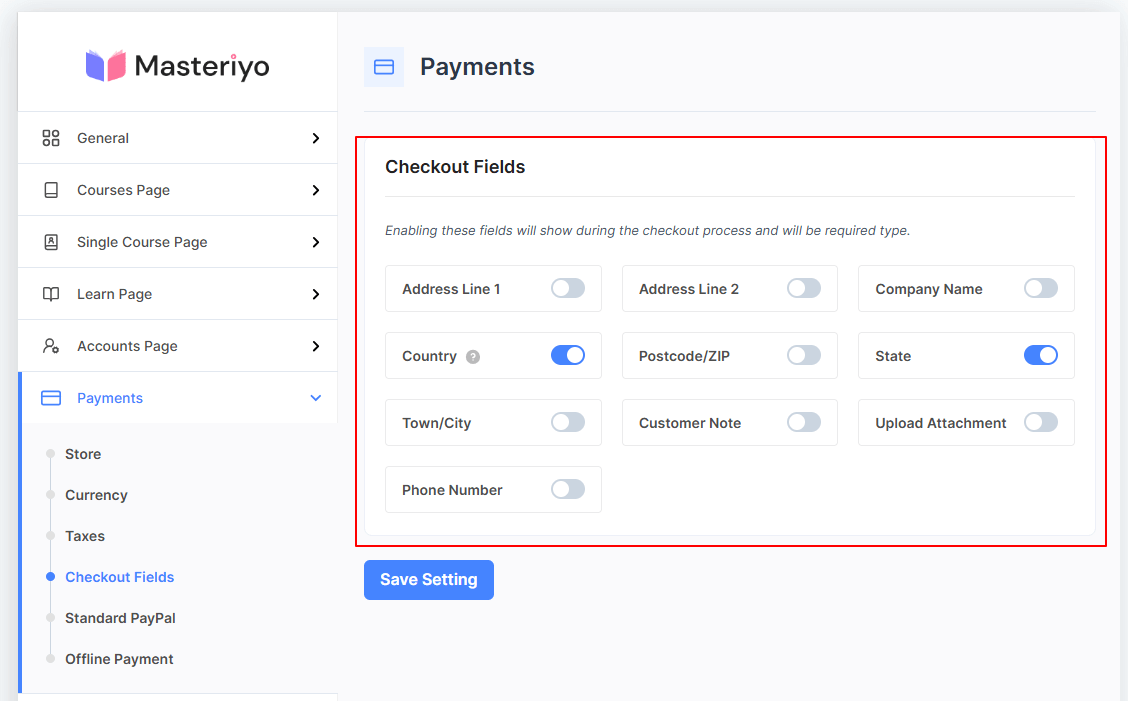
Checkout Fields
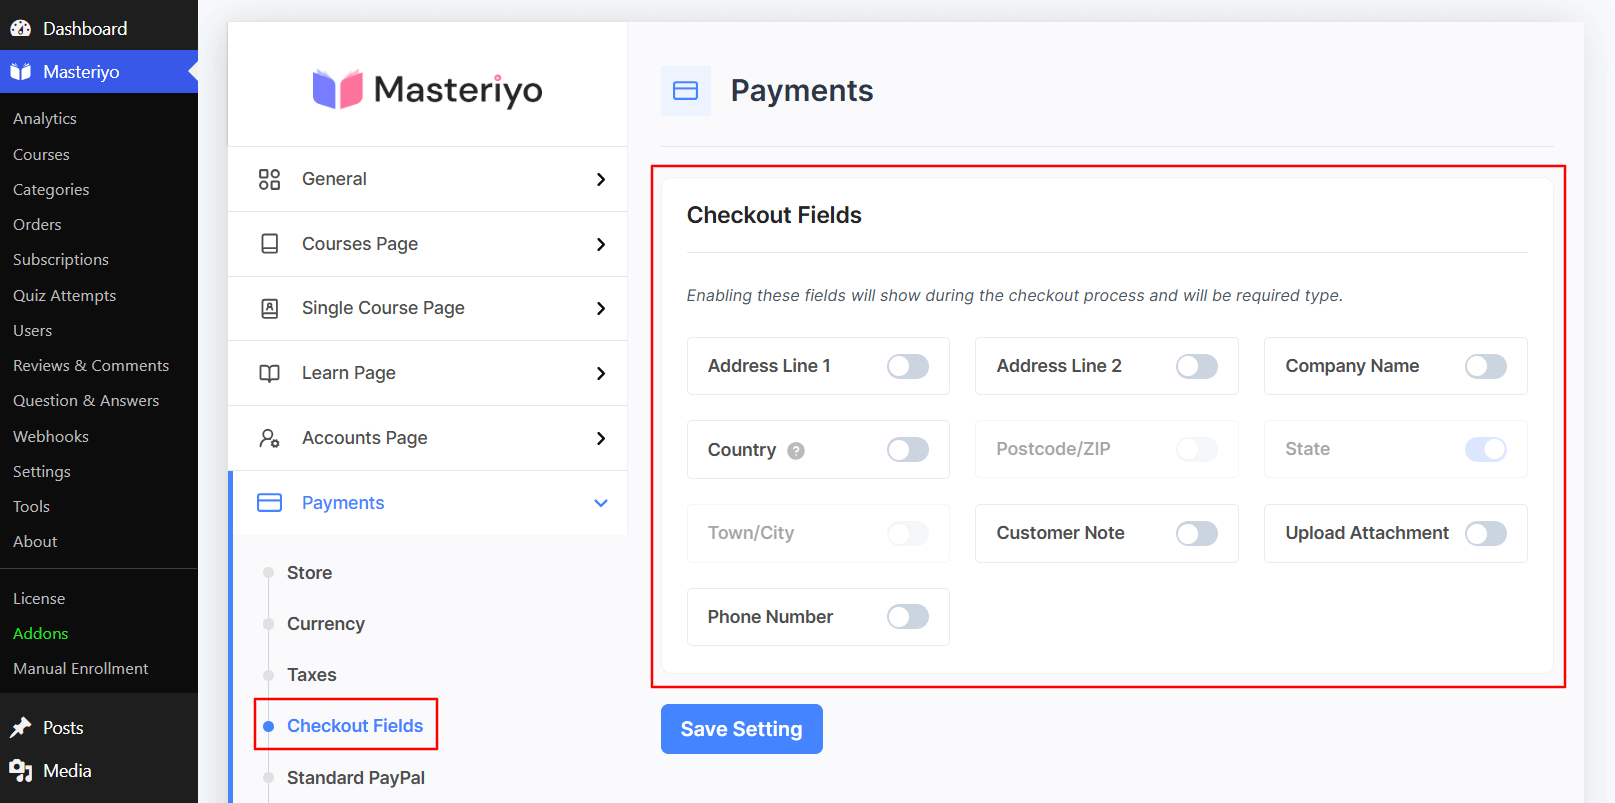
You can enable any of the available fields to display them on the checkout form.
Standard PayPal
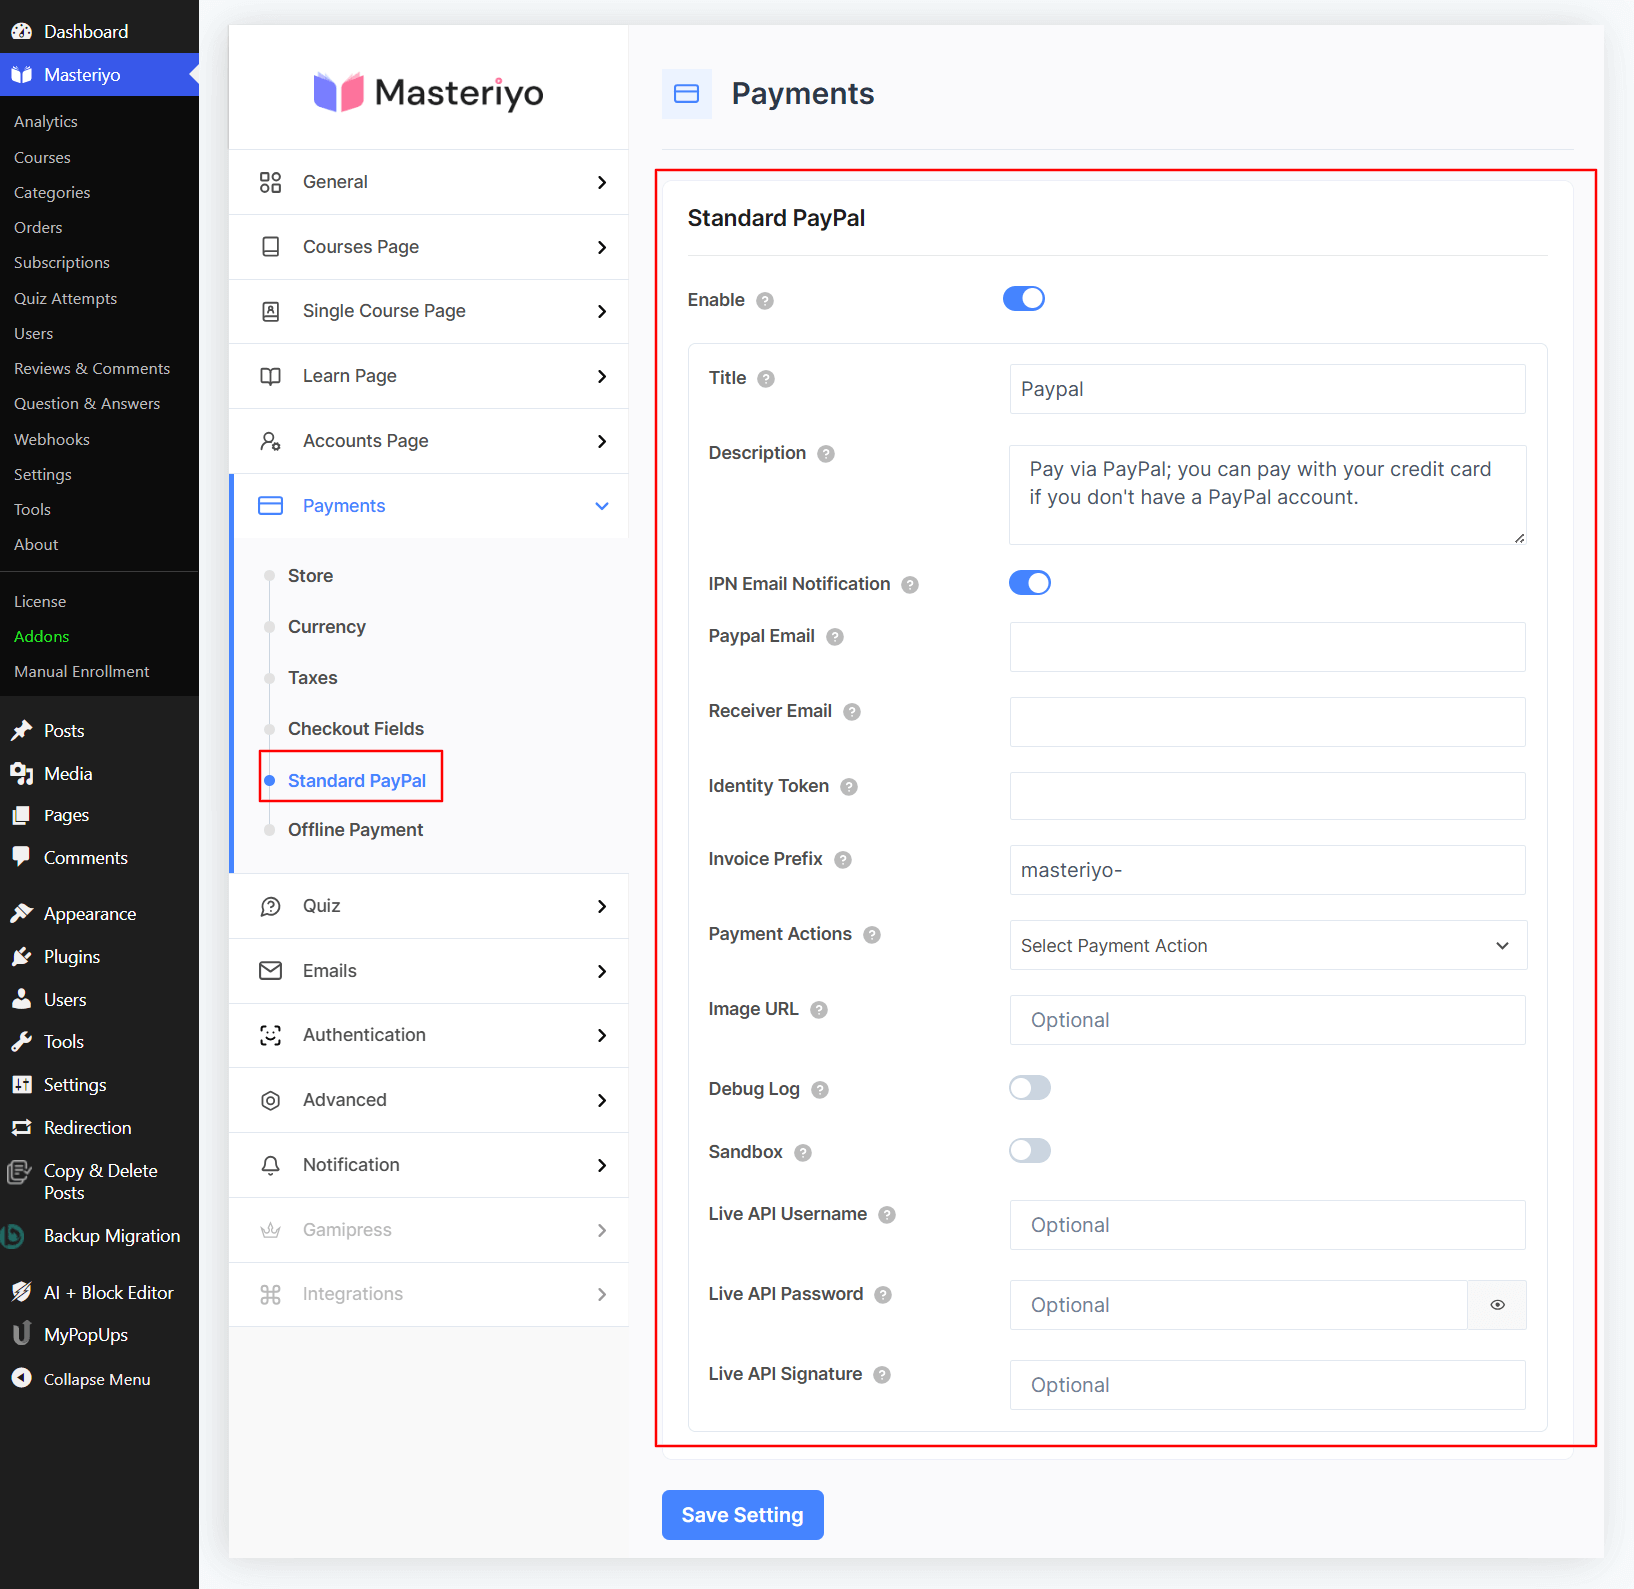
- Enable - Enable this option to use the PayPal payment method.
- Title - Write the payment title so it can be seen on the Checkout page.
- Description - Describe the payment method.
- IPN Email Notification - Enable this to send a notification when IPN is received from PayPal.
- PayPal Email - Email used in your PayPal account.
- Receiver Email - If your main PayPal email is different from the above-entered email, set it here.
- Identity Token - Add the identity token. An identity token in PayPal is a unique alphanumeric code used for secure authentication and integration with third-party applications or services.
- Invoice Prefix - Provide a prefix for the invoice.
- Payment Actions - Select either Capture or Authorize as the payment actions.
- Image URL - URL for a 150x50px image to be displayed on the checkout page as the logo.
- Debug Log - Enable this option to store debug logs.
- Sandbox - Enable this if you want to use a test/sandbox account.
- Live API username
- Live API password
- Live API Signature
Offline Payments
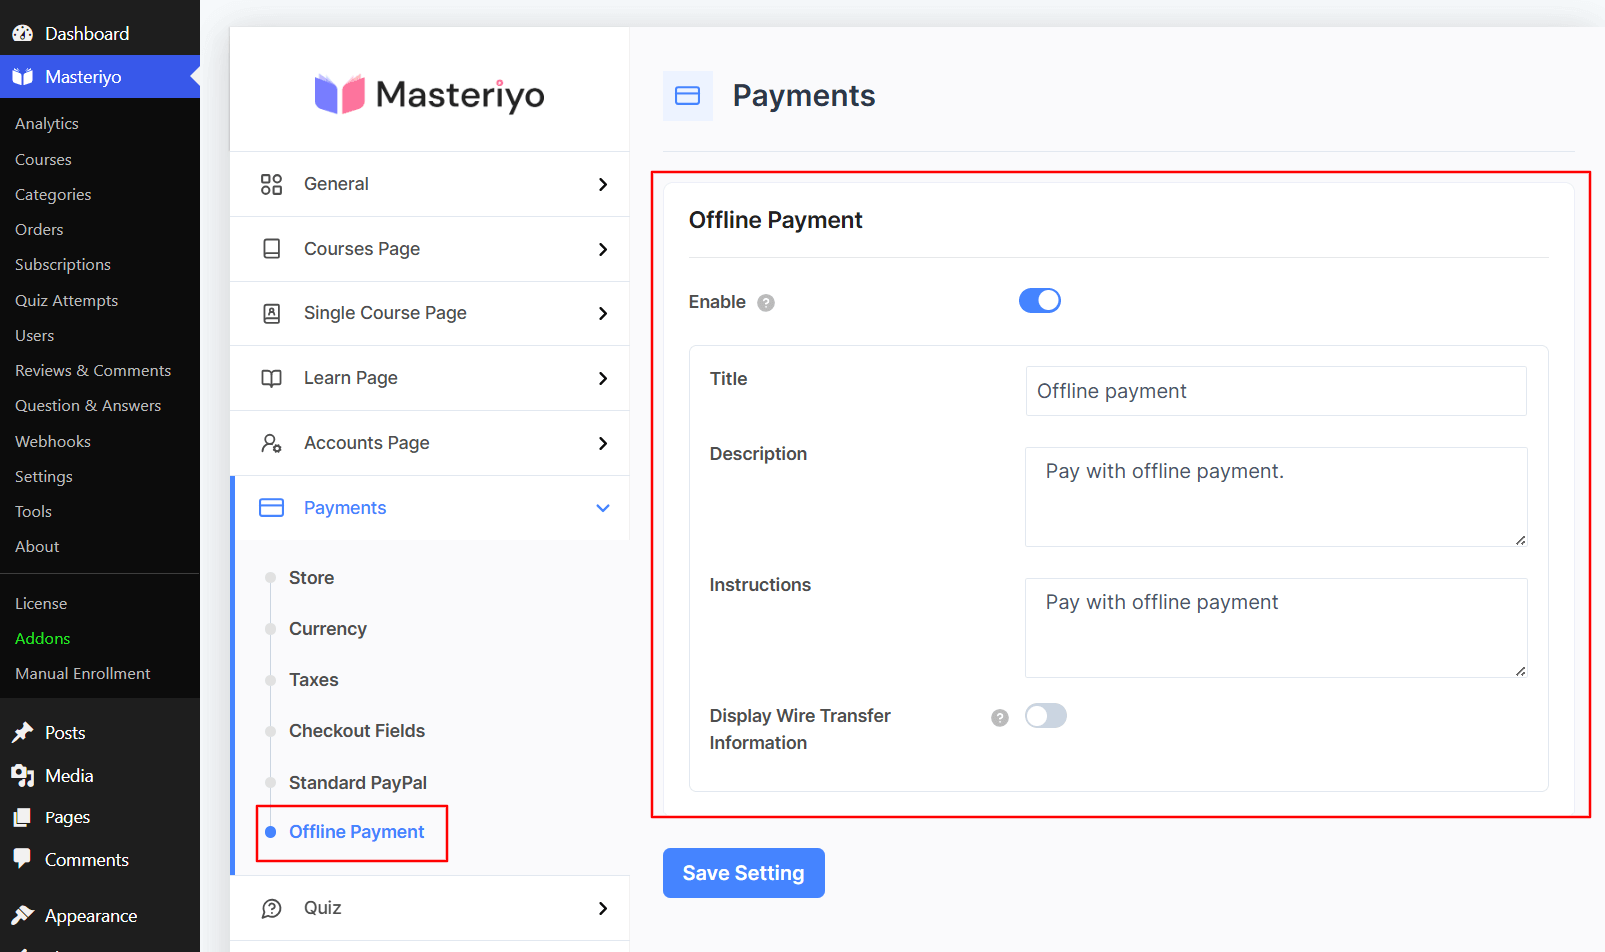
- Enable - Enable this option to use the offline payment method during checkout.
- Title - Provide the title to the offline payment.
- Description - Describe the offline payment method.
- Instruction - Specify if you have any instructions required.
You also get a wire transfer option with offline payment. It allows you to display essential bank details to customers during checkout so that you can receive payments directly in your bank account. To display the information, toggle the Display Wire Transfer Information option. Next, fill in the required fields to display your banking information:
- Title: Give a name for this payment method
- Account Number: Your bank account number
- Account Holder Name: The name registered with the bank account
- Bank Name: The name of your bank
- Swift: The bank’s international identifier for wire transfers. You can find it on your bank’s website or by contacting your bank directly.
- Description: A short instruction for your customers
Save the changes after you complete the configuration. Customers will now see the wire transfer option with the necessary details at the checkout.
Stripe
- Enable - Enable this option to use the Stripe payment method.
- Title - Provide the title to the Stripe payment.
- Description - Describe the payment method.
- Sandbox - Enable this option if you want to use the sandbox/test Stripe payment.
- Test Publishable Key - Get your API credentials from Stripe and add the test publishable key here.
- Test Secret Key - Add the test secret key from Stripe here.
- Webhook Secret Key - Get your webhook secret key from Stripe and add it here.
- Webhook Endpoint - Add the given endpoint to your Stripe webhook endpoint list to verify the payment status.
Was this article helpful to you?
Give us Rating
Last edited on July 23, 2026.
Edit this page